Mini Monets and Mommies: 2014

Wednesday, December 31, 2014

Valentine's Day Sensory Art and Science Activity

Valentine’s Day is coming up and we’re getting ready to break out the heart art. Combining art and science is always fun – even for me as an adult! But, the kids probably love it more than I do (maybe?). The expanding Ivory soap experiment is usually a big hit. Even my 13-year-old will stand patiently at the microwave watching the soap fluff up. What does this have to do with Valentine’s arts and crafts? Read on to find out…
Holiday crafts


Last fall I used expanding Ivory soap (after it had settled and cooled) to make a chunky, textured finger paint. This time we’re going in a bit of a different direction. This time we’re making a textured Valentine’s Day heart. It’s sort of a variety of the shake the glitter over glue art activity.

Start with the soapy science:
Kids' science

Before you pop the bar of soap into the microwave ask your child what she thinks will happen. Jot down her predictions on a piece of paper. Write down each one that she makes – even if seems totally implausible (it’s all part of the scientific process).

Put the soap in a microwave-safe bowl that you don’t plan on using for food anymore. Every microwave varies, so you may need to tinker with the amount of time that you’ll need for the soap to expand. I like to use 30 second increments.

When you take the soap out have your child look at it and tell you which of her predictions came true. Do not let your child touch the soap. Even though it looks like a fluffy cloud, it is hot. Let it cool.

Now for the art-making:

Here’s What You’ll Need:

·        Red or pink cardstock paper

·        A marker or crayon

·        Scissors

·        Ivory soap (the expanded leftovers from the experiment)

·        Clear-drying school glue

Here’s What to Do:

1.     Fold the paper in half book-style.

2.     Draw half a heart, starting at the center fold of the paper.

Kids' Crafts
3.     Cut the heart out.

Paper Art
 
4.     Open the paper to reveal a full heart (this is a great time to talk about math, fractions and symmetry).

Holiday Craft
 
5.     Draw a pattern on the heart with the glue. Your child can make zig-zags, swirls, polka dots, lines or any other design she wants.

Glue craft
 
6.     Gently flake the soap (make sure it is completely cool before doing this). Pull apart the thin edges, as this is easiest. As your child rubs the soap between her fingers it will turn into chunky flakes.

Kids' Science
 
7.     Sprinkle the soap flakes over the glue to create a snowy texture.

Science art
 
8.     Tap the excess flakes back into the bowl of soap. Now your child has a fluffy, textured Valentine’s Day heart!

Holiday Art
 
Are you looking for more creative crafts? Try making:

A heart-felt gift bag
Felt art


A heart garland
Valentine Craft


And follow my Pinterest board for ideas!
Follow Mini Monets and Mommies's board Creative Kids Crafts on Pinterest.

Monday, December 29, 2014

Active Kids' Art with Giacometti's Walking Man Sculpture

Kids’ art doesn’t always equal sitting at a table and drawing. Even viewing activities don’t always have to be sedentary experiences. One of my favorite sculptures to look at with children is Alberto Giacometti’s Walking Man.

Kids art

When my son was younger (and even now as a teen) I took him to the museum where I worked to look at this sculpture. Even if you don’t have the opportunity to see this one in person, you can still do this activity with your child. Use the photos on this page, look in a book or print out a poster-sized image to use.

Active Kids’ Art Activity
Kids' activity

Walking Man inspires—well, walking. So, the first step of this art exploration is to become the sculpture:

1.     Look at the sculpture with your child.

2.     Ask your child to tell you what she sees. If she’s not sure where to begin, prompt her with questions such as:

·        What is this a sculpture of?

·        What do you think the man is doing?

·        How does it look like he’s moving?

3.     Stand like the sculpture. Have your child try to mimic the sculpture’s form.

Walking On to the Art-Making

Now it’s time to get hands-on and let your child make her own Walking Man.

1.     Tear a piece of kitchen foil into long strips.

 
2.     Twist, mash and mold the foil into a thin tube. This will become the sculpture man’s body and head.

Kitchen sculpture
 
3.     Mold the top of the tube into a head shape. Your child can use her palms to make the top of it round.

Art Activity
 
4.     Twist a second piece of foil into another tube to make arms. Have your child wrap them around the first tube to secure them under the head.

Sculpture art
 
5.     Repeat this process to make another leg. The tube itself is the first leg, so you child only needs to make one more.

Children's project
After she’s done sculpting the foil, your child can move her very own Walking Man, positioning him in different poses. She can get active and try the poses first. For example, she can stand on one foot with the other leg stretched out behind her and raise her hands in the air. After she’s done moving she can bend the foil artwork to match.

Kids' craft
 

Are you looking for more activities based on famous art? Follow my Pinterest board for ideas!
Follow Mini Monets and Mommies's board Famous Artist Kids' Activities on Pinterest.

Friday, December 26, 2014

How To Make Art Viewing Fun for Kids

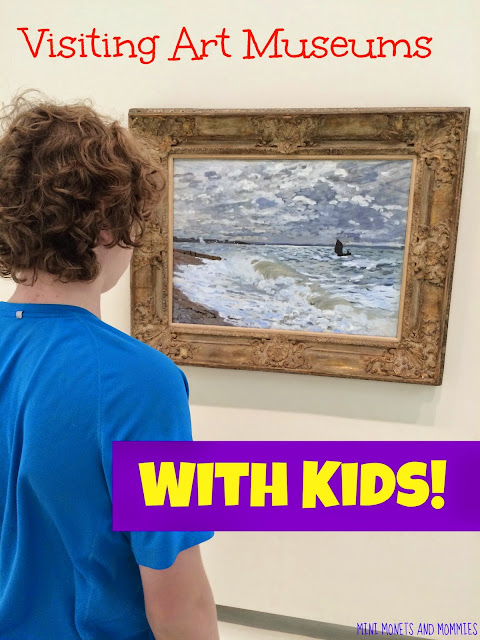
I’ve spent a lot of time in art museums. After teaching in art museums for the better part of the last decade, I’d looooove to say that every parent should take their child to see real, authentic art. I’ve written plenty on the subject, helping moms and dads to figure out what to look at with their kids, how to look at it and what to talk about. Today I was walking through the galleries of my local museum with my 13-year-old son. It suddenly occurred to me that I’ve been going under a one-size-fits-all agenda when it comes to viewing experiences.

Child art

 
Granted, when I have a group of 10 preschoolers or 20 third graders, I can’t tailor each question to each child. But, if I’m walking around a gallery with my own child – I can. This doesn’t just apply to eye-rolling teens (like my son), but to every child of every age. While starting with basics or general questions is a great jumping-off point, building the discussion around the child’s specific interests is key.

So, what does this look like in real life?
Childrens art

I’m going to suggest beginning with these basics:

1.What’s going on in this picture, painting, sculpture or (insert any other type of artwork that you’re looking at here)?

-Why ask this? It gets your child thinking. It’s the #1 question we always asked students visiting the museum. As a museum teacher I used a method -- Visual Thinking Strategies -- that facilitated discussion by starting off in this way. We always followed this question with:

2. What do you see (in this picture) that makes you say that?

          -Why ask this? It makes your child think even more. Think of this like a science exploration. Your child makes a hypothesis and then observes carefully to tell you why she thinks her prediction is correct. It’s an evidence-gathering activity. You can prompt your child to go deeper by asking what else she can find.

Gallery Kids
 
For many kids, these few questions can really get them talking. For others, not so much. My own son has always been one of these not-so-much kind of kids. Well before he was too cool to go to the museum with mom (i.e., before the tween/teen years), he was only marginally interested in art. That’s ok. Not every kid is an art-lover. But, I did want to expose him to more of the world than Thomas the Train had to offer (he was very much a train-lover). I tried fun little scavenger hunt approaches to art viewing after my typical open-ended questions failed to interest him. These worked out ok, but not great.

Fast-forward to several years later and we are walking through the art museum together as my son rolls his eyes yet again and says, “Are we ready to leave yet?” No, we aren’t. I’m a notorious embarrassing picture taker. I always, always make my son pose for photo ops. I spy Alberto Giacometti’s “Walking Man” and beg my son to pose like the walking sculpture so I can snap a picture. He eventually agrees.
Art Museum
 
As he’s standing next to the sculpture he says, “You know, we had to do this in school during art class.” I did not know that. He then proceeds to tell me what he thinks is a hilarious story about his friend posing like the “Walking Man.” Before I knew it, he had stop posing, was looking at the sculpture and was talking about it. He never talks about art- so why now? Because he started the story, with a connection to his own life.

We moved into the ‘ancient art’ gallery and looked at an Egyptian relief. Instead of asking what he saw, I started with his social studies class. I know that they extensively studied ancient civilizations. Allowing him to bring his own interests, stories and world into the art opened it up for him.

Viewing Project
 
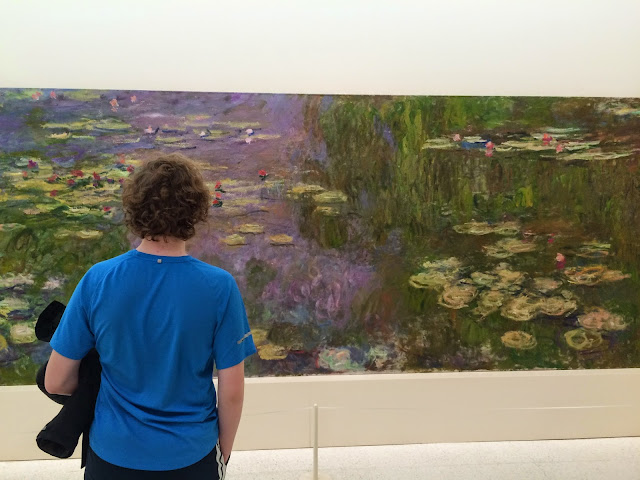
Your child doesn’t have to be a teen for this to work. I started thinking about some of the conversations that I’ve had with preschool-aged students at the museum. One of my favorite artworks is Monet’s “Water Lilies.” The kids do seem to enjoy viewing it, but some of the best conversations that we’ve had have revolved around their own interests or their own life stories. For example, I had a preschooler start talking about the lily pad pond at her grandparents’ house and how that painting reminded her of it. Another picked out his favorite colors in it, and then got more and more exuberant (that’s code for jumping up and down and drawing the attention of more than one of the museum’s security guards) as he pointed out the different hues.

Kids' Art
 
How can you use this approach with your own child?

Pick an artwork that has something in it that you know will spark her interest, attention or memory. It can be a setting, story, character, color or anything else that you know will get her talking. For example, has she been non-stop talking about a recent snowstorm? Take a look at a snowy scene! Maybe you just got back from a trip to the beach? Look at an ocean-themed artwork. Did she help you out in the garden? Visit an artwork that shows plants and flowers. You can also pick artworks to look at that match books she has recently read or themes from school. For example, if her pre-k teacher is helping her to learn shapes, look for a geometric painting and let her pick out the squares or rectangles.
Street Scene
 

You don’t have to wait until you take a trip to the museum to look at art in this way. Use the basic open-ended questions, coupled with specific ones based on your child’s interests, when you’re looking at pictures in books or online. The key (at least for me) is connecting it to something that sparks your child’s attention. There’s no parenting rule that says your child has to view and discuss art by the great masters. If he’s totally into trains, pick a painting with a cool choo choo in it. If your child carries her new pet cat around 24-7, look for an artwork that features furry feline friends. Bring the conversation to him instead of directing it at him. After all, wouldn’t you rather talk about something that interests you?

Are you looking for art activities to go with your viewing discussions? Follow my famous artists Pinterest board for ideas!


Follow Mini Monets and Mommies's board Famous Artist Kids' Activities on Pinterest.

Finger Painting with Clay Art Activity

Finger painting is messy. Yep, it's very, very messy. That's ok, in most circumstances. Your child's hands, face, arms and the kitchen table will all wipe clean -- as long as you use washable paints. But, there are some times when you just can't make a mess. That's where clay comes in to play.

Kids' crafts

(This post contains affiliate links. Please see my disclosure statement for more information).

I spent years teaching a preschool art class in a museum. In the galleries of the museum. There was no way that I would have ever been allowed to take paints into an area filled with Van Gogh’s and Monet’s. That said, time and time again the parents asked if their kids could paint. I get it, kids love to paint. But, what could I do? There was no way that this could ever happen in the gallery setting. So, I swapped in some model clay. No, your child isn't really finger painting, but the motion and result is almost the same. This activity also offers bountiful bonuses:


1. Your child is using an art material (in this case it's clay) in a totally new and different way. The unexpectedness of how he'll use the clay will get him amped up to make some art and maybe even hold his attention for more than a few minutes.

2. It's almost mess-free. Ok, no art project is 100% mess-free, but this is much neater than pulling out the real finger paints

3. Even though it's a less-mess activity, it's still packed with creativity and allows your child to express himself. Basically, it's not a neat and tidy color in the lines coloring book version of art.

Here's what you'll need:

  • Cardboard- Reuse the front of an empty cereal box, cut apart the box that your new flat screen came in or recycle some other cardboard source. You can buy cardboard sheets from the craft store, but you might as well light your hard-earned cash on fire (or your debit card in the case that you -- like me -- never actually carry real paper money). Also, you MUST use cardboard or a thick board. Construction paper won't cut it for this activity, and the heavy clay will break or seep through.
  • Modeling clay - You will need to get this from the craft store. Look for a soft clay that your little one's fingers can easily spread. If you can feel the clay through the packaging, go for it. If you get home and realize that the clay has clearly been sitting on the shelf since you were four, return it. Your child will go nuts trying to use hard clay for this project.
  • Scissors - You'll be using these (see my note in the instructions).
  • Crayons

Here's what you and your child should do:

1.     Draw a shape onto the cardboard. Your child can do this, so don't worry if his circle looks like a glob or his star is more like a half-melted snowflake. The shape should be at least the size of your hand. This gives him enough surface space to really work on. Speaking of your hand, make the project extra special and let him trace your hand (fingers open please) with a crayon.

2.     Cut the shape out. While I don't normally recommend "doing" for your child, in this case it's a safety issue. My son likes to call me the most overprotective mother in the world. This extends to other people's kids as well. I don't want to see any pinkies or thumbs getting cut off or callouses created while your young child tries in vain to slice through thick cardboard.
 

3.     Optional- Your child can (or doesn't have to) draw a simple picture onto the cardboard with crayons. Younger kids can skip this step and move on to applying the clay. Older preschoolers (and big kids who want to try this activity out) can draw a simple landscape, a spring flower or some other nature-like picture.

4.     Pull the clay apart into quarter-sized pieces. Use at least three different colors. Your child can pull them apart into even smaller pieces as he works.
 
Children's art


5.     Smooth it onto the cardboard – finger painting style!

Kids' clay
 

Kids' art
 
Are you looking for more process art activities? Follow my Pinterest board for ideas!

 
Follow Mini Monets and Mommies's board Process Art for Kids on Pinterest.
Monday, December 22, 2014

Oreo Bottom Cupcakes

I have three words for you: Oreo bottom cupcakes! If you’re a cookie, or cupcake, fan – these are amazing. They are super-tasty and perfect for parties. Whether you’re celebrating your child’s birthday, New Year’s Eve, Christmas or any other special day, nothing says “party treat” like this sweet dessert.

Dessert Sweets

When my son tuned seven I set up a sundae bar in the dining room for his birthday party. Had I thought of cupcake decorating, I would have done that instead (ice cream + hot August weather + 20 7-year-old boys = a melty mess). So, if you’ve got a party to plan, are looking for a fun (but, not so-healthy) playdate idea or just want to treat your child to something extra-extra-special, start with one of these cookie bottom cupcakes. Let your child add an artistic touch with fun frosting colors and a rainbow of sprinkles or candy decors!

To make the cupcakes:

It’s so, so, so simple. I’m not the world’s best baker (by far), and even I had no problem making these. If you have a favorite from-scratch recipe, go for it. I used a boxed white cake mix.
Kids' Treats

After you mix the cake batter, place an Oreo at the bottom of each cupcake liner. Pour the batter on top and bake. That’s it! It is that simple. We used birthday cake Oreos, but you can use the plain ones or get creative with special edition versions.
Cookie Cakes

After the cupcakes have cooled:

Set them out on a table. Cover the table with an easily-washable cloth. This makes it easy to clean up any spills or stray frosting.

Give your party guests a choice of frosting and toppings. Let the kiddos come up with their own colorful creations or give them a theme, such as:
Dessert Party

Famous artists- We made Monet and Picasso cupcakes

Rainbow – Try mixing the primary colors of frosting
(red, blue and yellow) into new hues.

S’mores – Who doesn’t love a s’more? And when you add marshmallows and chocolate, it makes the cupcakes all the better.

And, that’s it! Now your child’s party guests (or the grown-ups who you’ve invited) have creatively designed Oreo bottom cupcakes.

Are you looking for more cupcakes? Follow my Pinterest board for ideas!
Follow Mini Monets and Mommies's board Cupcakes! Yum! on Pinterest.

Sunday, December 21, 2014

New Year's Eve Confetti Kids' Craft

Throw some confetti—it’s New Year’s Eve! While my son is a bit beyond being impressed by confetti (very little impresses a 13-year-old), it is a former holiday favorite. But, I don’t really love the idea of spending money on confetti. Instead, we always made out own. This holiday art activity encourages your child to use his eye-hand coordination skills and get creative, making a confetti collage!
Holiday art

(This post contains affiliate links. Please see my disclosure statement for more information).

When kids get into those preschool safety scissors years, cutting paper becomes a super-fun way to pass the time. Seriously, I would give my son a magazine and let him have at it for what seemed like hours (probably it was more like minutes, but it did occupy him and help to build his fine motor skills). I also used this tactic with some of the children who I taught art to. When I’d have a rather rowdy student I’d hand over a pair of scissors and some scrap paper. It’s a constructive way to refocus a child’s energy and let him get creative. It also creates a mound of confetti!

Here’s What You’ll Need:

·        A child-friendly magazine and/or other paper such as tissue, construction paper or card stock

·        A piece of poster board or card stock paper

·        Safety scissors

·        Clear-drying school glue

·        A paintbrush, paper towel or sponge – This is to spread the glue out on the paper. Try a combo to make it more fun for your child.

Here’s What to Do:

1.     Cut the magazines or paper into confetti. Have your child make a mound of paper strips and shapes.
New Year's

2.     Squeeze a golf ball-sized pool of glue onto the paper.

3.     Spread the glue out over the paper. Your child can paint it across or wipe it with a paper towel or sponge.

Kids' crafts

4.     Celebrate New Year’s and throw the confetti! This is a great way to kick off the holiday or have a noon-year’s eve celebration. As your child tosses the confetti over the paper it will stick to the glue, creating a colorful collage.

Holiday art

Confetti art

Are you looking for more art activities for your little artist? Follow my Pinterest board for ideas!
Follow Mini Monets and Mommies's board Creative Kids Crafts on Pinterest.

Friday, December 19, 2014

New Year's Eve Oreo Cookie Balls

When I think of New Year’s Eve the first thing that comes to mind is the Times Square ball drop. Well, maybe not the very first – but, it’s up there. The ball’s come a long way from its 1907 debut. Back then it was covered in 100 25-watt bulbs. The modern-day ball is covered with 2,688 Waterford Crystal triangles that are lit by 32,256 LED lights. To celebrate this over-a-century-old holiday tradition, have the kids make their own version.

New Year's Eve

When I say that the kiddos can make a New Year’s Eve ball, I actually mean an Oreo cookie ball. The well-known version of this tasty treat is an Oreo-cream cheese combo covered in chocolate to make a truffle. This recipe nixes the chocolate. I’m a fan of chocolate, but for this kids’ cooking activity it’s easier (and a tasty alternative) to use frosting. This means no heating and no waiting for the chocolate to cool before eating!

Here’s What You’ll Need:

·        Oreos—We used the birthday cake kind as a ‘celebration’ treat.

·        6 oz. of softened cream cheese

·        Frosting

·        Gold crystal sugar or sprinkles

Here’s What to Do:

1.     Crush the cookies in a food processor. They should be the consistency of soil.

Kids' baking
 
2.     Mix the cookie dust with the cream cheese. Your child can use her hands. Have her mush and mash the mixture.

3.     Create balls from the mixture.


4.     Place the balls on a piece of wax paper and pop them into the freezer for one hour.

5.     Take the cookies out of the freezer and coat them with frosting.

Oreo Balls
 
6.     Cover the frosting with gold sugar or sprinkles. Put the Oreo New Year’s Eve balls into a bowl and sprinkle the sugar on top. Keep rolling them until they are covered in gold!

Holiday Treat
 
Oreo Truffles
 
 
Are you looking for more Oreo ball recipes? Try:

Pretzel Oreo Cookie Balls

Chocolate Pretzel


Pumpkin Pie Cookie Balls

Cookie Balls


Follow my Pinterest board for even more ideas.
Follow Mini Monets and Mommies's board Oreo Truffle Balls on Pinterest.