Pages

Saturday, May 31, 2014

Fairy Princess Wings: Make Your Own Doll Accessories

Who doesn't love fairy princess wings? I have a son. That means my home has a serious lack of pretty princess and fanciful fairies floating around. That said, I miss these “girly” playthings. I know, I know – not every girl loves princesses and fairies, but as a former little girly girl, I sort of wish that I got the chance to recreate my youth as an adult. So, in the spirit of girliness I decided to try out a fairy wing art activity.

Kids' art

This is how it goes: Your child’s (girl or boy – as boys can play with dolls too) favorite doll is in need of an imaginative makeover. Instead of dressing her up in hot pants or a faux fur coat, help your child to create her own pair of fairy wings for the doll to wear. This project started as a simple coffee filter art exploration and then moved on from there.

Here’s What You’ll Need:

·         A coffee filter

·         Food coloring

·         Water

·         A pipe cleaner

·         Optional: Craft feathers or flowers

Here’s What to Do:

1.      Drop a few drips of food coloring onto the center of a coffee filter. When your child adds a few splashes of water the color will spread like magic. Let the filter dry completely.

Color Art
2.      Help your child to fold the filter accordion style. This is a great way to build her fine motor skills. Pinch the filter in the center for her.

3.      Hold the filer in its center and let you child wrap the end of a pipe cleaner around it. Leave some extra slack at the ends for later.

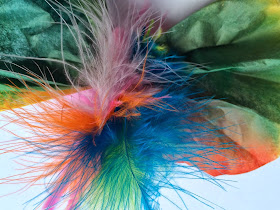
4.      Insert a few craft feathers (I’m somewhat obsessed with ultra-colorful craft feathers) into the back- securing them with the pipe cleaner. Your child doesn’t have to do this step, or she can create a nature fairy by adding in flowers or leaves that she collects outside.

Kids art

5.      Have your child fold the extra slack at the ends of the pipe cleaner over to make arm holders. Think of this as like making backpack straps. Secure the ends underneath.

6.      Fluff the coffee filter to spread out the fairy wings.

7.      Insert the doll’s arms (you’ll need a small-sized doll) through the pipe cleaner straps. Like I said, I live in a boy house. I didn’t have a “doll” to suit up, so my son’s Lego guy (who for some reason is wearing a dinosaur suit) is now ready to take flight!

Fairy Wings

Friday, May 30, 2014

Printing Letters: A Paint Project for Artsy Kids

Print-making is one of my favorite projects to do with kids. In my years as an art teacher I did many printing activities – all were equally fun (at least in my mind)! A few weeks ago I posted an Andy Warhol pop art paint print project. I thought that I’d expand on that one, adding a literacy-based art option.

Kids Art
 
This styrofoam activity includes a few different educational aspects – art-making, the creative process, learning letters and science (reusing items instead of tossing them in the trash). When your child is done making her paint-print letters you can hang them on the fridge to display or use them as a deck of alphabet cards. Try this activity over and over again, until your child has made a complete alphabet set. She can use them to spell words or she can string them together (just punch holes on the sides and tie them together with yarn or thin ribbon) to make a name banner.

Here’s What You’ll Need:

·         Styrofoam- Reuse the fruit or veggie tray that you get with the store packaging. Even though meat, poultry and fish may have styrofoam trays too- don’t use these. They trap bacteria and present a health hazard to your child.

·         A popsicle stick

·         Tempera paint

·         Card stock or construction paper

·         A paintbrush

·         White printer paper

·         A dark marker

·         Scissors

Here’s What You’ll Do:

1.      Cut the styrofoam into squares. Size them according to your needs. I chose roughly index card-size.

Cut the Styrofoam into squares or rectangles.
2.      Have your child use a craft stick to ‘draw’ a letter into the foam. She’ll need to press hard enough to make an imprint, but not so hard that she rips the surface. She can make single lines or try a bubble letter.

3.      If she’s doing a letter that isn’t symmetrical, she’ll need to draw it on backwards. For example, my son’s name begins with “I”. He can just draw an “I” onto the foam. It doesn’t look any different backwards. But, if your little Esther, Luke, Robbie or Sebastian is making their first name letter, you need to make a backwards printing plate. One way to do this (if your child isn’t into or able to draw it backwards) is to draw the letter with a marker onto a piece of thin white paper. Flip it over (so that it is now a mirror image of the original) and put the paper onto the styrofoam. Press the craft stick through the paper on the lines. When she takes off the paper she may need to go over her lines if they aren’t deep enough.


4.      Paint over the surface with tempera. You don’t want her to fill in the lines with paint – it won’t print well. If the paint seeps into the lines, have her run the craft stick through the painty lines to remove it.

Alphabet Art

5.      Press a piece of card stock or construction paper on top. Have her pat the paper to transfer the paint.

6.      Pull apart the printing plate and paper to reveal the image!


You can clean off the printing plates with water and a sponge after your child is done with one color. Add a new color or save them to use again.

Are you looking for more creative crafts for kids? Check out and follow my Pinterest board for ideas!
Follow Mini Monets and Mommies's board Creative Kids Crafts on Pinterest.

Do you want even more alphabet art? Take a look at my new ebook the A-B-C's of A-R-T!

Thursday, May 29, 2014

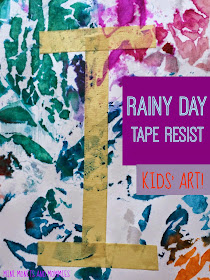
Rainy Day Tissue Paper Tape Resist Prints

Learning about letters, science and art all in one kids' activity! A few weeks ago I posted on making a rainy day tissue paper print. Non-colorfast tissue (the stuff that bleeds its color when it gets wet) is one of my favorite art materials to work with. Kids love the magic behind the color transfer process and the results usually look pretty great. I wanted to combine this process with a simple tape resist project. Even though this activity is simple, it can help your child to explore the creative process, learn about science (the weather) and get a jump on her literacy skills (if she chooses to use the tape to make a letter or spell a word).

Kids' Prints

The weather here has been rainy, rainy and then it rained some more. If you’re experiencing the same weather, take the art-making outside and give this one a try.

Here’s What You’ll Need:

·         Paper and/or cardboard

·         Tissue paper – Do not get the colorfast kind. It won’t work for this activity.

·         Tape- Honestly, I only had masking tape, so that’s what I used. This type of tape tends to peel the paper a bit. If your child is up for exploring the process, give it a whirl without regard to the type of tape that you use. On the other hand, if she’s a perfectionist, try blue painter’s tape (it won’t stick as much). There are so many different kinds of tape out there, so choosing one that works for you shouldn’t be a problem. I just got dizzy at the amazing array of tapes at my local office superstore.  Seriously, who really needs duct tape with a picture of mac and cheese printed on it?

Here’s What You’ll Need To Do:

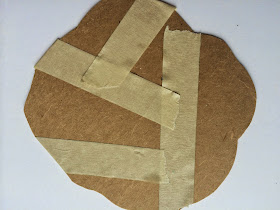
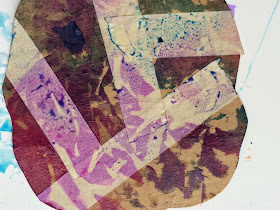
1.      Decide if you want to keep the paper as is or cut it out. I cut out a piece of cardboard into the4 shape of a rain cloud.

Kids' crafts
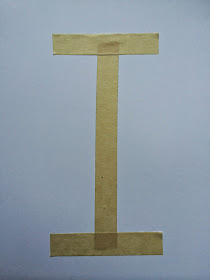
2.      Tape the design. Have your child make an abstract pattern of lines or create a letter.

Letter Craft
3.      Tape the taped paper outside and place it on a flat surface where the rain will hot it. When the tissue starts to run the colors will bleed onto whatever is below it. So, don’t put it anywhere that can’t get messy.

4.      Pull apart pieces of bright tissue paper. Pastels won’t work well.

5.      Place the tissue on the paper, covering the entre sheet.

Kids Crafts
6.      Let the rain work its magic.

7.      When the tissue is soaked through bring it inside. Set it on a garbage bag, piece of cardboard or similar barrier.

8.      Peel the tissue off to reveal the design. The folds and bumps in the tissue tend to result in an animal print-like pattern.

Art activity
 
 
Children's Art

9.      Peel the tape off to reveal the resist image.

Are you looking for more kids' art activities? Follow me on Pinterest for ideas!
Follow Mini Monets and Mommies's board Creative Kids Crafts on Pinterest.

Kids' Glitter Paint Project: Freezing Art!

Glitter art for kids? What kid doesn’t absolutely love sprinkling glitter on top of glue, paper, paint, her hair or anything else that’s not nailed down (and some things that are)? Even my 12-year-old tween son admits that when it comes to the sparkly stuff – he’s all in. That said, while the kiddos get a kick out of sprinkling sparkles everywhere, most moms don’t get the same rush out of cleaning the teeny tiny morsels out of every nook and crevice around the house.

Kids' Art
 
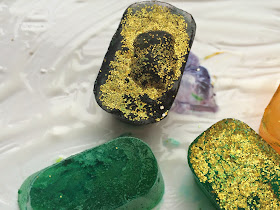
I’m always on the lookout for different ways to use glitter. Instead of just sprinkling the sparkly stuff all over a craft project, I tried freezing it! While simply stashing sparkles in the freezer won’t do, mixing them up into colorful ice cubes will. As a bonus, it adds in a science lesson on states of matter. If you really want to amp up the art and science connection, you can also throw in some color mixing. You can also keep a few left over cubes in the freezer and pull tthem out for a rainy day project.

Before you begin, get scientific and hypothesize (yes, even a preschooler can learn that big old word and use it correctly in a sentence) what will happen when the colored water that you’re about to make freezes. If you’re adding in color mixing (i.e., you’re having the kids mix two different food colorings in each ice cube tray slot) start with that.

Now you’re ready to start the melting ice cube glitter paint project! Caution- this is super-messy. I don’t mind the mess, but I would also throw down an open garbage bag or piece of cardboard on your workspace.
Glitter paint

Here’s What You’ll Need:

·         Ice cube tray

·         Water

·         Food coloring

·         Glitter

·         A paintbrush

·         Clear drying school glue

·         Card stock or another thick paper

Here’s What You’ll Need To Do:

1.      Squeeze a drop or two of food coloring into each compartment of the ice cube tray. You can have your mini Monet mix up her own hues by adding two drops- each one in a different color. For example, I added one red and blue drop to make purple.

2.      Add water to the food coloring.

3.      Sprinkle glitter into each liquidy colorful cube.
Kids' art
 
Children's art

4.      Put the cubes in the freezer until they – well, freeze. If you have an older child who 100 percent understands that these are not make-your-own popsicles (the glitter means you can’t eat them) go ahead and insert a craft stick into the center of each cube as they begin to freeze. Younger kids may confuse a popsicle stick with something that’s edible- if this is the case for your child, just use the regular cube.
Science art

5.      Paint the paper with glue. Squeeze a golf ball sized pool of glue onto the center of the paper. Have your child spread it out with the paintbrush.

6.      Pop out the sparkly cubes.
Ice cubes

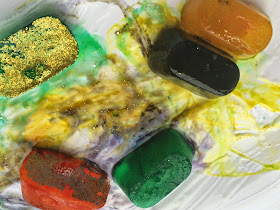
7.      Have your child rub the cubes over the glue. As they melt the color and glitter will release into the glue. If she’s getting picky about her now colorful hands (the food coloring will temporarily stain her hands), she can push the cubes around with a plastic spoon or a popsicle stick. Don’t forget the science aspect. Ask your child why she thinks that this is happening?
Water colors
 
Summer project

Are you looking for more glitter art activities? Check out and follow my Pinterest board for ideas!
Follow Mini Monets and Mommies's board Kids' Glitter Art on Pinterest.

Tuesday, May 27, 2014

Summer Vacation Kids' Memory Book Craft


Childrens Art
 
Its summer vacation and you’ve got the camera out. Well, maybe not your camera. A decade ago when my son was a toddler I toted around a clunky camera everywhere I went. Back then my cell phone didn’t even take pictures, so my only hope of capturing those memorable moments was with an actual camera. Sometimes I even brought along the one that uses actual film – the kind a lab has to process. It’s much easier now to take pictures with my sleek little iPhone. That said, they tend to stay in that little iPhone, only making their way as far as Facebook or an email to grandma and grandpa.

Instead of relying on myself to download and print the pics, I thought why not just make a kid-created picture album. This vacation journal activity offers your child the chance to combine literacy and art while creating a lasting memento of your family’s trip.

Start the art-making before you go away and bring the journal (plus markers or crayons) everywhere that you go!

Here’s What You’ll Need:

·         Cardboard- Reuse the front and back of a cereal or cracker box.

·         Scissors

·         A hole punch

·         Construction paper

·         Pipe cleaners

·         Crayons or markers

·         Any other decorative materials such as tissue paper, modeling clay, model magic, pom poms and so on and son on

·         Clear drying school glue

Here’s What You’ll Need To Do:

1.      Help your child to cut out a cover and back from the cardboard.

2.      Using the cover as a template, cut the construction paper to fit inside.

3.      Stack the book – cover, construction paper pages, back – and punch two holes (one at the top and one at the bottom) of the left side.

4.      Secure the book together. Thread half a pipe cleaner through each hole. Leave a little slack so that your child can open the book, and twist to tie. If you’re worried about your child poking herself with the sharp ends of the pipe cleaners, use yarn or ribbon instead.

Stop here and take the book on vacation. Honestly, if your child decorates the cover now it will deteriorate during the trip. Don’t spend your time off listening to whines over lost pom poms or wet tissue paper. Wait until you get home to have her jazz it up with a mini masterpiece that features a scene from vacation. Bring a baggie with pens, pencils, crayons or markers wherever you go and let her add to the pages. You can also bring a few extra sheets of paper to make new pages if necessary. Simply untie the pipe cleaners, yarn or ribbon and place the new sheets in. When you get home have her decorate the cover any way she wants.

Another option for the cover is to bring home a few vacation mementos to collage on. Glue on cleaned sea shells, a ticket from a play that you saw or anything else that she brought back with her (within reason of course!).
Are you looking for more creative kids' crafts? Check out and follow my Pinterest board for more ideas!
 
Follow Mini Monets and Mommies's board Creative Kids Crafts on Pinterest.

Monday, May 26, 2014

Kids' Color Mixing: Cupcake Canvas


I’m no cupcake queen. But, I sure love trying to come up with creative ideas for this sweet little treats. Although I one of the world’s worst cooks (seriously), I’ll bake for my son once in a while. So, I figured – why not use that blank top of frosting as a canvas for icing art? I’ve made Monet’s Impressionist cupcakes and Jackson Pollock ones. This time I got to thinking about color mixing.

Over a decade ago I had my first day on the job as a museum-based children’s art teacher. My then-boss asked me to get paint trays ready for the kiddos to work with. I went to the super-stocked paint closet and got out a rainbow of temperas. My boss ran in and stopped me before I started pouring the paints. “Only the primaries. And white,” she said. From then on I only gave the kids red, yellow and blue (and white to lighten the hues) for any project that we did. A landscape? Primaries please. A self-portrait? Yep, only red, yellow and blue. The objective was or the children to think about the colors that they were using and make their own.  With that in mind, I’ve done a zillion (maybe less) color mixing art activities.

This time I wanted to try something different than the good old paint and brush color mixing. There are tons of variations on this activity, but this one adds a sweet treat that the kids can eat to the mix. Before you start the baking (especially if your child is new to color mixing), discuss the process. Give her new vocabulary words, including primary colors (red, yellow and blue) and secondary colors (orange, green and purple). You may also want to read a book that focuses on this concept. My favorite for preschoolers (or around that age) is Leo Lionni’s “Little Blue and Little Yellow” . I’ve also had success with Ellen Stoll Walsh’s “Mouse Paint”.

When you’re ready to bake—

Here’s What You’ll Need:

·         White cake mix- Like I said, I’m not a baker. I use the boxed stuff and don’t feel one bit bad about myself for my lack of skills. But, if you’re a dessert diva please do substitute your own homemade recipe. If you have a really great one that you’d like to share, please leave a link to it in the comments section. You’ll also need whatever ingredients your mix requires (i.e., eggs, water, oil), a bowl and mixer.

·         White frosting- Again, mine comes from a package.

·         3 bowls

·         3 spoons

·         Cupcake tins and liners

·         Food coloring- Red, yellow and blue only

Here’s What You’ll Need To Do:

1.      Mix up the cake. This is an opportunity for your child to explore math and science! Let her measure and mix the ingredients.

2.      Spoon the batter into three bowls.

3.      Have your child squeeze two or three drops of food coloring into the bowls and mix them.

Add blue and yellow into the first bowl to make green.

Add red and yellow to the next bowl to make orange.

Add red and blue to the last bowl to make purple.

4.      Spoon the colorful batter into the lined tins. Make solid-colored cupcakes or combine them.

5.      Bake the cakes. Do not let your child do this step. Never allow your young child to use or go near the stove and oven.

6.      Clean the bowls and spoons thoroughly.

7.      Divide the frosting among the three bowls.

8.      Add food coloring to the frosting and mix.


Add blue and yellow into the first bowl to make green.


Add red and yellow to the next bowl to make orange.

       Add red and blue to the last bowl to make purple.

9.      Frost the cupcakes!

If your little one is wondering why the frosting colors are so light, ask her to think about what it started as. When you mix white with another color it lightens it – making the frosting pastel.

Do you have a favorite cupcake recipe? Add a link to the comments section below. Do you want more ideas for creative treats? Visit and follow my Pinterest board!

 
Follow Mini Monets and Mommies's board Cupcakes! Yum! on Pinterest.