Mini Monets and Mommies: June 2014

Monday, June 30, 2014

4 Fourth of July Crafts, and 5 Reasons for Your Kids to Make Them

July 4th is coming up! As we prep for the holiday, set some time aside from buying hamburgers, hot dogs and buns (not to mention, cleaning the yard for our barbeque guests – because none of us moms ever, ever have random half-inflated soccer balls, strewn about pool noodles, a stray baseball glove or a bevy of bikes and trikes sitting around) to make an art activity.

Holiday Art
Why take time out of all of your running around to set up the paints and glitter for kids during the week leading up to the Fourth of July? Here are a few reasons:

1.      You can break up a not-so-exciting day. The kids are bored and getting whiny, especially after being dragged to the grocery store, bakery and party supply store. Even though you’ve kicked your party planning into high gear, they really don’t care. Take a break, set up a holiday craft and have some fun (you can get in on the artsy adventure too) making a project.

2.      Décor, décor, décor. Why buy ready-made decorations when the kids can create them for you? Make some art and hang it up in your home, on your front door to greet your guests or line the buffet table with hand-made creations.

3.      It’s better than using the TV as a babysitter. This doesn’t mean that you should leave the kids alone while they are crafting. My son always says I’m super-overprotective, but I do believe that children should always have adult supervision during art-making activities. That said, you can sit the kids down and have them color a red, white and blue flag or they can glue together a collage at the kitchen table while you wash and dry dishes a few feet away.

4.      Get psyched for the holiday! Your child may not really know what July 4th is or care much about it. Making a holiday craft the week leading up to the big day gives the kids something to look forward to.

5.      It’s fun! What sounds more exciting: Picking up the million Legos that are hidden behind the couch, under the cushions and lining the stairs, or sprinkling sparkly glitter all over ooey, gooey glue? I know what my answer is, but what’s your kids’ answer? I’m guessing it’s the glitter.

So, you’ve decided to try a Fourth of July craft with the kids. What should you do? Here are a few easy options that are also tons of fun:


Kids' crafts


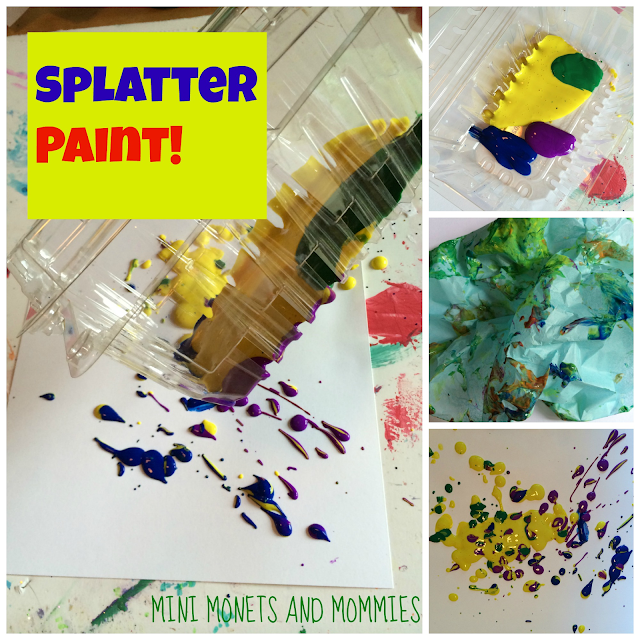
·         Paint splatter art: Instead of using brushes, reuse an old fruit container (or poke holes in the bottom of a cup with a lid) to splatter red, white and blue across a white piece of paper. Use this technique to make a banner by doing the same splatter over a white sheet.
Holiday Craft
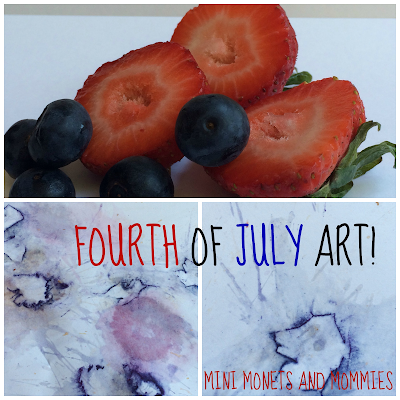
·         Berry splatter: If paint just isn’t fun enough – try berries instead. Gather together red and blue berries and let the kids squish them. They’ll explode like July 4th fireworks on the paper.
Children's crafts
·         Flag collage/print: Use tissue paper to make a flag collage. Choose non-colorfast tissue, put a wet piece of paper down and make a print.
July 4th
·         Glitter flag: Piece together reused popsicle sticks with glue, attach them to a piece of cardboard and sprinkle red, white and silver glitter on them to make a flag. They also double as cool coasters.


Saturday, June 28, 2014

Pink Princess Sparkle Strawberry S'mores


Even though I usually post kids’ art activities, occasionally I’ll dabble in the cooking arena. (especially when it comes to s'mores). I use the word “cooking” very loosely. I’m one of the world’s worst cooks and am far from a pro in the kitchen. That said, I do enjoy the once-on-awhile ‘no cook’ recipe. Add in artsy intent and that’s totally my style. I’ve made Monet’s Impressionist cupcakes, Jackson Pollock style cupcakes (yes, I went through a serious cupcake phase) and some pretty princess and pirate popsicles.

Strawberry Treat

While making princess popsicles I got slightly infatuated with the idea of making everything I could pink and sparkly. Around that time I developed a fascination with s’mores. I mean, I’ve always loved the regular marshmallow, graham and chocolate camping favorite. But, I started to realize that these magical marshmallow creations could be so much more. My son helped me to make a sprinkle-covered version that he enjoyed, but I wanted to feed my princess frenzy and make glittering ones. The result: Pretty pink princess strawberry flavored s’mores!

Here’s What You’ll Need:

·         Marshmallows

·         Chocolate

·         Graham crackers

·         Strawberries

·         Pearlescent sugar

·         A heat-safe bowl

·         Wax paper

Here’s What to Do:

1.      Cut the strawberries into slices for your child.

Princess Pink
2.      Heat the marshmallows. I used a microwave (I didn’t have a campfire available). But, you can use the traditional camping stick method or heat them over a stove (without putting them in the flame). Don’t allow your child to heat the marshmallows – do this step for her.

3.      Line a bowl with wax paper. This will help the marshmallows from sticking too much.

4.      Put the heated sugary treats into the bowl and have your child squish strawberries over them. Coat the marshmallows completely, turning them pink.

5.      Sprinkle the pearlescent sugar over the pink marshmallows.

6.      Use the left over sugar (it’s likely that your child will end up sprinkling extra sugar all over the bowl) to coat the strawberry bits that remain.

7.      Assemble the s’more. Graham cracker, sugar-coated berries, pink sugary marshmallows, chocolate, graham cracker!

Chocolate Sprinkles
Are you looking for more s’mores? Check out and follow my Pinterest board for ideas!

 
Follow Mini Monets and Mommies's board Sweet S'mores on Pinterest.

Friday, June 27, 2014

DIY Glow In the Dark Paint

How have I managed to be a mommy for the past 12 years and not have known about the wonders that tonic water holds? No, I’m not talking about some magic elixir that cures colds or makes toddlers stop having tantrums. Instead, I’m referring to the glow in the dark properties of this mixer. When exposed to a black light the quinine in the liquid makes it glow an eerie shade of electric blue.
Glow Paint

So I patiently waited for the sun to go down, turned on the black light (I felt a little bit like my living room was suddenly a 70s rec room) and poured the tonic water. My 12-year-old can’t stand to craft. He rolls his eyes in only the way that a tween can, shakes his head and mumbles something such as, “Mom, who cares about making art?” Um, lots of people. But, this time he was totally game to try out the project. Don’t worry; your child doesn’t have to wait until he is older to try this DIY glowing paint. This art activity is an all-ages event.

Here’s What You’ll Need:

·         A black light—You can buy a black light bulb in any home improvement type of store. Twist it into you’re a lamp base.

·         Dark paper – such as navy blue or black

·         Tonic water

·         A bowl

·         Paintbrushes – Amp up the painting fun and try other artsy tools (or make your own). Spread on the tonic with cotton swaps, pom poms, yarn, ribbon or crunched up tissue paper.

Paint Fun
Here’s What to Do:

1.      Pour the tonic into a bowl.


2.      Place the paper on a surface that can get wet or cover a table with a piece of thick cardboard or a garbage bag.

3.      Turn on the black light.

4.      Dip the brush into the tonic and encourage your child to paint lines, dots or splatter it in a Jackson Pollock type of style. As a bonus – it’s the type of paint splatter that won’t really make a mess. Just wipe up the water afterwards.


The “painting” won’t glow after the black light goes off. This is purely a fun process. If you really want to keep your child’s glow in the dark art, snap a picture. Go back to the picture later on and ask your child to tell you what he painted and why he thinks it glowed.

Are you looking for more process art activities? Check out and follow my Pinterest board for ideas!
Follow Mini Monets and Mommies's board Process Art for Kids on Pinterest.

Help! My Child Hates Art!

In my years as both a mom and an arts educator I’ve heard many parents says something along the lines of, “But, my child just doesn’t want to make art. Aren’t all kids supposed to like doing that kind of stuff?”
Crafting Kids


Simply said, no – not all kids enjoy making art. Artsy activities have benefits galore that include:

·         Building pre-writing skills

·         Improving fine motor development

·         Inspiring critical thinking

·         Developing spatial awareness

·         Boosting creativity

That said, your child won’t suffer developmentally if she never paints a portrait or makes a paper mache masterpiece.

Here are some of the top questions/problems that I’ve heard along with a few simple answers:

My child won’t make art at home, should I sign her up for a class to encourage her?

No, and yes. I do believe that exposing a young child to new experiences is beneficial, but you need to weigh the pros and cons. It’s kind of like eating a new food – if you child’s never tried it, how does she really know that she doesn’t like it? With that in mind, if your child has tried art (and tried it, and tried it some more) and still resists, don’t force her into a class just because you think she has true talent or because you’re rather crafty yourself. In my professional practice teaching preschoolers at a museum, I found that the kids who were forced into an art class ended up building up even more of a dislike for it.

Aren’t all kids supposed to like art? Is there something wrong with my child?

No and no. Think about your own likes and dislikes. Do you like everything? Of course not. Neither does your child. While your neighbor’s 4-year-old may get giddy at the sight of a paintbrush, your child may prefer soccer, dance, gymnastics or playing violin. Your child is unique. Don’t force her into being someone who she isn’t.

How will my child learn to write if she doesn’t scribble as a tot?

Yes, it’s true that making marks during art experiences can help when it comes to pre-writing, but that doesn’t mean your child has to draw all of the time in order to build these skills. If she’s just not into “drawing” a picture, try something more straightforward such as tracing letters.

What about her fine motor development?

There are tons of non-art ways for your child to build her finger and hand skills that go beyond drawing and painting. Building with blocks, lacing games, everyday activities such as zippering her coat and scooping through sand or sensory bins with rice can help your child develop dexterity and hand-eye coordination.

My child wouldn’t pick up a crayon even if I bribed her with a cookie. Does that mean she hates all art?

Probably not. Possibly, but you shouldn’t generalize based on one specific process. Just because your child doesn’t want to draw doesn’t mean that she won’t enjoy making a torn paper collage, sculpting with clay or finger painting.

Motor Development
I would really like my child to work on her writing. Is there any way to get her to write letters other than using a drawing activity?

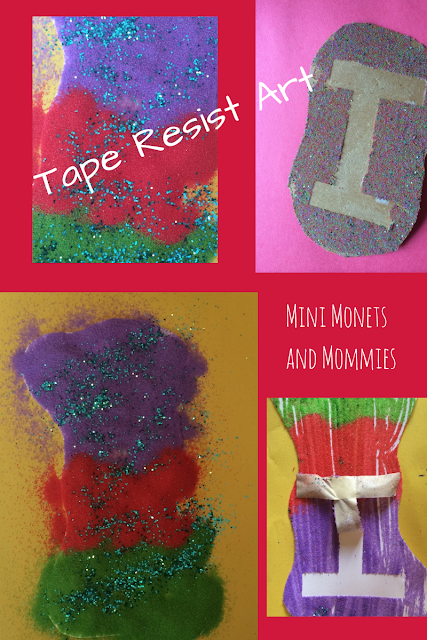
Sure! She can paint her letters or even use finger print dots to make the letter lines. She can use a craft stick or toothpick to write letters in foam and print them paint (making her own stamper) or collage a mega-sized letter using tissue paper pieces. She can also try "finger painting" with modeling clay (have her spread clay across paper similar to the finger-paint process), making an alphabet sculpture or making a tape resist letter painting.

Kids' art

Kids' crafts


Even though you might want to help your child become the artist that you know she is, pushing her isn’t the way to go. Keep in mind that she needs to explore her creative side on her own terms. Don’t worry if she suddenly stops wanting to make craft projects. My son love, love, love, loved chicken nuggets, and then at age four decided they were a no go. Kids change, go through phases and get temporarily picky at time. Be patient and let your child take the lead. While you might be artsy to the max, she may find a different path to follow!
 

Thursday, June 26, 2014

Patriotic Paint Splatter Art: Red, White and Blue

Whether it's Memorial Day, Fourth of July or your child just wants to get patriotic, this easy art activity is perfect! We've used empty plastic strawberry containers to make abstract splatter artwork (think Jackson Pollock). This time I’m trying the same thing, but with an all-American red, white and blue theme.

Kids art
I
’ve done the good old paintbrush splatter art with my son when he was younger as well as more times than I can remember while teaching kids’ art classes. Instead of rehashing the same activity, this mixes things up a bit and gets your child thinking about new ways to make art. I have an overabundance of berry containers (the clear plastic kind that have lids and a few holes on the sides) sitting around. This summer I’ve decided to try swapping out the cookies and chips for strawberries and blueberries (my 12-year-old is not happy about that). Instead of tossing the mass amounts of empty containers, I’m turning them into crafting materials.

So, prep for the mess (I mean it – the paint will go everywhere) and let your little artist splatter her way to a firework-like Fourth of July creation!  Add a music and movement component to this activity and put on some patriotic tunes in the background (Yankee Doodle, America the Beautiful, the Star Spangled Banner, etc.). Have your child shake the paint on to the paper to the beat.

Here’s What You’ll Need:

·         A plastic fruit container that has a lid and holes in the bottom.

·         Red, white and blue tempera paints

·         Paper

·         Optional: Red, silver and blue glitter

Here’s What to Do:

1.      Prepare your work area. Cover anything that you don’t want to get messy. If you’re not entirely sure to keep things at least somewhat clean, I have a post on a few different ways to prepare for children’s art activities.

2.      Pour quarter-sized dollops of red, white and blue paints into the bottom of the container.

July 4th

3.      Place a piece of paper on the work surface. Use card stock, construction paper, poster board or any other paper that you have on hand.

4.      Close the lid to the container. Let your child shake, shimmy and splatter the paint all over the paper.


Paint Splatter
 
Jackson Pollock
5.      Optional: Add some special sparkle with red, silver and blue glitter. Your child can put the glitter into the paint splatter box contraption or sprinkle it right on to the painted paper surface.

If the paint is too thick to come out of the holes, add a few drops of water. The watery temperas will splatter out in a swirling stream of colors.

Children's crafts

Holiday Craft
Are you looking for more art activities that your child can try? Check out the Mini Monets and Mommies Facebook page or visit and follow me on Pinterest for ideas!
Follow Mini Monets and Mommies's board Creative Kids Crafts on Pinterest.

Wednesday, June 25, 2014

Recycle, Reuse and Paint! Abstract Art with Temperas

Painting doesn’t always require your child to use a brush, sponge or similar tool. The other day I was getting ready to toss a strawberry container – one of those clear plastic kids with the lid on it and the holes in the top and bottom for the berries to “breathe”. I stopped and thought, “What kind of project could this become?” My 12-year-old just shook his head, rolled his eyes and said, “Mom, why are you always making those crafty things?” Well, because they’re fun! And this one was a messy masterpiece in the making.
Kids' Print

(This post contains affiliate links. Please see my disclosure statement for more information).

Add some paints, paper and even tissue to the reused plastic container and what do you get? Jackson Pollock style paint splatters, patterned prints and marbled looking artworks.

Here’s What You’ll Need:

·         A clear plastic strawberry (or other fruit) container

·         Clear packing tape

·         Tempera paints

·         Thin paper

·         Tissue paper

·         Card stock paper

Here’s What to Do:

1.      Prepare your work area – and your child – for the mess. I used a thick sheet of foam core board, but am opened garbage bag, cardboard, vinyl table cloth or other barrier will work to prep for this project.

Paint Set-up
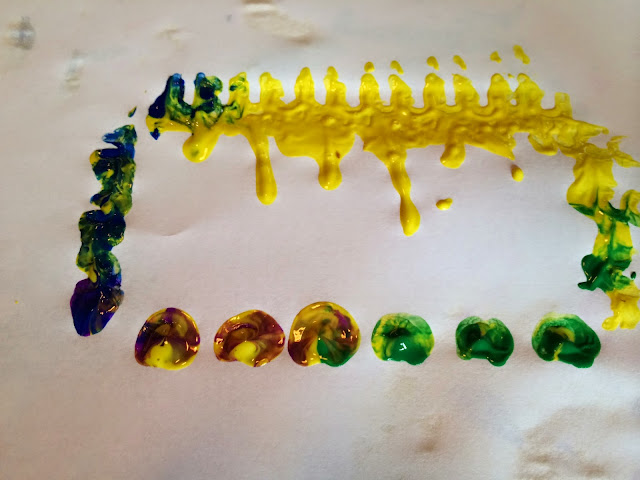
2.      Squeeze a few different colors of paint into the bottom the plastic container. You don’t have to cover it completely or actually fill the container up. Just add a few quarter-sized dollops. Keep the container over a covered surface. The paint will start to leak out as soon as you put it in.

Tempera Paint
3.      Shake it! Have your child shift and shake the container over a piece of white card stock. If she wants to create a larger paint splatter use poster board or rolled butcher paper.

Kids art
 
Art children
4.      Press the container onto a piece of card stock paper. The paint that is left over will squeeze out of the holes, creating a print.

Colorful art
5.      Tape the holes in the container. When your child is ready for a new way to play with paint, completely cover all of the holes. Some paint may still leak out, so keep it over your covered work surface. Add more paint—in at least three different colors.

kids crafts
6.      Open the container and put a folded piece of paper or tissue paper inside.

Kids crafts
7.      Close it up and let your child shake the artsy contraption.  The paint will mix and blend as it coats the paper.
Art materials
 
Kids Paint
 
Are you looking for more art-making activities? Check out and follow my Pinterest board or visit Mini Monets and Mommies on Facebook for ideas galore! Follow Mini Monets and Mommies's board Process Art for Kids on Pinterest.

Tuesday, June 24, 2014

Living Art: Kids' Green Activity with Plants

Living art for kids? Yep! If gardening is on the agenda, this kids' activity is a bit different than the traditional dig in the dirt project.

Eco Craft

I’ve heard of being green, going green, green living and various other eco word choice compounds, but green walls? Green walls, to me, meant the failed dining room experiment in which I thought that moss would be a great hue to paint the area (it was not). But, then I remembered seeing something that at the time I thought of as somewhat amazing when walking through downtown Pittsburgh – the green wall at PNC. These mega-sized piece of landscape-ery (yes, I do realize that this isn’t a real word) is living art. By using a combination of differently colored vegetation in shapes and patterns, these plant-covered outdoor public pieces of art pack an earth-friendly statement and are an environmentally way to regulate the temperature and noise inside of the building that they reside upon.

I was planting some new seed in my lawn the other day after the combination of a bitterly cold winter and rushing stream of water from a super-soaking rain decimated much of my grass. It occurred to me that I could take some of the leftover grass seed and try to make one of these “green walls”. Not the building-sized version, but a teeny tiny one that isn’t exactly a wall, but more of a kids’ living art activity.

So, instead of paper and pencils or paint and markers, my son and I set out to make a grassy pattern in a box. This project is easy to adapt, and great for children of all ages. It also doubles as a science exploration and you can even use it to learn a math lesson. Encourage your child to predict what will happen before you plant

Here’s What You’ll Need:

·         A box – A shoe box or similarly sized box will do.

·         Soil

·         Grass seed

·         Tape – Masking or painter’s tape (as long as it’s not clear)

·         Shirt or low-to-the—ground flowers or ornamental grasses

·         A garbage bag

·         Scissors

Here’s What to Do:

1.      Line the inside of the box with the bag.

2.      Poke drainage holes in the bottom of the box and bag for drainage. If the box is thick, you may have to do this step for your child. Keep the box outside so that it can drain with less mess to your house.

3.      Fill the box with dirt.

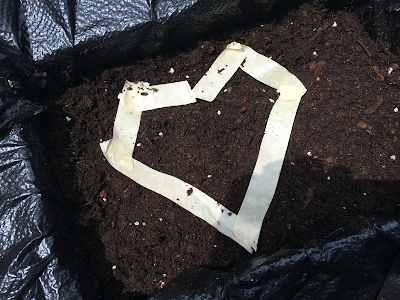
4.      Create a shape or shapes in the dirt with the tape. Have your child pick a simple shape such as a heart, circle or square. Have her place the tape in the dirt, making the shape.

Outdoor art
5.      Add grass seeds to the inside of the shape – filling it in. have your child lightly cover the seeds with soil and add water.

6.      Water the seeds. Doing so also helps your child to better understand what plants need to grow and the life cycle.

7.      Remove the tape as the grass grows. The grass is now in the shape that your child taped.

Kids' art
8.      Fill in the soil around the grass shape with small-sized plants to create a contrast from the grass in another color and texture.

Green Project
Continue to care for the living art with your child.  Are you looking for more art + science activities? Check out and follow my Pinterest board for ideas!
Follow Mini Monets and Mommies's board Preschool Art and Science Activities on Pinterest.