Pages

Thursday, July 31, 2014

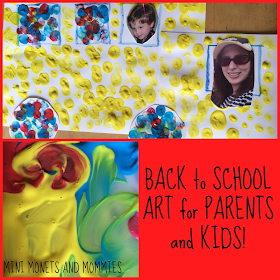
Back to School Parent-Child Art Activity

It’s back to school time! There are tears, anxiety and trepidation. No, I don’t mean your child – I mean you. Everyone seems to pay so much attention to how your child feels about, will deal with and reacts to the first day of school, who is worrying about you – the parent? Sure, making your child feel confident and comfortable as he ventures into the world of academics is essential. That said, it can be extremely trying for a parent to let go and watch as her baby boards a bus to spend the day with someone else.
Parent-child project

My son went to preschool. Even though he had already gone to a school (it was only a few afternoons a week), when he got on the big yellow bus to go to kindergarten, I cried. It’s funny, as I was thinking about that day I ran into an old neighbor who had moved years ago. Our kids were the same age and when they were younger (they’re tweens and teens now) we spent almost every day together at the park, the pool or each other’s homes. We also spent the first day of school together. We waved good-bye to our kids together and then went to her house – both with tears in our eyes. Even though this sounds super-sad now, a few weeks into the school year we weren’t crying together. We had very much begun to enjoy the fact that we had time to talk about “grown-up” stuff without having to spell certain words out.

If you’re worried how you will react to your child’s school debut, don’t stress – it’s completely normal. Before you pack his book bag, hand over his lunch box and send him on his merry little way, try out a parent-child back to school bus craft. Not only will it provide some quality bonding time for both of you, but it will give you a lasting memento to look at when he’s away at school all day.

Here’s What You’ll Need:

·        Card stock paper

·        Scissors

·        Markers

·        Tempera paints – Yellow, red and blue

·        A paint palette—I reused the plastic lid from a large-sized coffee can.

·        One photo of you and one of your child

·        Clear drying school glue

Here’s What to Do:

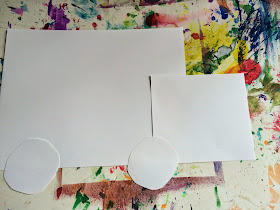
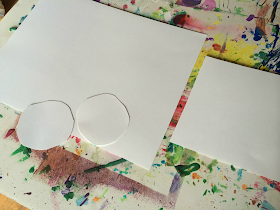
1.     Cut shapes from the paper. Use one 8x11-inch piece of paper (horizontally) as the body of the bus. Cut a square as the front of the book and two circles for wheels. Take the opportunity to review these basic geometric forms with your child.

Geometry Craft
 
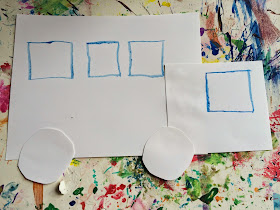
2.     Glue the square to the front of the rectangle (right side) and the two circles at the bottom.

School craft
 
3.     Draw windows on the front and body of the bus. Have your child free-hand these to practice drawing shapes.

School craft
 
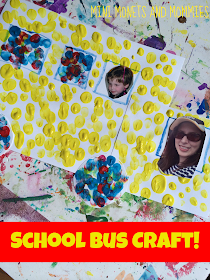
4.     Now it’s time to get crafting together. Pour a golf ball-sized pool of yellow paint onto the palette or lid. Each of you should dip one finger into the paint. Finger print the bus together.

Print project
 
Art for children
 
 
5.     Paint print the wheels and the windows. Pour pools of the other colors to finger paint the rest of the bus. Your child can mix the primary colors to get the secondaries – orange, green and purple.

Colorful artSchool crafts
 
 
6.     Trim the photos of yourself and your child. Cut out the heads.

7.     Attach the photo heads to the bus. Glue your photo in the driver’s seat and your child’s in the body of the bus.


Transportation Crafts
 

Are you looking for more creative crafts to try with your child? Follow my Pinterest board for ideas or like the Mini Monets andMommies Facebook page!
Follow Mini Monets and Mommies's board Creative Kids Crafts on Pinterest.

Tuesday, July 29, 2014

Preschool Picture Books About Art and Artists

Children’s books about art and artists offer opportunities galore for learning! Even when I could take my classes of mini Monets into the art galleries of the museum where I was teaching, I still started class off with a good picture-filled story.

Art books

(This post contains affiliate links. please see my Disclosure Statement for information).

Whether you want to introduce your child to a concept such as primary colors, a specific process, a style, an actual artist or use art as a way to learn another lesson (letters, numbers, animals, and so on, an illustrated children’s books is an easy starting point.

Before I get into the books themselves, here are a few of my child-tested ways to use them with kids:

·        Illustrations are art. Always remember that those beautiful, brightly-colored pictures in the books are art in themselves. Tell your child the illustrator’s name and point out that he or she is an artist too. As you page through the book, ask your child to look at the pictures and tell you what she sees. Ask open-ended questions such as, “What’s going on in this picture?” or, “What do you think is happening?”

·        Use focused questions. Along with the general open-ended questions, use a few focused ones that lead your child to what your activity or learning objectives are. For example, if you want to help her learn the color names you could ask something along the lines of, “What color is the little boy’s shirt in this picture?”

·        Stop often for questions or to give answers. Instead of expecting your child to sit quietly and be read to passively, involve her in the process and encourage her to ask questions about what she sees.

·        Invite your child to repeat what you’ve said when introducing new vocabulary words or artists’ names. If you are reading about the primary colors, ask her to say “primary colors” as you point them out. Then have her point to each color on the page and say the name “red”, “blue” or “yellow.”

·        Let your child linger. Don’t flip through the pages too quickly. There’s no race to the finish of a good children’s book. Allow time to gaze at each page or hand the book over to your child and let her flip through it on her own.

Reading about art
 
Toddlers and Preschoolers: Basic Art Concepts

Little Blue and Little Yellow by Leo Lionni: One of my favorites. This artsy classic takes the concept of color mixing and makes it relatable by giving the color friends human-like qualities.  This goes beyond just teaching kids about the primaries and moves into the social domain as well.

Mouse Paint by Ellen Stoll Walsh: Another primary paint story that bridges the concept in a way that is completely on the young child’s level. It’s engaging and educational all at the same time!

Harold and the Purple Crayon by Crockett Johnson:  This decades-old classic can help kids to learn more than their colors. Even though the word “purple” figures prominently in the title, this book can help children to use their imaginations and learn about the concept of line.

Color Zoo by Lois Ehlert: Obviously it’s about colors, but the geometric animals can help children to explore, recognize and identify shapes as well.

My Many Colored Days by Dr. Seuss: It’s not as well-known as the Cat in the Hat, but this Seuss story (illustrated by Steve Johnson and Lou Francher) offers up a rainbow of colors, connected with emotions! Younger kids can point out the hues that they see, while older children can link the colors with their own feelings.

Famous Artists

When Pigasso Met Mootisse by Nina Laden: Hands down, one of my top kids’ books about art and artists. The imaginary tale of two animal artists at odds with each other – and with very different styles – is a lesson on art, friendships and compromise.

The Artist Who Painted a Blue Horse by Eric Carle: Carle’s colorful collage-like illustrations celebrate the work of Expressionist artist Franz Marc in a way that’s totally relatable to preschoolers.

So Many Stars, Andy Warhol (illustrator): A pint-sized look at the famous artist’s world. Pop art for the preschool set!

A Blue Butterfly: A Story About Claude Monet by Bijou Le Tord: Young children can learn about the famous artist, and his gardens in Giverny, while paging through this beautifully illustrated book.

Kids Making Art (About kids making art, not how-to’s)

I Ain’t Gonna Paint No More! By Karen Beaumont and David Catrow: Messy paint at its best! A great rad if you want to break your child out of coloring in the lines.

A Day With No Crayons by Elizabeth Rusch and Chad Cameron:  Teaches a stellar lesson that art is everywhere, meaning that imagination is key – and not necessarily the materials.

Beautiful Oops! by Barney Saltzberg: What a life lesson! Mistakes can be beautiful too. If you’re child goes ballistic when her paint smears or she makes a stray crayon mark – and many do – try this book out.

Art Books About the Alphabet

Arches to Zigzags: An Architecture ABC by Michael J. Crosbie, Steve Rosenthal and Kit Rosenthal: Yes, your preschooler can learn what an arch or I-beam is. This primer on basic architecture is also an artsy way to learn the letters.

I Spy: An Alphabet in Art by Lucy Mickelthwait: Some of the most famous artworks (by the likes of Miro and Chagall) accompanying the A,B,C’s.

A is for Art: An Abstract Alphabet by Stephen T. Johnson:  It’s almost like going to the museum, with these amazing alphabet illustrations.

Art Books to Grow On

As your child rounds the school-age years, these books are artsy illustrations of concepts and famed creators.

Linnea in Monet’s Garden by Christina Bjork, Lena Anderson and Joan Sadin: It’s art history and child fiction combined!

Uncle Andy’s by James Warhola: Yep, this is by Andy’s nephew. Warhola revisits his Uncle Andy through the eyes of his childhood.

Paris in the Spring with Picasso by Joan Yolleck and Marjorie Priceman: This read brings Paris and Picasso to life with colorful illustrations.

Child literature
 
Are you looking for famous artist activities to accompany your book? Follow my Pinterest board for tons of ideas!
Follow Mini Monets and Mommies's board Famous Artist Kids' Activities on Pinterest.

Monday, July 28, 2014

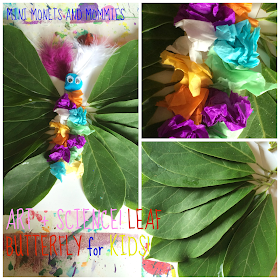
Kids' Butterfly Plant Art Activity

Combining science and art gets two types of learning in to one kids’ activity! I always enjoy a good science + art project, and lately have been working with icy art. There’s only so much that I can do with ice at one time before I go on brrr!!! cold overload. So, I’m switching it up and moving on to plants.

Nature crafts for kids
 
The other day I was looking at my magnolia tree. It didn’t really bloom well this year because of the extreme cold, but when I took a real look at their leaves I noticed just how intricately beautiful they are. The shape, the texture the tiny veins – and it’s not just magnolias. The flowering parts of plants are sure pretty, but don’t forget about the green stuff too.

Get out into nature and take your child on a leaf hunting expedition. Collect an armful of fallen leaves and head inside (or set up your art-making station outside on the patio or in the grass). Now your child is ready to transform her leaves into a beautiful butterfly!

Here’s What You’ll Need:

·        Leaves

·        Clear drying school glue

·        Card stock or poster board

·        Clay

·        Googley eyes

·        Tissue paper

·        Pom poms

·        Scissors

·        Optional: markers, craft fathers or pipe cleaners

Here’s What to Do:

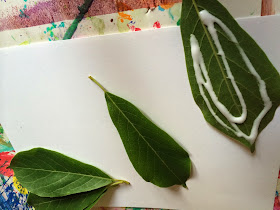
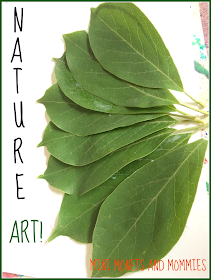
1.     Glue the leaves onto a piece of paper in a fan shape to make one butterfly wing. Repeat this step to make the second wing.

Plant crafts
 
Leaf craft

2.     Cut the wings out.


Art and science
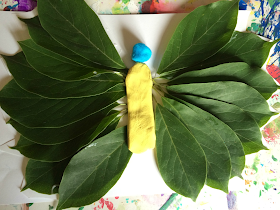
3.     Place the wings on another piece of paper. Have your child glue them on to make the general butterfly shape.

Insect art
4.     Create a butterfly body and head.  Give your child a few different choices. She can glue a line of pom poms down the center of the wings or glue one pom pom at the top (as a head) and make a clay body.

Pom pom
5.     If your child chooses clay, cover it with a textured tissue paper collage. Tear pieces of tissue and have your child ball them up. She can glue them to the clay.

Color paper
6.     Make antennae. Your child can glue two craft fathers, pipe cleaners or draw them on with markers.

Insect activity for kids
 
7.     Glue googley eyes to the head.

Nature-based art
Are you looking for science and art ideas? Follow my Pinterest board or check me out on Facebook!
Follow Mini Monets and Mommies's board Preschool Art and Science Activities on Pinterest.

Sunday, July 27, 2014

Cherry Red Coconut S'mores

I’m mostly all about kids’ art activities, but occasionally I take on a child-friendly recipe or two. I use the word “recipe” loosely – as I’m not a cook, not do I pretend to be one. I joke that I can only make stacked things; which leaves me with a half decent lasagna and s’mores. Recently, I’ve been on a s’mores kick. A few weeks ago I made pink princess s’mores. Strawberries were in season, so I added them to the “recipe” for a pink marshmallow hue.
Coconut kids food

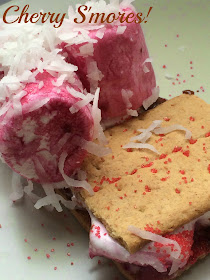
Cherries are everywhere right now, so today I took on cherry red coconut s’mores. I have a major sweet tooth, and these definitely quieted my sugar craving.  And yes, these are as tasty as they sound!

Here’s What You’ll Need:

·        Marshmallows

·        Cherries (the real ones, not the bottled maraschino ones)

·        Graham crackers

·        Chocolate

·        Red crystalized sugar

·        Coconut

Here’s What to Do:

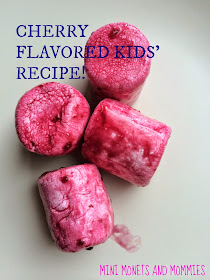
1.     Color the marshmallows red. Hint: This is a great opportunity to add in a lesson on colors with your child. My son is 12 and thought that the dyed treats looked like they were covered in blood—so go ahead and save this one for Halloween also. Put a few marshmallows in a bowl. Squeeze cherries over them. Paint the remaining white spaces with the leftover cherry mush.
 
Kids' foods

2.     Sprinkle coconut over the cherry-covered marshmallows, covering them completely.
S'more style

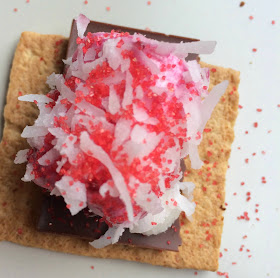
3.     Stack the s’more. Graham cracker, chocolate, marshmallow graham cracker.
 
Chocolate treat

4.     Heat it up. While I prefer campfire s’mores, the cherry and coconut-covered marshmallows seemed to do better in the microwave. Do this step for your child, and make sure that the s’mores aren’t too hot before she eats them. I heated my sugary stack for 10 seconds. But, microwaves vary, so you will need to adjust for your appliance.
Childrens' Desserts

5.     Shake glittery crystalized sugar over the whole thing. You can find this sparkly red sugar in the baking aisle or you can make your own by mixing red food coloring with course sugar.
Sweet kids' food

Hooked on the sugary treats and need another recipe? Follow my Pinterest board for all the sweet s’mores that you and your child can handle making!
Follow Mini Monets and Mommies's board Sweet S'mores on Pinterest.

Saturday, July 26, 2014

Negative Space Art: Kids' Leaf Paint Activity

Combining early childhood art and science has been on my mind a lot lately. What better way to get hands-on and explore concept such as nature or physical properties than with an imaginative art activity? Recently, I posted on DIY glow in the dark ice (it’s super-cool – literally – and the kids have a blast trying to figure out what makes it seem to magically light up) and frozen color mixing. I’ve been somewhat hung up on liquid to solid to liquid transformations, so I’m switching it up and focusing on nature.

Science craft
(This post contains affiliate links. Please see my disclosure statement for more information).

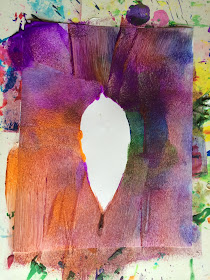
Not only does this art activity add in a touch of science, but it offers an opportunity for your child to explore the concept of negative space! Negative space is the area around an object. Yes, this is a terribly complex concept for the young child to easily grasp. But, this project will give her a concrete comparison that takes an out-there idea and makes it understandable.

So, let’s get on with the art-making process--

Here’s What You’ll Need:

·        A leaf (or your child can try another flat object)

·        School glue

·        Tempera paint

·        A paint roller or brush

·        Paper

Here’s What to Do:

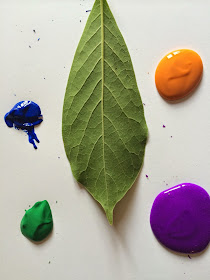
1.     Place the leaf on a piece of paper. Your child can also use a cut out shape (cut a piece of card stock or an index card) or a similar type of flat object.
Nature craft

2.     Squeeze a few dabs of tempera paint around the leaf. Use a few different colors, putting them in different areas. This gives your child the chance to mix colors.
Kids' colorful art

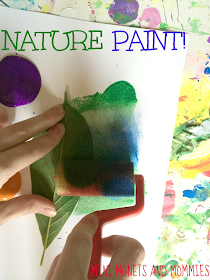
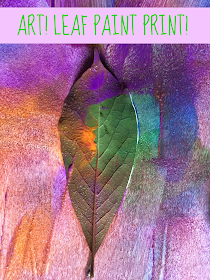
3.     Paint the entire piece of paper. Help your child to hold down the leaf, making it completely flat. She can roll or brush the paint, blending and mixing the colors, across the paper and over the leaf.
Plant art activity for kids
 
Paint with colors


4.     Peel the leaf off to reveal the negative space (the area is blank paper color, while the rest is paint-covered).
 
Childrens science art

5.     Glue the painted leaf onto another piece of paper.
 
Plant art activity

6.     Put the two papers side by side to compare the negative and positive spaces.
Crafts for kids

Display the two pieces of your child’s artwork next to each other or glue them onto a larger piece of poster board next to each other.


Are you looking for more creative arts and crafts for your child to try? Follow my Pinterest board for ideas! And, don't forget to sign up for the Mini Monets and Mommies email list to get my posts directly in your inbox!
Follow Mini Monets and Mommies's board Creative Kids Crafts on Pinterest.
Thursday, July 24, 2014

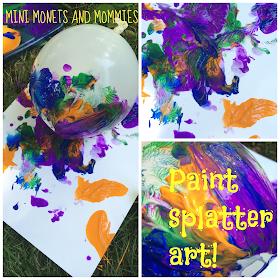
Kids' Balloon Paint Splatter Art Activity

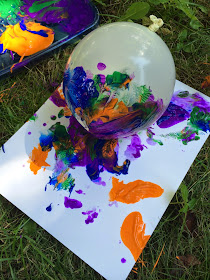
Balloon paint splatter art? Add a splash (literally, a splash) of paint to the party staple,  and what do you have? An action-packed art adventure with color splatters. I have a drawer filled with balloons that are left over from a snowball game that I played with some of my students last winter. Instead of leaving them packed away, my son and I blew up a few and brought them outside – with some paints.

Balloon art
What happened next was magnificently messy. You can do this activity inside if the weather isn’t cooperating, but you do need to prep your work area first. You can use garbage bags, cardboard or another barrier. Keep in mind, the paint will splatter. Just because your white couch is four feet away doesn’t mean that it’s necessarily safe. If you take the art-making outside you can simply hose off the mess. While the warmer months and dry weather may make it easier to try this activity outdoors, if there’s snow on the ground or rain falling from the sky, your child will get a water color effect to her paint project.

Here’s What You’ll Need:

·        Balloons

·        Tempera paints

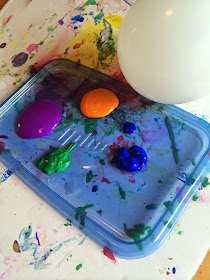
·        A paint tray—I used a plastic-ware lid. You can also use a piece of scrap cardboard.

·        Paper – A larger piece will capture more of the paint.

Here’s What to Do:

1.     Pour pools of a few different colors of paints onto the tray. Separate them by a few inches.
Paint splatter activity


2.     Blow up a balloon or two.

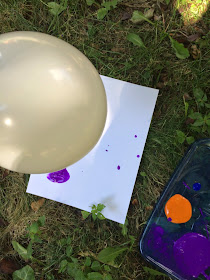
3.     Set the paper down on the ground.

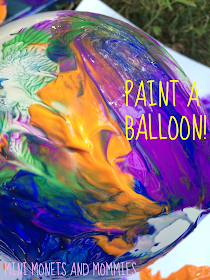
4.     Drop the balloon into the paint. Let it roll. The more that your child rolls the balloon through the pain, the more the colors will mix and blend.
Kids' process art

Art paint splatter
5.     Pick up the balloon. Have your child use the knotted end as a handle. Have her move the balloon over the paper and let her drop it.
Childrens' paint

6.     Repeat the process to make more paint splatters and prints on the paper.
Child paint

When your child is all done with the art-making add a special surprise activity. Stay outside or cover everything around her. Put the paint-covered balloon on a piece of paper and pop it for her (DO NOT let your child do this step herself). Admittedly, I discovered just how amazing the splatter of a paint-filled balloon popping is purely by accident. I did not prep for the mess and everything (including my white skirt, my son’s backpack and my dining room table) were covered in paint. That said, it was super-fun in a way that only a rainbow explosion can be.
The paint splatter mess!
The paint splatter beauty!


Are you looking for more creative crafts for your child? Follow my Pinterest board for ideas!

 
Follow Mini Monets and Mommies's board Creative Kids Crafts on Pinterest.