Pages

Sunday, August 31, 2014

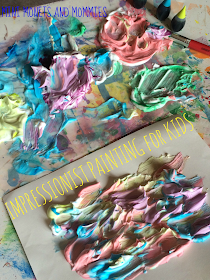
Shaving Cream Art with Monet: Famous Artist Activity

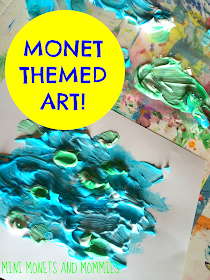
Monet’s Water Lilies is a favorite of mine when it comes to Impressionist art. The brush strokes. The textures. The colors. The hallmarks of this artistic style aren’t always easy for young children to recreate. That’s why shaving cream makes an awesomely easy addition to your little painter’s famous artist project arsenal.

Monet Art
 
Shaving cream paint is a simple sensory medium that is easy to make and fun for kids to use. Its, for lack of better word, fluffiness creates puffy brush strokes that stand up on top of the paper. Start out with a looking lesson on Monet’s artwork. If you aren’t lucky enough to live near a museum that has the real thing, show your child a reproduction in a book or online. Talk about what you child sees. Ask her:

·        How do you think the artist made this?

·        What colors do you see?

·        What time of day do you think it is in the picture?

·        What season do you think it is?

You can also read a book or two about the famous artist and his work. Some of my favorites are:

A Blue Butterfly: A Story About Claude Monet by Bijou Le Tord

Katie and the Waterlily Pond: A Magical Journey Through Five Monet Masterpieces by James Mayhew

The Magical Garden of Claude Monet by Laurence Anholt

Linnea in Monet’s Garden by Cristina Bjork

Now your mini Monet is ready to get painting.

Here’s What You’ll Need:

·        Shaving cream

·        A paintbrush

·        Food coloring

·        Card stock paper

·        Wax paper

Here’s What to Do:

1.     Pick one of Monet’s famous artworks for your child to re-create in her own way. Use the word “re-create” and not “copy”. The goal isn’t for your child to make exactly what she sees. She can’t. It’s just a fact – there’s only one Monet! Don’t let her get caught up in the “I have to make it look just like that picture or I’m wrong” line of thinking. The idea is for her to understand the basics concepts: Visible brush strokes, texture in the paint, natural setting, and colors that reflect the season and time of day.

2.     Spray a mound of shaving cream onto the wax paper. You can use a paper plate or tray instead. The wax paper provides a leaf-proof barrier and is easy to use.

Texture art
 
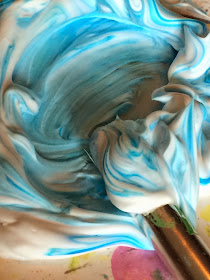
3.     Drop a few drips of food coloring into the shaving cream.

Blue art
 
4.     Stir the color in. Your child doesn’t need to mix it 100% in. Leaving some of the white cream visible gives the artwork a more textured look.

Childrens crafts
 
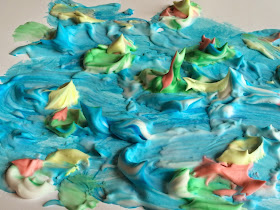
5.     Dip the brush into the colored cream. Make sure your child gets a glob of it on the brush. As she paints, have her make defined brush strokes. Let her know that she doesn’t have to smooth the paint down, making it a perfect glossy surface. The lumpy, bumpy look will mimic Monet’s work.

Claude Monet
 
6.     Repeat the shaving cream color step with other hues.  

7.     Paint the rest of the artwork. Layer color next to color, building up the painting.

Lily art
 
Kids art
 
 
Are you looking for more famous artist activities? Follow my Pinterest board for ideas!
Follow Mini Monets and Mommies's board Famous Artist Kids' Activities on Pinterest.
Your child may also like this Clay Paint Monet Art Activity:

Monet Art

Friday, August 29, 2014

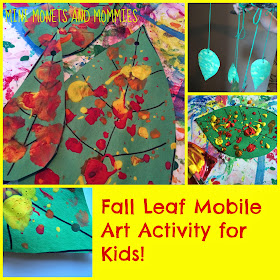
Autumn Art: Fall Leaf Mobile


Fall is in the air and it’s time for more autumn art! Earlier in the week I posted a color change leaf activity. I also promised to add on to the paint splatter project. If you didn’t read how to turn green leaves into red, orange and yellow Jackson Pollock style mini masterpieces, go back and check it out right now. Seriously, now. This how-to starts off where that one leaves (no pun intended – well, maybe it is) off.

Fall Art

After your little artist splatters, splishes and spots her way to a few artful autumn leaves, she’s ready to turn them into a marvelous mobile. Before you get into the art-making, take a beat to stop and talk about the science of mobiles. Explore how gravity and motion come into play when your child makes a piece of kinetic art. Ask her a few open-ended questions such as:

·        What do you think will happen to the mobile when the wind blows?

·        If you gently push the mobile, what will happen?

·        Why do you think the mobile moves?

·        Do you think that each side of the mobile will move the same? Why or why not?

·        How can we get the mobile to stay in the air?

After your science talk, it’s time or the art part.

Here’s What You’ll Need:

·        Your child’s color change paint splatter leaves – make at least four.

Fall Crafts

·        Two sticks or wooden dowels

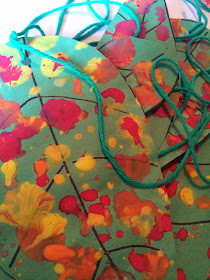
·        Yarn

·        Scissors

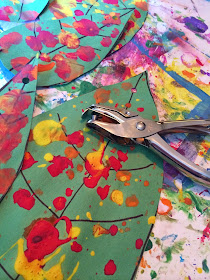
·        A hole punch

Here’s What to Do:

1.     Punch a hole at one end of each leaf.
Fall Craft


2.     Cut a piece if yarn per leaf. Vary the lengths.

3.     Thread a piece of yarn through each leaf. Help your child to tie the ends.
Leaf crafts

4.     Make a plus sign with the sticks or dowels.
Craft mobile

5.     Wrap another piece of yarn around the center of the plus sign. Have your child weave it around the place where the sticks cross in an over-under pattern. Tie the end of the yarn.

6.     Tie each leaf to an end of the plus sign.

7.     Create a hanger. Tie another piece of yarn to the center of the plus sign, leaving the other end loose.
Kinetic art

Hang the mobile! Take it outside and hang it from a tree branch to watch it sway in the wind. If the weather gets wet, bring the movable art inside. The tempera on the leaves will run in the rain. Your child can explore and experiment with movement indoors by blowing the fall leaf mobile with her breath or pushing it around with her hands.
Movable art

Are you looking for more science and art activities? Follow my Pinterest board for ideas!

Follow Mini Monets and Mommies's board Preschool Art and Science Activities on Pinterest.

Wednesday, August 27, 2014

Learning Left: Kids' Letter L Art Activity


Learning left from right isn’t always easy. Sometimes even the older kids who I teach mix them up and I find myself saying, “Nope, try your other left.” Even though struggling to learn directions is perfectly normal, I’ve always found that the easiest fix is to get hands-on – literally.
Left and right

Ask your child to hold both hands out in front of his body, palms down. Have him hold his fingers tight together and extend his thumbs out horizontally. Which hand makes the letter L? The left hand! Add on an alphabet art activity to reinforce this concept and help him to remember right and left.
Direction activity

Here’s What You’ll Need:

·        Tempera paints

·        A paper plate

·        A paintbrush

·        Paper

Here’s What to Do:

1.     Pour a golf ball-sized pool (or a few) of tempera paint onto a paper plate.  Use your child’s favorite hues or add in a color mixing activity and use the primaries – red, yellow and blue.
Kids' art

2.     Repeat the letter L hand activity and have your child make the “L” shape with his hand.

3.     Paint the L. There are two options that your child can try. Pick one or do this activity a few times, trying both. Your child can dip the L part of his left hand (thumb and pointer finger) into the paint. He’ll need to smoosh his hand through the paint to really cover it. If he’s not into the dip and print method, he can use the brush to paint the tempera on. Go with a solid color, mix up a few or paint on rainbow-like blocks.
 
Childrens crafts

4.     Press your child’s hand onto a piece of paper. When he lifts it up he’ll magically leave behind a letter L print!

Alphabet Craft

Keep the letter L print on hand (no pun intended) to reinforce the direction and print knowledge that he’s gained during this activity. If he forgets which hand is which, remind him of the paint project to help him to figure it out on his own.
Alphabet Activity

Keep the alphabet part of the activity going with a picture book. Your preschooler might enjoy:

·        Eating the Alphabet by Lois Ehlert

·        Eric Carle’s ABC by Eric Carle

·        Alphabet City by Stephen T. Johnson

·        The Alphabet Tree by Leo Lionni

·        Alphabet Rescue by Audrey Wood and Bruce Wood

·        P is for Pirate: A Pirate Alphabet by Eve Bunting and John Manders

·        I Spy: An Alphabet in Art by Lucy Micklethwait

Are you looking for more alphabet art activities? Follow my Pinterest board for ideas!
Follow Mini Monets and Mommies's board Letter and Literacy Kids' Crafts on Pinterest.

Monday, August 25, 2014

Famous Artist Kids' Cooking: Cubist Cupcakes


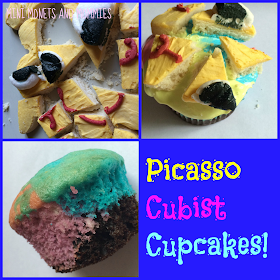
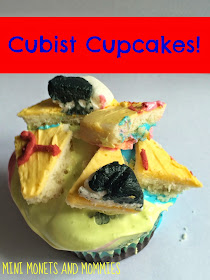
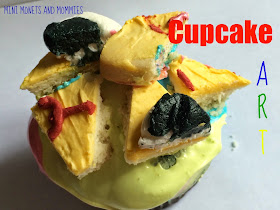
Picasso’s famous art as a cupcake? Yes, indeed. I’m not a talented baker by any stretch of the imagination. My son almost always turns his nose at my brownies, and while my cupcakes are cute, they come from a box. That’s ok. I accept that I’m not a super mom.

Picasso activity
 
Even though I’m not the best at baking, I enjoy a good artistic cupcake project. I’ve made cupcakes in the styles of Monet and Pollock. Now I’m tackling Picasso’s cubist take on art. Not only can your child express her creativity and learn about the famous artist (and his style), but the baking part includes science and math lessons. Encourage your child to pour the ingredients, measure them up.  When it’s time to pop the cubist cupcakes into the oven, you need to take over and do the actual baking yourself.

I used a ready-made cookie from the bakery for this kids’ cooking activity. My son was nice enough to share an adorable sweet smiley face star cookie with me. But, you and your child can certainly decorate your own. I had the cookie on hand, it saved time and it seemed perfect for this project.

Here’s What You’ll Need:

·        Cupcake mix—either from a box or your own recipe.

·        White frosting – Again, either from the store or you can make your own favorite recipe.

·        Food coloring

·        A face cookie – Buy a ready-made one or decorate your own with candy eyes or icing.

·        Cupcake tins and liners

Here’s What to Do:

1.     Mix up the cupcake batter. I choose two – chocolate and vanilla.

2.     Divide some of the batter (use a light-colored or white batter) into bowls. Mix food coloring in to make at least three different shades.

3.     Pour the batter into the lined tins. This is where the cubist look starts. Pour at least three different colors in chunks into each liner.

childrens recipe
 
 
4.     Bake the cupcakes. Do not allow your child near the hot oven. Do not allow her to handle the hot cupcakes.

5.     Let the cupcakes cool.

Kids' cooking
 
6.     Spoon the frosting out into two or more bowls. Mix a few drops of food coloring into each bowl.

Sweet treat

7.     Frost the cupcakes. Continue on with the cubist effect by making chunks of colors. Your child can add two, three or more colors to the tops of the cupcakes.

Kids' dessert
 
8.     Cut the face cookie into pieces.
 
Happy face
 
Cubist art
 
9.     Create a cubist cupcake masterpiece. Have your child place the cookie pieces in a random array on top of the cupcake.

Art Activity
 
Kids' Desserts
 
 
Do you have a favorite cupcake or frosting recipe? Add it to the comments section.

Are you looking for more cupcake ideas? Follow my Pinterest board for cupcakes galore!
Follow Mini Monets and Mommies's board Cupcakes! Yum! on Pinterest.

Sunday, August 24, 2014

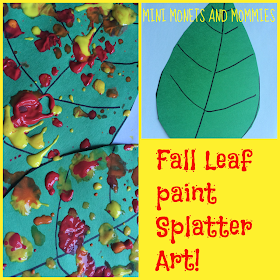
Fall Leaf Paint Splatter Kids' Art Activity


When Jackson Pollock first dripped, dribbled and flung paint onto a canvas it’s doubtful he ever envisioned his abstract art techniques being used for a fall themed kids’ art activity. That said, painting with splatters, splishes and splots can help your young artist to learn about this famous masterpiece-maker.
Paint Splatter

As trees change from green to an autumn orange, yellow or red, your child can transform paper leaves from summer to fall colors. What does Jackson Pollock have to do with coloring fall leaves? This activity uses his famous paint-splatter to make plain paper leaves into abstract autumn art.

This is a messy art activity. Prep for the mess before the art-making begins!

Here’s What You’ll Need:

·        Green construction paper

·        A marker

·        Scissors

·        Tempera paint in red, orange and yellow

·        A paintbrush

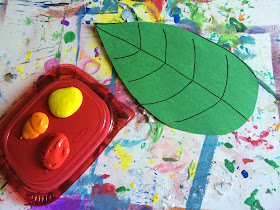
·        A paint tray, palette or the top of a plastic-ware container (turn it over and it makes an inexpensive palette)

Here’s What to Do:

1.     Draw a fall leaf onto a piece of green paper with a marker. Your child can draw her own leaf shape or she can trace a real one.
Green art

2.     Cut the leaf out.
Kids' Art

3.     Pour golf ball-sized pools of red, orange and yellow tempera paints onto the palette.
Splatter art

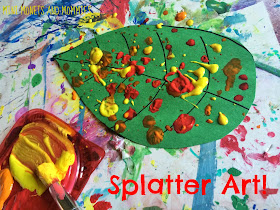
4.     Soak the brush in the first color of paint and fling it onto the leaf. Repeat with the other fall colors. If the paint is too thick to splish and splash easily, add water to it.
Pollock Craft
 
Paint fall
 

It’s as easy as that to change green leaves into autumn-colored splatter art! The creative fun doesn’t have to end there. Check back in with me later in the week for a way to turn this colorful plant project into a nature mobile.

Are you looking for more artsy ideas? Follow my Pinterest board for process art that your will inspire and entertain your little artist!
Follow Mini Monets and Mommies's board Process Art for Kids on Pinterest.

Wednesday, August 20, 2014

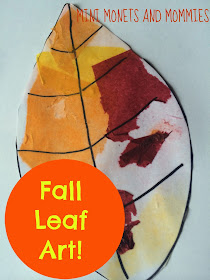
Fall Leaf Tissue Paper Print Art Activity


Even though it seems way too soon, fall is almost here. Get the kids in the autumn spirit with a tissue paper painting project. Non-color-fast tissue paper is kind of the best. Because it doesn’t hold its color, when you get it wet it transfers. What do you get? Instant watercolors!
Leaf art

Kids can turn a plain piece of paper into a fall leaf with red, yellow and orange tissue paper. This printing project requires bright, bold colors – so hold off on soft yellows or pale pinky reds.

Here’s What You’ll Need:

·        Red, orange and yellow tissue paper – If it says colorfast or it doesn’t bleed, don’t get it. It won’t work for this art activity.

·        White construction paper or cardstock

·        A marker – A permanent marker will hold up when you put the tissue paper on. If you want to add another layer to the DIY watercolor theme, use a washable marker. The colors will blend and mix with the wet tissue.

·        Water

·        A bowl or plastic container

·        Paper towels

·        Scissors

Here’s What to Do:

1.     Draw a leaf onto a piece of paper. Your child should make it at least as large as her hand, preferably bigger.
Fall Craft

2.     Cut the leaf out.

3.     Tear or cut apart the tissue.
 
Torn paper

4.     Soak a paper towel in water.
Water art

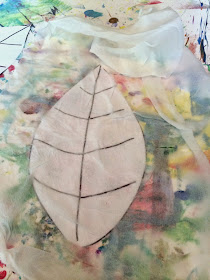
5.     Place the wet towel on the paper leaf and press down gently.

6.     Flatten the tissue paper onto the wet leaf.
Art leaf

7.     Dip another paper towel into a bowl or container of water. Wet the tissue paper-covered leaf with the paper towel.

8.     Let the wet tissue paper sit on the leaf for a half hour or so.
 
Leaf art

9.     Peel the tissue off to reveal the color underneath. Don’t worry if some of the tissue sticks. This will add a colorful texture to the project.

Are you looking for more creative crafts that your child can try? Follow my Pinterest board for ideas!
Follow Mini Monets and Mommies's board Creative Kids Crafts on Pinterest.