Pages

Tuesday, September 30, 2014

Fall Leaf Water Color Paint Kids' Activity


The leaves are changing colors. That means it’s time for fall art activities! I’m tiring from the same old projects (they were fun, but there’s only so many times that you can make a leaf wreath before you want to poke your eyes out with the stems). So, I tried to get creative.

Autumn Leaf
 
What happened? I major flub. I’ve taught children’s art programs for over a decade and have done plenty of projects with my own child. That said, sometimes what sounds like a fantastic idea in my head ends up far less than fabulous in reality. My idea—use non-colorfast tissue paper to dye fall leaves brilliant hues. Yes, I know that they come off of the trees with all the beauty that nature has to offer. But, sometimes they are more of a yucky brown shade. Case in point, here’s what I found in my front yard:

Brown leaves
 
I gingerly placed each leaf on a piece of paper and add bold tissue on top. I used a water-soaked paper towel to drip the water on.

Water colors

Colorful crafts
 
It was a no-go. While some of the color stuck, most rolled off onto the paper.

I tried soaking the leaves in a mix of food coloring and water.

Purple water
 
Leaf print
 
Again, nothing!

Then I looked at my fingers. The tell-tale signs of tissue paper dye were left behind. “Oh, I wish that there was some way to water color paint with tissue paper without using a brush or staining my hands,” I thought. Then it dawned on me: The color rolled right off the leaf. What a perfect hands-paper barrier. So, if you want to try tissue paper water colors with your child, but aren’t particularly interested in staining her fingers, give this a try. As a bonus, it’s a fun fall-themed project. I added another step, and used this art exploration as a crayon-resist project.

Here’s What You’ll Need:

·        Fall leaves

·        White card stock paper

·        Tissue paper – Only use tissue that bleeds. Colorfast paper won’t work.

·        Wet paper towels

·        A white oil pastel crayon

Here’s What to Do:

1.     Draw a fall design (such as a leaf or pumpkin) onto the paper with the white oil pastel.

 
2.     Place the tissue on the paper.

3.     Squeeze the wet paper towel over the tissue.

4.     Spread the colorful water around using the leaf. It’s like your child is finger painting with water colors – minus the messy hands.

Tissue Print
 
Tissue crafts
 
When the art-making is all done, try talking about what your child made and how she did it. This allows her to reflect on her artwork and even get in a science lesson or two. Ask open-ended questions such as:

·        Where did the colors in the water come from?

·        Why do you think the leaf protected your hand from the water colors?

·        Do you still see the crayon drawing? Why do you think the paint didn’t stick to it?

Are you looking for more leaf projects? Follow my fall Pinterest board for ideas!
Follow Mini Monets and Mommies's board Fall Activities for Kids on Pinterest.

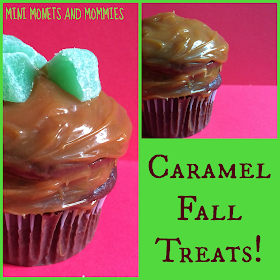
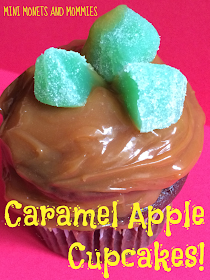
Caramel Apple Cupcakes

Candy apples make me think of carnivals and fall festivals! What don’t they make me think about? Cupcakes. That said, I still decided to combine the two (with chocolate, none the less). And, they were super yummy! I’ve said it before and I’ll say it again – I am not a baker. We can’t all be the Cake Boss. Even though I’m completely a from-the-box kind of mom when it comes to baking those school party or PTA bake sale treats, I do like to get my creativity out.
Cupcake art

 I don’t have a ridiculously scrumptious recipe for cake or frosting (if you do, feel free to add a link to the comments section below). What I do have are a few artsy ideas for taking a super-simple cupcake mix recipe from blah to bling. As a bonus, it makes baking even more fun for the kids! Not only can your child boost her math skills by measuring, learn properties of matter science lessons by watching the baking processes, but she can get creative and make cupcake art.

This fall themed treat recipe is insanely simple, but so tasty. I really couldn’t stop eating these (yes, I have poor self-control when it comes to sweets). So, if you’re expecting a chef-quality blueprint to follow, you won’t find it here. But, if you’re looking for a creatively cute way to dress up a cupcake that doesn’t require years at pastry arts school, you’re in the right spot.

Here’s What You’ll Need:

·        Chocolate cake mix – I used the box stuff, but if you have a favorite recipe, go for it.

·        Caramel sauce – Apple dip cuts out a sticky cooking mess.

·        Green gumdrop candies – I found leaf-shaped ones that were perfect for the top of the apple.
Apple Treats

Here’s What to Do:

1.     Mix the cake batter. If you want to add another layer of “apple” to your cupcakes, swap out the oil for applesauce. While kids can help to measure and mix, never allow your child to do the actual baking (i.e., don’t let her use or near the oven).
Cake mix

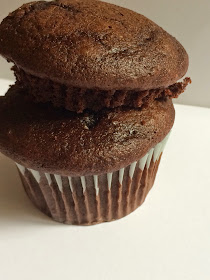
2.     Cut the top off of one cupcake and place it on top of the other to make a round, apple shape. Use a layer of caramel to hold the two pieces together.

 
Kids' cooking


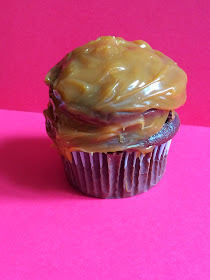
3.     Coat the top of the cupcake stack with caramel sauce.
 
Cake art

4.     Push gum drop leaves into the top. If you’re using regular gumdrops, cut them into slices to make pieces that resemble leaves.
Fall Foods

Are you looking for more cupcakes? Follow my Pinterest board for ideas!
Follow Mini Monets and Mommies's board Cupcakes! Yum! on Pinterest.

Monday, September 29, 2014

Candy Corn S'mores: Halloween Treats


Candy corn, chocolate, marshmallows. Can a Halloween recipe for kids really get much better than that? It’s no secret that I love s’mores. I’m one of the least talented bakers out there, so when it comes to making the sweet treats I like to keep it simple. Something that’s basically a candy sandwich that you can microwave is right on target for my cooking level. That said, s’mores are super tasty and my son (like just about every kid – and many adults!) loves them.

Halloween S'mores
 
 
(This post contains affiliate links. Please see my Affiliate Disclosure Statement for information). 
While I do enjoy the traditional chocolate, marshmallow, graham cracker stack, I also like to change things up a bit. Take a look at some of the delicious delights at the end of this post for some ideas. This time we made candy corn s’mores. Even though they don’t have candy corn in them, they have the same color scheme and a similar sweet taste. If you’ve got a younger child who is still learning her colors, use this recipe as a way to teach the subject. Ask her to name the colors that you’re using (yellow and orange). Add a color mixing activity and have her stir together two of the primaries (red and yellow) to make orange marshmallows.

Here’s What You’ll Need:

·        Marshmallows

·        Graham crackers

·        Chocolate

·        Marshmallow fluff (or you can melt down your own)

·        Red and yellow food coloring

·        Orange and yellow colored sugar or sprinkles

·        Candy corn M&M’s – Yes, they actually make these. And they are so, so, so good (honestly, I’m still snacking on them right now)!
Kids treats
 

Here’s What to Do:

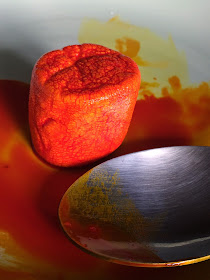
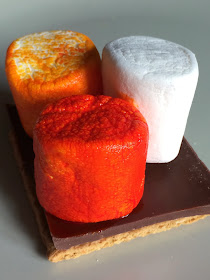
1.     Color the marshmallows. Make two bowls of food coloring baths. Squeeze a few drops of yellow into one bowl and mix red and yellow in the other to make orange. Roll one marshmallow through each bath.

Orange Mix

Kids' cooking
 
2.     Spread a layer of marshmallow fluff over a graham cracker.

Graham Cracker
 
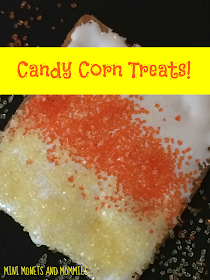
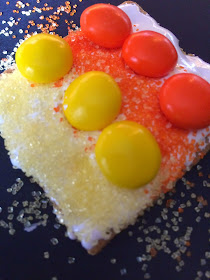
3.     Decorate the fluff in a candy corn style. Leave one end white. Sprinkle a stripe of orange sugar (or sprinkles) in the middle. Add another link of yellow sugar or sprinkles after the orange.

Sprinkles sugar
 
4.     Line up a row of yellow M&M’s in between the yellow and orange stripes. Repeat with a line of orange M&M’s between the white and orange stripes.

Sugar Treat
 
5.     Place a piece of chocolate on another graham cracker.

Graham Sandwich
 
6.     Stack one yellow, one orange and one white marshmallow on top of the chocolate. If they are falling off of the chocolate bar, cut the marshmallows in half to make mini versions.

Colorful Foods
 
7.     Microwave the s’more for 10 seconds. Every microwave varies, so yours might need more or less time. Never, ever allow your child to handle the freshly heated marshmallow. Let it cool before she touches it.

8.     Press the candy corn top down onto top of the marshmallows.

9.     Sprinkle some of the orange or yellow sugar/sprinkles over the ooey, gooey edges that are sticking out.

Fall foods

 
If you’re looking for more fun, kid-friendly recipes, click on the pictures below:

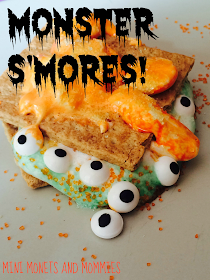
Monsters

Halloween Recipe
 
Cherry Coconut
Coconut Treat
 
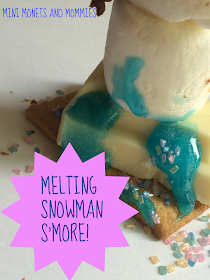
Frozen's Olaf Melting Snowman

Olaf Snowman
 
Princess

Strawberry Sparkle
 
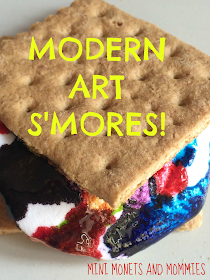
Modern Art

Artsy Dessert
 
Are you looking for even more ideas? Follow my S’more Pinterest board!

 
Follow Mini Monets and Mommies's board Sweet S'mores on Pinterest.

Saturday, September 27, 2014

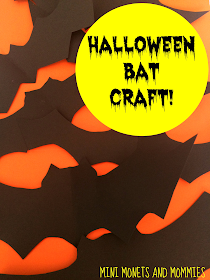
Bat Mobile Halloween Kids' Craft


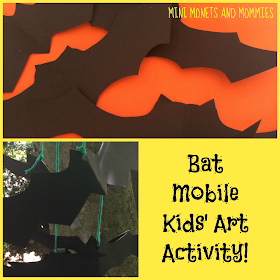
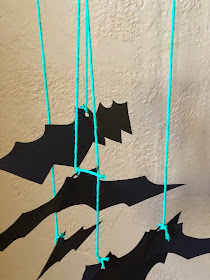
It’s a bat mobile! No, not the kind that Batman cruises around in. It’s a mobile – with bats. This easy-to-make Halloween craft for kids is super-simple and even teaches a lesson or two about science.
Halloween Art
 
How? When the mobile’s complete, use it to discuss physics (yep, physics!) with your child. I’m not talking about the type of science content that was in your senior year physics class. Instead, help your child to explore basic concepts such as gravity and motion.

Here’s What You’ll Need:

·        Black card stock paper

·        A light-colored crayon

·        Scissors

·        A hole punch

·        Yarn

·        Two straws

Here’s What to Do:

1.     Fold the card stock in half, book style.

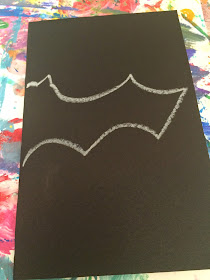
2.     Draw the bat. Have your child start at the center and draw half of a bat.

Halloween crafts
 
3.     Cut the bat out – keeping the paper folded.

4.     Unfold the paper. Like magic, your child has a symmetrical bat.

Paper crafts

 
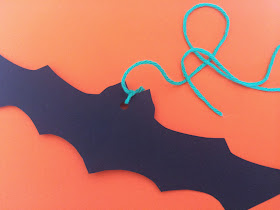
5.     Punch a hole at the top of each bat.

 
6.     Cut pieces of yarn in different lengths.

7.     Tie one piece of yarn through the hole in each bat.

Fall art
 
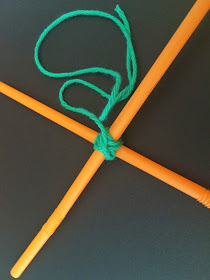
8.     Cross two plastic straws, making a plus sign. Weave a piece of yarn around the center (where the two straws cross) and tie the ends.

Craft yarn
 
9.     Add another piece of yarn to the center of the straw plus sign. Leave the other end free to tie up the mobile.

10.   Attach the bats to the ends of the straws.

Bat crafts
 
11.    Tie the loose end of the center string to a tree limb outside or a post indoors.

Animal art
 
Physics Lessons for Kids
 
After your child makes the bat mobile, take it outside and tie it to a tree or post. Let the wind work its magic or give the mobile a push. Ask your child, “What happened when the wind or your hand moves the mobile?” or “Does it just swing one way? Why do you think it swings back too?”

Paper art

Play with weight and move the bats around. Untie a few of the paper flying creatures and move them all to one side. Investigate what happens when the balance changes on the mobile.

Are you looking for more fall art projects? Follow my Pinterest board for ideas!
Follow Mini Monets and Mommies's board Fall Activities for Kids on Pinterest.

Friday, September 26, 2014

Paper Mache Pumpkin Fall Art Activity

Paper mache, papier mache, paper paste. Whatever you call it – it’s certainly ooey, gooey messy artsy fun! It’s fall, and I’m making paper mache pumpkins. These sweet little guys also serve double duty and are awesome additions to a Halloween party buffet or holiday table.
Autumn Crafts

(This post contains affiliate links. Please see my affiliate disclosure statement for more information).

I’m partial to making a mess with art. For years I taught an art camp called “Make a Mess”. Parents loved that their kids could go somewhere that wasn’t their own home and get messy with art. I honestly never cared of my son dripped finger paints onto the floor or got a stray crayon mark on the wall. That said, my house isn’t particularly fancy. If it was, I probably would have felt the same way and put the art mess off until my son was at school or a class.
This pumpkin project is full of messy fun! You can use a store-bought paper paste -- I like to use Elmer's art paste -- or make your own. For this activity I mix equal parts water and flour. That’s it. Just two cups of water and two cups of flour. The result? A super thick paste. Before you even start the art-making process, use thee paper paste mixing as a math and science lesson. Let your child do the measuring and mixing. Ask your child:

·        What do you think will happen when you mix the flour and water together?

·        Why did the water get so thick when we started to add in the flour?

·        How is the new mixture different than the two ingredients that we started out with?

·        How dos the paper mache feel on your hands?

·        How does the paper mache smell?

Now your little artist is ready to get crafting. Prep your work surface by covering it with a garbage bag or other similar barrier. It’s going to get messy!
Art crafts

Here’s What You’ll Need:

·        Paper mache mix

·        Construction paper

·        Orange tissue paper

·        Scissors

·        A cork

·        Orange tempera paint

·        A paintbrush

·        Glitter

·        Clear drying school glue

·        Googley eyes

·        Black paper

·        Balloon

·        Card stock paper

·        Tape

Here’s What to Do:

1.     Blow up the balloon. This makes the shape of the pumpkin.
 

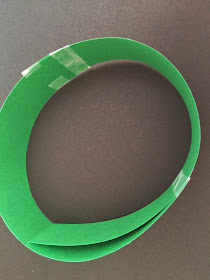
2.     Make a stand for the project. The stand allows the air to reach most of the paper mache, letting it dry without it sticking to whatever is underneath it. Cut two strips of card stock paper. Fold them into a circle and secure with tape. Use the balloon to measure the size.
 
Paper Stand
 

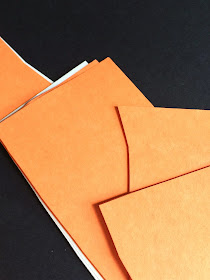
3.     Cut the construction paper into strips. I used orange and white, but your child is going to paint it so the color really doesn’t matter.
Paper mache

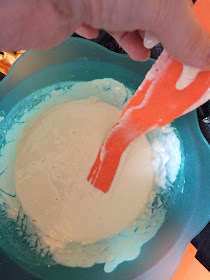
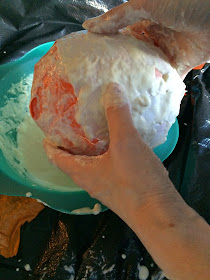
4.     Dip the paper strips, one at a time, into the paste mix. Squeeze the excess back into the bowl.
Papier mache

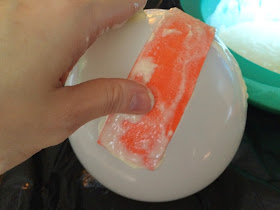
5.     Wrap the strips around the balloon.
 
Balloon Sculpture

Kids' Art

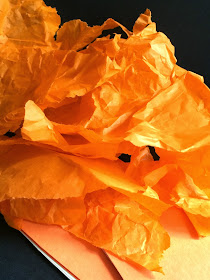
6.     Tear pieces or tissue paper.
 
Paper mache

7.     Press the tissue over the construction paper-covered balloon. This adds texture to the project.
Pumpkin Crafts

8.     Place the pumpkin onto the stand. Let the paper mache dry overnight.

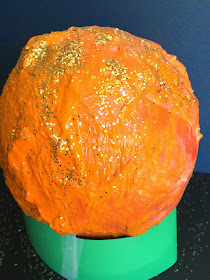
9.     Paint the pumpkin orange.
 

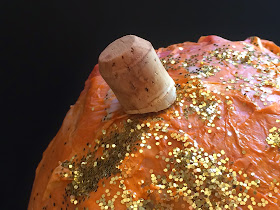
10.  Sprinkle gold or bronze glitter over the still-wet paint.
 
Sparkle Crafts

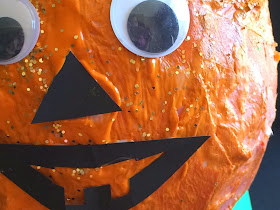
11.   Glue on the googley eyes.
 
Kids' Sculpture

12.   Cut a triangle nose and jack o’ lantern mouth from the black paper.

13.  Glue these onto the pumpkin’s face.
 
Art Crafts

14.   Glue the cork to the top of the paper mache project.

Chidrens art
 
Fall crafts

Are you looking for more fall themed crafts? Follow my Pinterest board for ideas!

 
Follow Mini Monets and Mommies's board Fall Activities for Kids on Pinterest.