Mini Monets and Mommies: October 2014

Friday, October 31, 2014

Fall Leaf Finger Paint Art

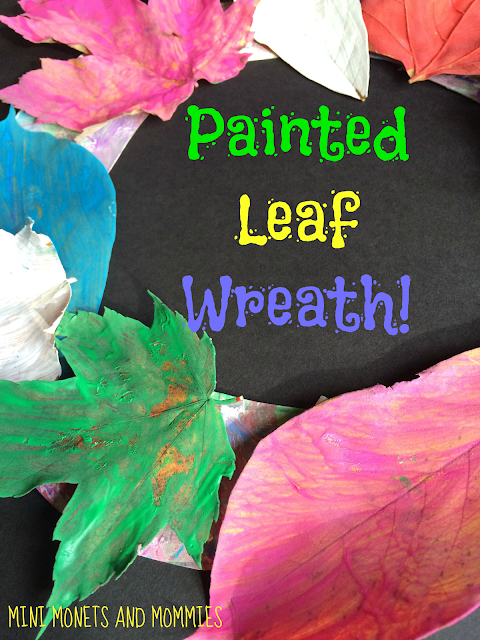
The autumn leaves are falling from the trees, and I’ve been busy thinking of things to do with them! My first thought was – have my 13-year-old rake them up so the very noisy municipal leaf machine could come by and whisk them away. But, he had homework to do. So, instead I thought about what I could turn them into. There was a panted leaf wreath, and then abstract art negative space paintings.

Finger Prints
 
(This post contains affiliate links. Please see my Disclosure Statement for more information).

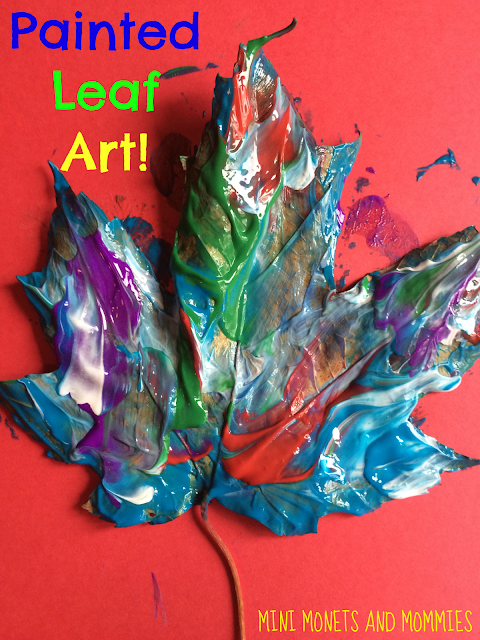
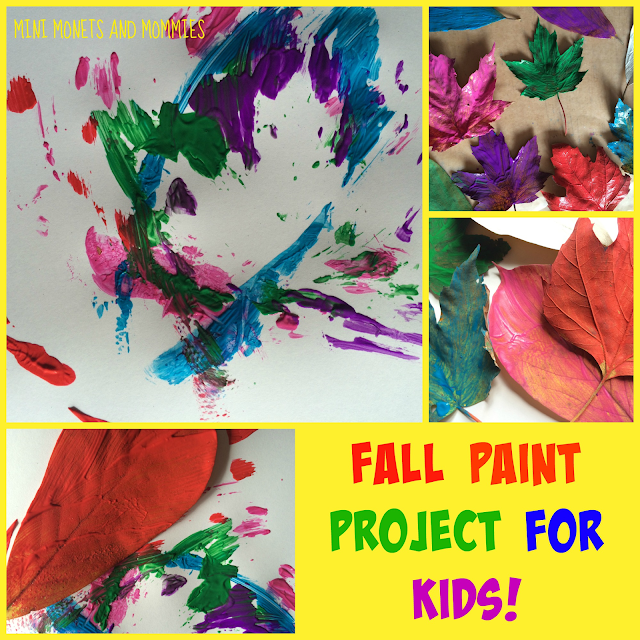
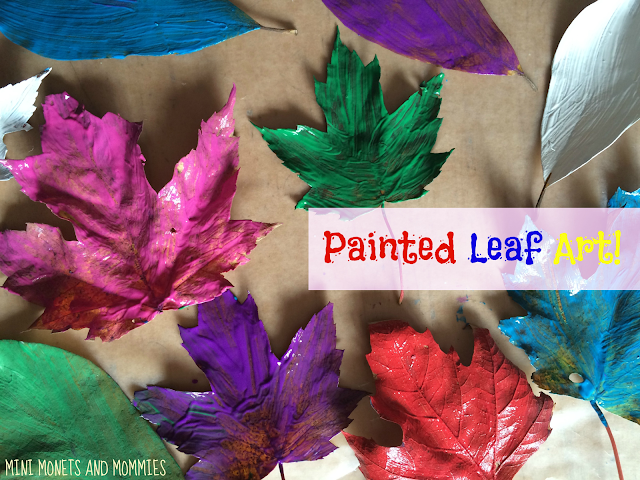
The latest installment in ways to use autumn leaves, is a fall finger paint. Finger painting is good, messy fun for everyone. Not only will your little artist enjoy making a mess with her colorful palette, but she can also explore different ways to make art- that don’t involve putting a piece of paper down and painting it! Instead of using paper as a canvas, this activity uses fallen leaves. When she’s done painting, she can keep the leaves as is or use them to make a:
Rainbow craft

·        Wreath


·        Mobile

·        Collage

·        Mosaic (you’ll need to cut them into pieces)

·        Book about fall

·        Rainbow (glue the leaves in a rainbow pattern on poster board)

Here’s What You’ll Need:

·        Fall leaves

·        Tempera or washable finger paint

Here’s What to Do:

1.     Pour a few golf ball-sized pools of the paint. I like to use a piece of wax paper or plastic-ware lid to hold the paint.
 

Kids' paint

2.     Place the leaves on some sort of barrier. I used foam core board, but you can also use a flattened garbage bag, thick cardboard or even a vinyl tablecloth.

3.     Finger paint! Your child can dot dab and squish the paint onto the leaf. She can blend the colors together, making new ones.
Fall craftsTempera Project


Autumn art


Fall art

Try a color mixing lessons, and have her turn the primaries (red, yellow and blue) into the secondaries (purple, orange and green).
Color blendingPaint mixing


Follow the art-making (or start it out) with an autumn themed book. Some of my favorites are Red Leaf, Yellow Leaf and Leaf Man by Lois Ehlert.
Kids' art


Are you looking for more fall art activities? Follow my Pinterest board for ideas!
Follow Mini Monets and Mommies's board Fall Activities for Kids on Pinterest.

Thursday, October 30, 2014

Fall Leaf Abstract Art for Kids


Ah, autumn! It’s sweater weather and the leaves are falling off of the trees. Now I’m not saying that mother nature hasn’t done a bang up job turning the leaves into eye-catching colors. But, recently I decided to paint a few leaves and make a Thanksgiving wreath. In the process I noticed that the paint spilling over the edges of the leaves turned into kind of interesting looking negative space prints.

Autumn art
 
When I pulled the painted leaf off of the paper (admittedly, I was only using the paper as a way to keep the artsy mess off of the table), the area under the leaf (i.e., negative space) was still blank. The area surrounding it was brightly-colored, leaving a leaf-shape behind. The more leaves that we painted, the more abstract the art became!

Try it with one leaf, two leaves or a whole handful. Before you get to the art-making, try a simple science activity and go for a nature walk. Bring a bag to collect the fallen leaves. As you take a look around, ask your child:

·        How do the leaves look different now that it’s not summer anymore?

·        Why do you think the leaves changed colors?

·        What colors do you see in the leaves?

·        Why do you think the leaves are falling off of the trees?

Grab a few different shapes and sizes of leaves to start the process!

Art for kids
 
Here’s What You’ll Need:

·        Fall leaves

·        Tempera paint

·        A paintbrush

·        White paper

Here’s What to Do:

1.     Place the first leaf on the paper.

2.     Brush a coat of paint over the leaf. This isn’t a time for your child to be neat. She’ll need to paint off of the leaf in order to create the negative space print. Let her get messy and paint over and around the leaf.

Fall art

Autumn crafts
 
3.     Lift the leaf off and put it to the side.
 

4.     Repeat the painting process with more leaves. Encourage your child to place them on different parts of the paper or in different directions. Use different colors of paint. Your child can use “fall” themed colors such as red, yellow, brown and orange or you can give her a rainbow of hues.

Paint art

Kids' art

fall art
 
leaf print
 
 
5.     Save the leaves to use for other art activities!


Are you looking for more fall activities? Follow my Pinterest board for ideas!
Follow Mini Monets and Mommies's board Fall Activities for Kids on Pinterest.

Wednesday, October 29, 2014

Thanksgiving Fall Leaf Wreath Kids' Art Activity

Thanksgiving is a time to, well—give thanks. That said, I’m pretty sure my son thinks it’s a time when he has to wear what he considers unbearably uncomfortable clothes (i.e., a button down shirt and pants that don’t have an elastic waist) and sit at a turkey-filled table, picking through the “interesting” potato and raisin recipe that grandma read about online. But, that’s not what the holiday is really about. It’s not about the turkey, the mashed potatoes, the candied yams (although, yum!) or even those black Friday sales that now start on Thursday. It’s about giving thanks and showing gratitude. The Thanksgiving leaf wreath art activity is a crafty way to help your child give thanks (or at least think about who and what she is thankful for).

Painted project
 
 
(This post contains affiliate links. See my disclosure statement for more information).

A few weeks ago I saw a picture of a brilliant painted pine cone wreath. It was like a rainbow of tempera paints exploded onto a circle of pine cones. It was so viciously vibrant that I decided to give it a try. What does this have to do with the Thanksgiving giving thanks leaf wreath? On my way to the park to pick up a few pine cones (I conveniently live near a park that is actually called Pine Cone Park- and for good reason) my 6-month-old puppy decided that he didn’t want to go past the front yard. And, here’s what the front yard looks like:
Fall Outside
 

So, with all of the fall leaves I decided to do a leaf wreath in the same colorful style of the rainbow pine cones. Add another layer of learning on to the art adventure and include a lesson on giving thanks (in a not so obvious way). This activity is packed with artsy goodness, gratitude and fun for kids of all ages!

Wreath crafts
 
Here’s What You’ll Need:

·        Fall leaves – Go outside and have your child collect a few different sizes and shapes of leaves. This is a great opportunity to talk about nature. Ask your child why she thinks the leaves are different colors now or why they fell off of the trees.

Autumn leaves


·        Clear drying school glue

·        Cardboard—I reused an old cereal box.

·        A marker

·        Wax paper – You can use this as a ‘painting palette’ and a barrier for the mess.

·        Paper

·        Clear tape

·        Scissors

·        Gauze

·        Tempera paint -- You can use any washable, non-toxic paint. For this project we used Crayola Kids' Paint.

Here’s What to Do:

1.     Squeeze golf ball-sized pools of bright tempera paints onto the wax paper.

Paint project
 
2.     Paint the leaves. Your child can use a brush or she can ball up a piece of gauze, dip it into the paint and dab it on. This method is helpful if the leaves are dry and brittle.

Tempera art
 
3.     Set the leaves aside to dry.

Kids' art
 
4.     Draw the wreath shape (a circle) onto the cardboard. Have your child draw a smaller circle inside.

Draw markers
 
5.     Cut the wreath out. Your child may need some help getting through the cardboard if it’s thick.

wreath craft
 
6.     Paint the cardboard. Use the gauze to dab and dot different colors of paint onto it. Encourage your child to create patterns, different textures or blend the colors with the gauze.

Pattern texture
 
7.     Let the cardboard dry.

8.     Cut the paper into rectangles or squares that are smaller than the leaves. Have your child write what she is thankful for on each piece of paper. If she isn’t ready to write yet, draw it on with a pencil and have her trace the letters. Ask her what the word “thankful” means and what she wants to give thanks for.


Gratitude Notes
 
9.     Tape one thankful paper to the back of each leaf. Why not the front? Because this activity is about helping your child to understand that being thankful is something that is deeply personal. It’s not about being showy or broadcasting what you have.

Thanksgiving art

Kids' thankful
 
10.  Glue the leaves onto the cardboard. Your child doesn’t have to completely cover the cardboard. She can let some of her patterned painting show through.
Children's art
 

Colorful crafts
 
Every time that your child looks at the wreath, she’ll think about what she is thankful for. You can also try this as a family activity in which each personal makes a leaf or two.

Are you looking for more Thanksgiving activities? Follow my Pinterest board for ideas!
Follow Mini Monets and Mommies's board Thanksgiving Kids' Activities on Pinterest.

Sunday, October 26, 2014

Halloween Candy Cake


It’s the day after Halloween and the magnificent mound of candy sitting on the dining room table makes you wonder if your house will be on a perennial sugar high through New Year’s. You (like many parents) have thought about tossing the remaining goodies in the trash. But, the sad look that your child is sure to throw in your direction stops you in your tracks. So, what’s a mom (or dad) to do? Bake a cake!
Chocolate recipe
 

I’m not a baker. I’m only marginally able to throw together ingredients and come up with something that doesn’t taste completely terrible. But, I do enjoy getting creative in the kitchen. Making a leftover Halloween candy cake is super simple (and later this week I’ll give you and even easier recipe for a pie!). My son helped with most of the baking, and all of the eating. I didn’t go the from-scratch route, as this is a recipe for those who are short on time (or those who are like me, and are missing that baking gene).

Even though this decadent dessert can use up most of your child’s candy, some sweet treats won’t do well in it. Only use chocolate-based candies that don’t have super-sticky or hard components. We used peanut butter cups, Kit-Kats (my husband loved the crunch, but my son did not) and 3 Musketeers bars. You can substitute other chocolaty ingredients as you see fit.

Chocolate treats
 
Here’s What You’ll Need:

·        Chocolate cake mix – If you have a favorite recipe, please go ahead and use it.

·        Chocolate pudding mix

·        Milk

·        Whipped topping

·        Chocolate Halloween treats

·        Colorful sugar crystals or sprinkles—I used orange and green for a Halloween theme.

Here’s What to Do:

1.     Mix the cake batter. Your child can help you to measure and mix it up (and it sneaks in a math lesson).

2.     Crumble, break apart and crush the chocolate.

Chocolate recipe
 
3.     Sprinkle the crushed candy into the cake batter. Have your child stir it together.

Candy cake
 
4.     Pour the mix into a baking dish. I used a 13 x 9 dish, but you can use whatever size fits your needs.

5.     Bake the cake. Don’t allow your child to put the cake in the oven or go near the oven while it’s baking.

6.     Make the pudding. Mix the milk (again, let your child do the measuring) and the pudding powder.

7.     Stir a few tablespoons of whipped topping in with a few tablespoons of pudding.

8.     Take the cake out of the oven. Let it cool.

9.     Cover the cake with the pudding-whipped topping mixture. It won’t look “pretty.” My son said it looked like a mud cake. While it might not be aesthetically pleasing, the taste makes up for what it lacks in looks.

Whipped Topping
 
10.  Sprinkle the sugar crystals on top.


Colorful sugar
 
Halloween dessert
 
Yes, I know - this isn’t in any way healthy. It’s candy in a cake, with pudding and sugar on top. You really can’t get unhealthier than that. I may have gained five pounds just smelling the sweet chocolate as I took the cake out of the oven. While I don’t condone an unhealthy diet for children, this is a treat. It’s not an everyday dessert or something that you should make every weekend. It’s a way to use up your child’s Halloween candy all at once. So, invite a few friends over to finish the cake. When they’re done eating, the candy is done too.

Are you looking for more Halloween themed ideas? Follow my fall Pinterest board for activities!

 
Follow Mini Monets and Mommies's board Fall Activities for Kids on Pinterest.

Saturday, October 25, 2014

Scented Shaving Cream Sensory Paint

Shaving cream art is one of my favorite sensory activities. What kid doesn’t love the gushy, mushy mess that it creates? In the past few weeks we’ve made shaving cream Thanksgiving turkeys, fall trees and Monet-inspired Water Lilies. After one of those posts, a reader asked what kind of shaving cream she could use if her child couldn’t stand the smell.
Art Activities

(This post contains affiliate links. Please see my disclosure statement for more information).

I get it. Shaving cream has that distinctly “grandpa” scent to it. I told the reader to look for the most plain-Jane formula that she could find. When you start adding in the aloe, softeners and smoothers, you often also get a strong smell. That said, even with a plain old cream, you’ll still get that manly scent.

To solve this problem, I added another layer to the sensory exploration. Why turn of your child’s nose when she plays with shaving cream art when you can make it part of the activity. I typically color the shaving cream with food coloring or tempera paint. This time I used a few left over Kool-Aid packs (you can swap these for any other similar powdered drink mix). Not only does the powder add a sweet fruity scent, but it also gives the shaving cream a new color and creates an entirely different texture to play with.

Here’s What You’ll Need:

·        Shaving cream

·        Wax paper – It makes an excellent barrier and is cheaper than buying a pricey art palette.

·        Powdered drink mix

·        Card stock paper – The thicker paper holds the weight of the shaving cream paint better than thinner construction paper.

·        Plastic straws

Here’s What to Do:

1.     Create at least three mounds of shaving cream on the wax paper.

Sensory art


2.     Sprinkle the powdered drink mix on top. You don’t have to use the entire packet. Start slowly, adding more as needed. Some of the colors may turn out differently than your child expects. We used grape (which smells amazing). But, instead of a bold purple, we got a mauvish grey.

Drink Mix

Sensory Paint
 
3.     Stir the powder into the shaving cream. It won’t completely dissolve. This adds a sandy or gritty texture for even more tactile play fun!

Scented paint
 
You’ve made the puffy, textured paint with your child. So now what? First, even though this paint smells like food, it isn’t. If your child is prone to putting her art materials in her mouth, you’ll want an edible version. This shaving cream paint is not in any way edible. If you’re sure that your child can keep from licking the paint off of the paper, proceed with the process!

There are plenty of ways for your child to use this paint:

Start with some abstract art. Give your child the paper, the paint and let her use her fingers to create squiggles, lines, swirls, clumps or her own shapes.

Cream art
 
Shaving cream
 
 
Give her a straw. Ask her what she can do to change the way that the paint looks on the paper with the straw. She can draw onto the paint. As the straw wipes the shaving cream away, she’ll see lines, patterns and curves showing through.

Sensory art
 
If she wants to paint “something”, your child can sue the colorful shaving cream to make a picture on the paper. We made flowers, but your child can pick any image that she wants!


Shaving cream
 
Are you looking for more creative kids’ activities? Follow my Pinterest board for artsy ideas galore!
Follow Mini Monets and Mommies's board Creative Kids Crafts on Pinterest.