Mini Monets and Mommies: May 2015

Sunday, May 31, 2015

Chalkboard Paint Fridge Magnet Kids' Craft

Are you looking for chalkboard paint kids’ art activities that go beyond painting a wall? I’ve always wanted to paint an entire wall with chalkboard paint, but for now I’ve stuck to the smaller crafty creations. A few weeks ago we painted our broken karate boards with the stuff. It came out really well, so I wanted to try something different.

Fridge magnets

Before we get started, I’m not using the kind of paint that you buy at a home improvement store (i.e., the type that you roll onto your walls). Instead, I picked up a bottle of the craft version at a local arts supply store. It’s inexpensive and super-easy to use. As a bonus, cleanup is amazingly easy (that said, I’m talking about from hands – and not from clothes).

I seem to have bought a stockpile of wide craft sticks. They were on sale, what can I say? So, I thought, “Why not use them as fridge magnets?” I decided to try the chalk board paint, and it went quite well. Why make magnets that the kids can use chalk to draw on? Simple – they make great (and changeable) reminders. Make a daily schedule set and have everyone list the times and activities (for example, John, soccer 5:00), use them to tell the family what’s for dinner, make as-you-go shopping lists (let the kids add items as needed) or just doodle on the magnets.

And on to the art-making…

Here’s What You’ll Need:

·        Craft chalkboard paint

·        A paintbrush -- Use either a bristled or sponge-tipped type.

·        Wide craft sticks

·        A magnetic strip

·        Scissors

·        Clear-drying school glue

·        Colorful chalk

Here’s What to Do:

1.     Paint the front of the craft sticks. Let them dry completely.

Chalk Paint

2.     Add a second coat of paint.

Paint project
 
3.     Cut the magnetic strips into thin pieces.

4.     Glue the magnet pieces onto the back of the fully fried craft stick.

Kids' art

Children's art
 
5.     Wait for the glue to dry.

6.     Flip the stick over and write a message or draw a design.
 
Kids' Craft

You can erase the fridge magnets and reuse them as needed.

Are you looking for more kids’ crafts? Follow my Pinterest board for ideas galore!
Follow Mini Monets and Mommies's board Creative Kids Crafts on Pinterest.

Thursday, May 28, 2015

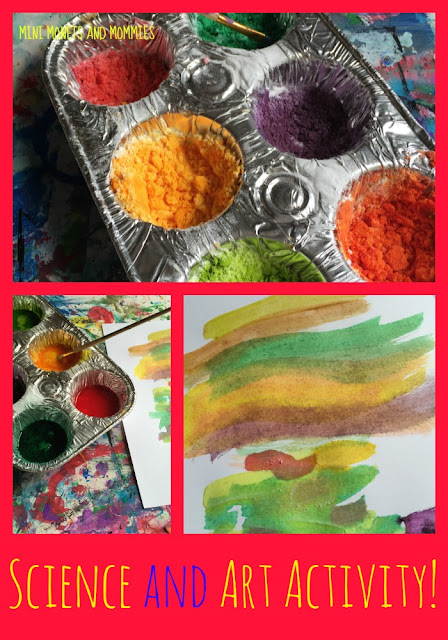
Kids' Science and Art: Fizzing Water Color Paint

Fizzing water color paint is the best! Seriously. It combines science and art, and makes a total mess. What kid doesn’t love that?

Water Colors

(This post contains affiliate links. Please see my disclosure statement for more information).

I kind of had my heart set on doing a fizzy paint version of Monet’s Water Lilies. But, I didn’t have all of the colors that I needed (while I’m all for mixing colors, blue is a primary and I didn’t have it). So, I decided to go for a water color version of a Renoir. We made a cotton ball paint version awhile back, and I thought why not try something different?

In all honesty, this one didn’t exactly turn out as ‘garden-y’ looking as the cotton ball paint. But, it was fizzy fun. Encourage your child to explore and experiment with the painting activity. Before you get started, ask a few questions (to get the science part rolling). Ask her to predict what will happen when you add the ingredients together. Make a list of her predictions (she may have more than one). After you’re done with the activity, check what actually happened against the predictions.

Here’s What You’ll Need:

·        Baking soda

·        White vinegar

·        Food coloring

·        Card stock paper

·        A paintbrush

·        A muffin tin

Here’s What to Do:

1.     Fill each of the muffin tin’s compartments one-third of the way up with baking soda.
Kids' science

2.     Drip food coloring into the baking soda. Use a different color in each compartment. The more that your child adds, the brighter it will be.

3.     Stir in the color and let it dry for an hour or so.
 
Children's project

Now that the paint is ready to go, your child has a few different choices when it comes to the actual art-making. In either case, you want to prep for the mess. I used a piece of foam core board, but you can also line your table with a flattened garbage bag. Your child can:

Sprinkle the paint onto the paper. Arrange it in a shape, pattern or just randomly. Slowly pour the vinegar on top and watch as the paint fizzes up on the paper. Your child can also use an eye dropper to gradually add different amounts of vinegar. Compare what he difference is between small and large amounts.
Art science

Fizzing science

OR

Pour the vinegar directly into the muffin tin, on top of the baking soda paint. The more that you pour the more it bubbles up. Be careful, it may just erupt like a volcano and spill out everywhere. If this happens, grab the paper and put it down around the muffin tin to catch a Jackson Pollock type of paint splatter. If it doesn’t spill, your child can now use the paints like regular water colors. It may not be fizzing like crazy, but it will create bold colors that she can layer on with a brush.
Kids' science
 
Kids' crafts
 

Are you looking for more art and science activities? Follow my Pinterest board for ideas!
Follow Mini Monets and Mommies's board Preschool Art and Science Activities on Pinterest.

Monday, May 25, 2015

Alien Slime

It’s alien slime time! My first foray into the kids' activity of slime-making went so well, that we kept on making the ooey, gooey stuff. I love this artsy science activity, and have no idea why I’ve never tried it before. Even though my son is well past those ‘little kid’ years, he still was completely happy to help out and make the slime – and of course, play with it later on.

Kids' activity

(This post contains affiliate links. Please see my disclosure statement for more information).

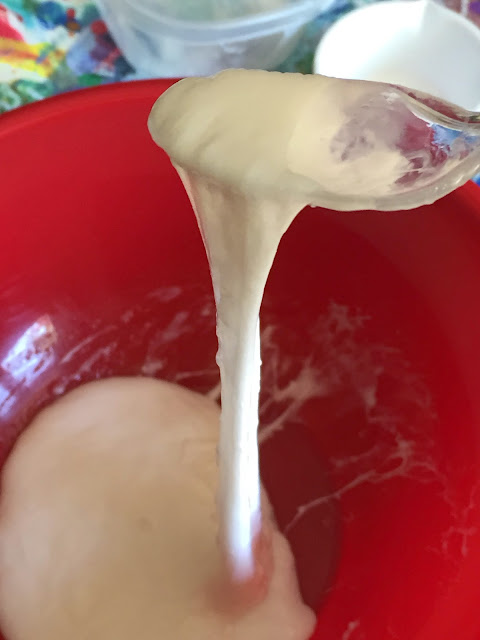
My first batch was a glitter version. The second one- well, it didn’t go quite as well. I was kind of pleasantly shocked at how perfect the first batch turned out. It was the exact right consistency. Yay! The second one, not so much. I may have accidentally added a bit too much water. Instead of the rubbery consistency that makes this kids' activity, it was clumpy and super-slimy. So, I added in a bit more glue and liquid starch (the universal main components of slime), and it turned into this alien concoction!

Here’s What You’ll Need:

(I scoured the Internet for the best kids slime recipes. I found that a good 95 percent were school glue, water and liquid starch. The other ones subbed Borax or Metamucil  for the liquid starch. Not being a laundry maven, I had never used liquid starch. I found it at (and only at) Wal-Mart. Even though it’s basically corn starch, water, detergents, oils and a few chemicals I didn’t recognize – it’s not non-toxic and it is NO way edible. If you have a child who eats or tastes everything, don’t make this just yet).

·        School glue

·        Tap water

·        Liquid starch

·        Green food coloring

Here’s What to Do:

1.     Measure equal parts of water and glue. I used ½ cup of each. This was roughly half the bottle of glue, so it worked out well.
 
Measuring activity


2.     Mix the water and glue together.

3.     Add the mix to the same measurement (in this case, ½ cup) of liquid starch. Mix it all up. If there’s more water, it will get runnier. Let your child experiment a little with the measurements to get a slimy consistency that he likes.
 
Kids' science

4.     Add a drop or two of food coloring. Mix it all up. Ewwwwww!!!
 
Green goo


If you save the slime in a plastic ware container it should get firmer. I had wanted to make a glow in the dark alien slime, but it never goes so well when I try to make ‘glowing’ projects. My first thought was to swap the tap water for tonic water (it glows under a black light, and I've used it before in other kids' activities), but I’m not certain that there will be enough of the water in it to really give it a good glow. I’m thinking that glowing paint is the way to go. This also typically requires a black light. Maybe next time we’ll experiment with adding glow-in-the-dark craft paint to the mix and show you how it goes!

Sensory play
 
Are you looking for more slime-type ideas? Follow my Pinterest board for slimes, doughs and goos.
Follow Mini Monets and Mommies's board Slime, Play Dough and Goo on Pinterest.

Saturday, May 23, 2015

Red, White and Blue Glitter Slime for Kids

Slime has been the kids’ activity most on my mind recently. Why? I don’t know, why not? It’s science, kind of artsy, sensory and seriously fun for kids of all ages (really – my 13-year-old even left his Xbox for enough time to help me make a batch, and play with it!).
Kids' goo

(This post contains affiliate links. Please see my disclosure statement for more information).

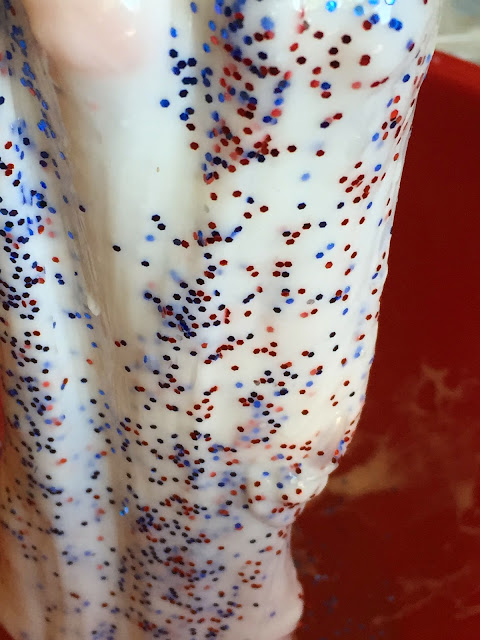
For my first foray into slime, I chose a red, white and blue patriotic version, using glitter (I’m a fan of glitter and I love any activity that is sticky enough to keep the sparkles in place). I’m a bit of a Pinterest addict (my son says it’s for bored stay-at-home moms, and maybe he’s not wrong). Every day I see crazy amounts of slime posts popping up on my feed. After reading up on the DIT’s I found out one thing – they’re all pretty much the same when it comes to ingredients. Now before you start waving your hands and shouting at your laptop, “Um, no way! I have a totally different recipe that no one has ever, EVER thought of!” let me just say, I applaud you. What am I a fan of more than glitter? People who create unique, one-of-kind projects, activities, crafts, lessons, etc. But, in general most slime recipes use water, school glue and either liquid starch of Borax. I went the liquid starch route, and here’s what happened…
Children's activity

Here’s What You’ll Need:

·        Liquid starch

·        Water

·        School glue


Before you get started, let me say that this isn’t one of those edible recipes. While liquid starch is mostly corn starch, castor oil, various soaps and a few chemicals, it’s not safe to go in your child’s mouth. Even my 13-year-old (who is used to my making edible play dough and clay recipes) asked, “Mom, can I eat it?” No! No, no, no, no and no! Some kids can’t help themselves and like to explore through their sense of taste. If that’s your child, hold off on making slime.

Also, any bowls, measuring cups and spoons that you use while making slime should become art-only utensils. Don’t reuse them when cooking later on.
Glitter activity

Here’s What to Do:

1.     Measure and mix equal parts of water and glue in a bowl. I used a ½ cup measurement. The bottle of glue that I bought divided roughly into two half cups, so it seemed like a good size. If you want a thicker, denser slime, use less water. Don't forget- this is the perfect time to teach your child some math and science lessons! Let him do the measurements and mixing. Before adding the liquid starch, ask him to predict what will happen.

Slime science
 
2.     Stir the water and glue thoroughly.

3.     Measure the liquid starch. Use the same measurement that you made for the water and glue (in this case it was ½ cup).

4.     Pour the liquid starch into a separate bowl.

5.     Mix the water and glue in slowly. I started with a spoon, then quickly switched to my own hands to get a more thorough mix.

Slime-making project
6.     Sprinkle in the glitter.

Sparkle Activity

Sparkle science
 
7.     Mush, turn and flop the slime and glitter around to mix it up.
Glitter art

Glitter activity
 

Now you’re ready to play! The longer the slime sets, the firmer it gets.

Are you looking for more slimy recipes? Follow my Pinterest board for all kinds of ideas!
Follow Mini Monets and Mommies's board Slime, Play Dough and Goo on Pinterest.

Thursday, May 21, 2015

Kids' Flower Paint Print Art Activity

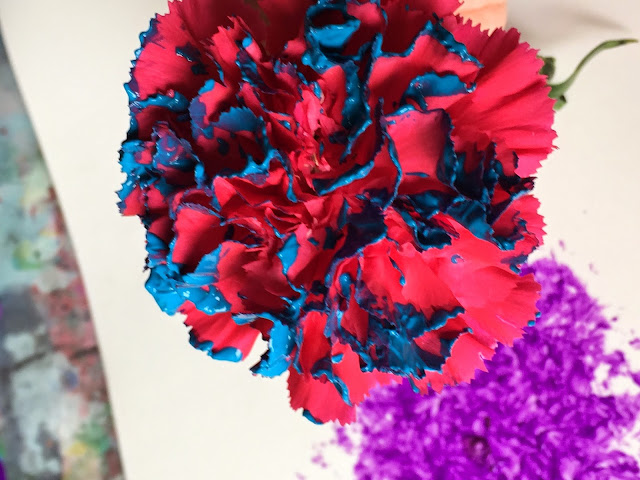
Kids’ print-making art activities are some of my favorites! At work (teaching children’s art classes), at home – I’ve done styrofoam plate prints, model magic prints and even flip-flop sandal prints. This time, it’s an easy spring craft: Flower paint prints.
Flower art

I had a bouquet of carnations that were heading towards looking not so hot. So, what better to use the carnations for than to make a flower print (literally – a print that looks like a flower). I was going to just use the paint-covered petals to make an exact copy, but then it kind of took on a life of its own. There was color-mixing, pattern-making and all kinds of artsy things.

I used craft foam as a base for the print (it’s a bit of a different material for your child to use – which makes it more fun!), but you can also use paper if that’s what you have on hand.

Here’s What You’ll Need:

·        Craft foam (or paper)

·        Tempera paint

·        Flowers

·        Wax paper

Here’s What to Do:

1.     Pour the paint into puddles on the wax paper (it’s an inexpensive palette).

2.     Dip the flower’s head into the paint.
 
Paint project


3.     Press the painted flower onto the foam/paper to make a print.
 
Kids' crafts

4.     Repeat to make a flower shape (petals). Your child can mix colors together to make new ones. In this example, red and blue made purple.
 
Kids' project


Print-making project

That’s it! Your child can keep on printing, exploring different textures. Even though I used a carnation, that doesn’t mean you have to as well. Try dandelions (what else where you going to do with them anyway?) or anything else that you your child wants. If you don’t have or want to use the fresh versions, you can also try faux flowers. They may not work quite as well, but it’s a similar idea that results in a textured print.

Are you looking for more kids’ art activities? Follow my Pinterest board for ideas!
Follow Mini Monets and Mommies's board Creative Kids Crafts on Pinterest.

Wednesday, May 20, 2015

S'mores Cookie Ball Truffles No-Bake Treats

Ah, Oreo has a new special edition flavor – and it’s s’mores! If you’ve been reading my posts you know that I’m not a baker, adore s’mores and have a thing for making cookie truffle balls. So, when I saw these new little treats while grocery shopping, I couldn’t pass them up (in all honesty, I passed them up a good four or five times, and finally gave in and bought them!).


Oreo truffles

I love, love, looooove just about all of Oreo’s special edition cookies. The cotton candy ones were exactly as I expected (yes, they do taste like cotton candy) and I turned the pumpkin spice ones into Thanksgiving pumpkin pie truffles. It’s almost Memorial Day, so that means it’s time to grill and break out the summer-time campfire. I’m all for making the good old fashioned burnt marshmallow, ooey-gooey, made-on-a-twig s’mores. But, if you want to try something different these cookie balls are for you.

I wasn’t planning on making any sweet treats for a while. I actually had a pretty little post on carnation prints written and ready to go (you can catch that later this week). I also was planning on nixing the sugary treats. Seriously. I have a sweet tooth, but I was thinking of going paleo. I downloaded an app, populated my grocery list, and then totally blew it when I saw the Oreo display. So, as I sit munching on these calorie-packed goodies, I’m realizing that I must go to the gym tomorrow first thing. I’m also realizing that these graham cracker, cream cheese little bits of joy are mini no-bake cheesecakes (they’re also s’mOreos).

On with the no-baking…

Here’s What You’ll Need:

·        Special edition s’mores Oreos

·        6 oz. softened cream cheese

·        Graham crackers

·        Chocolate bars

·        White frosting – It’s supposed to be the ‘marshmallow’ part. You can use marshmallow fluff, but the icing is less sticky and easier to work with. Plus, frosting or marshmallows – they both bring the super-sweet taste.

Here’s What to Do:

1.     Blend the cookies in a food processor.
 
Dessert Treat

2.     Mix the cookie crumbles with the cream cheese. Don’t be dainty here. Use your hands. It’s really the only way to get a good mix through.
 
No-bake recipe

3.     Roll the mix into balls. Make them somewhere around a golf ball or donut hole size.

4.     Pop the balls into the freezer for an hour.

5.     Microwave the chocolate for about a minute (microwaves vary, so you may need more or less time). Don’t let the chocolate coil. When you take the chocolate out, the bowl will be hot (and so will the chocolate).

6.     Drizzle the chocolate over the balls with a spoon or roll them through it (again, with a spoon – not to protect yourself from the mess, but from the heat).

7.     Let the chocolate harden.
 
Chocolate desserts

8.     Coat the outside with icing.
 
Icing recipe

9.     Blend the graham crackers in the food processor until it is like sand.
 
S'mores treats

10.   Sprinkle the graham crackers over the icing.

And…yum!
Oreo balls

Are you looking for more s’mores? Follow my Pinterest board for ideas!
Follow Mini Monets and Mommies's board Sweet S'mores on Pinterest.

Sunday, May 17, 2015

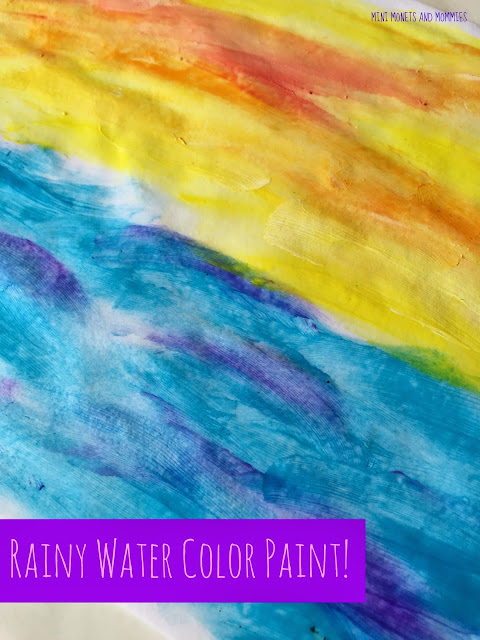
Kids' Rain Paint Water Color Art Activity

Water color rain paints were on the agenda today. It was raining all morning, so I thought, “This is perfect!” I gathered together the paper and paints, and then it stopped raining. I love a beautiful sunny day, but it kind of ruined my post plans.

Water color

What could I do about a rainy day art activity for kids when there was no rain? Even though the rain had stopped falling, the puddles remained. So, I dropped the paper in the puddles and then got painting…

Here’s What You’ll Need:

·        White paper

·        Tempera paints

·        Wax paper

Here’s What to Do:

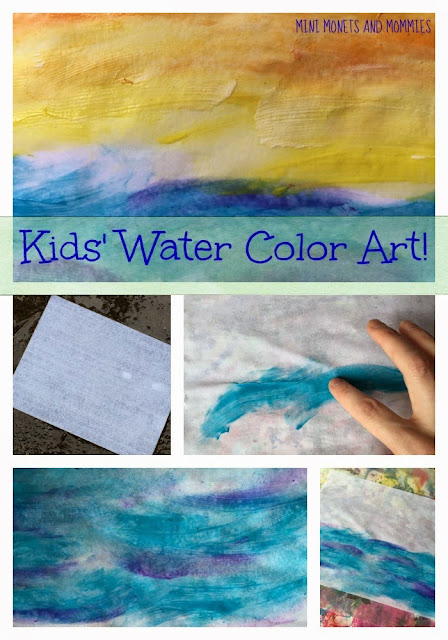
1.     Drop the paper into a puddle. If you want to try this art activity and it’s not raining (or hasn’t rained in days), use a shallow dish of water instead. Thoroughly soak the paper.
Water colors

2.     Bring the paper inside or set up an art station on the ground, a bench or outdoor table.

3.     Put the wet paper on a piece of wax paper.
 
Paper crafts

4.     Pour a few different colors of paint onto a palette (or use another piece of wax paper – it’s less expensive and works nicely).

5.     Finger paint onto the watery paper. Have your child dip her hands in the tempera and paint it onto the paper. As it mix and mingles with the water, it will spread out. Your child can explore with colors, create an abstract pattern or make an outdoor scene such as a sea scape or summer sunset. If your child is painting outdoors, have her copy what she sees in your backyard. She can create flowers, trees or a grassy area.
 
Kids' art

6.     Let the paper dry completely.

7.     Peel the dried paper off of the wax paper.
Water paint

Are you looking for more kids’ art activities? Follow my Pinterest board for ideas galore!
Follow Mini Monets and Mommies's board Creative Kids Crafts on Pinterest.