Pages

Monday, September 28, 2015

Halloween Glow Paint Sensory Kids' Art Activity

Glow paint is one of my favorite art materials for Halloween. Last fall I mixed the glow-in-the-dark paint with Model Magic to make googley-eyed ghosts (and a few odd little mash-up monsters).

Halloween craft

If you’re looking for a sensory exploration that combines science and art, this craft sand activity is an easy option. Your child can paint a picture, a simple word, individual letters or just make a design. After she’s done painting, start the scientific inquiry with a few open-ended questions. These don’t have to be difficult, just enough to spark your child’s thought process.

For example, try:

·        What do you think will happen to the paint when we turn off the lights?

·        If we cover part of the design with sand, what will change when it ‘glows’?

·        How do you think the craft sand will feel when you glue it onto the paper?

Now it’s time to start the art-making…

Here’s What You’ll Need:

·        Glow paint – Make sure it is age-graded as safe for your child.

·        A paintbrush

·        Construction paper

·        Craft sand or glitter

·        Clear drying school glue

·        A black light

Here’s What to Do:

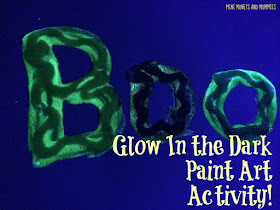
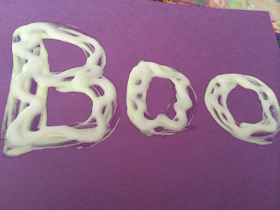
1.         Paint a picture or a word onto the paper (I used “Boo”, but you can choose another simple Halloween word, your child’s first letter or even a spooky design).
Kids' craft

2.         Draw a pattern or lines onto the letters with glue. Make sure that your child doesn’t completely cover the paint with the glue. If she does, she won’t see the glowing effect.

3.         Sprinkle craft sand or glitter over the glue. Shake off the excess.
 
Fall actvity

4.         Let the glue dry completely.

5.         Turn off the lights and turn on the black light (most glow paints need this to work).
 
Kids' crafts

Are you looking for more fall kids’ activities? Follow my Pinterest board for ideas!

 
Follow Mini Monets and Mommies's board Fall Activities for Kids on Pinterest.

Sunday, September 27, 2015

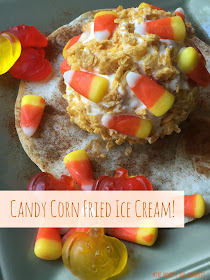
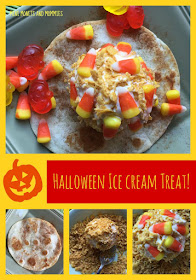
Candy Corn Fried Ice Cream Halloween Dessert

What does fried ice cream have to do with Halloween, fall treats or candy corn? Usually nothing. But, in this case I’m putting the super-sweet dessert ideas together into one recipe.

Candy corn

Ok, so I kind have a thing for ‘fried ice cream’. Technically, this isn’t really fried. It’s more breaded, but still quite tasty. When I was in high school the ‘cool’ math teacher was obsessed with Chi Chi’s fried ice cream. As an educational pioneer of the time, he put us into work groups to study with, do classwork with and take tests with. Before a big exam he would always say, “I want you all to get together the night before the test, go to Chi Chi’s for fried ice cream, and study there.” As you can imagine, I was totally excited when (fast-forward a few decades) my son came home from his middle school cooking class telling me that he had learned how to make none other than – fried ice cream!

Deciding not to make the ICE CREAM completely unhealthy, his teacher had them ‘bread’ them frozen stuff with corn flakes. I used that technique in this dessert as well. This method also works well if you have your kids helping. They can do most of the prep-work. Not wanting to miss out on the opportunity to carry the corn them on, I figured, “Why not add in some candy corn and make a Halloween fall treat?”

And here’s what happened…

Here’s What You’ll Need:

·        Vanilla ice cream

·        Corn flakes cereal

·        Candy corn

·        A tortilla

·        Cinnamon

·        Vegetable oil

·        Sugar

·        Optional: Honey

Here’s What to Do:

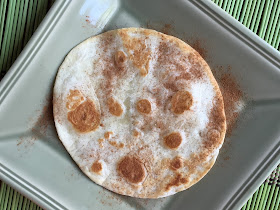
1.     The actual fried part – Fry the tortilla. Coat a frying pan with oil, put the tortilla on and fry it. Flip it and fry the other side.
 

2.     Mix a tablespoon of sugar with a pinch of cinnamon. Sprinkle the mix over the tortilla.
Sugar tortilla

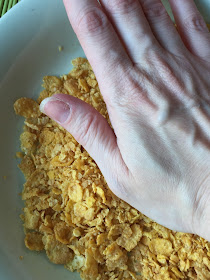
3.     Crush the corn flakes. Put them into a bowl and use your freshly washed hands to smoosh them (as a bonus, this action is quite exfoliating and leaves your hands super-soft).
Crushed cereal

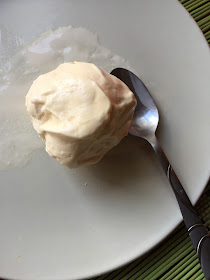
4.     Scoop the ice cream into a ball. Honestly, I don’t own an ice cream scoop. My solution was to use my hands (ala snow ball-making style) to form the sphere. The kids will get a kick out of ‘playing’ with their food while making an ice cream ball.
 
Dessert scoop

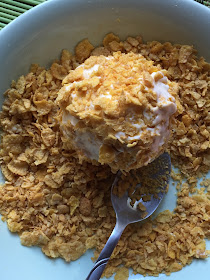
5.     Roll the ice cream in the corn flakes, coating it.
 
Corn flakes

6.     Press a few candy corns onto the outside of the ice cream where the corn flakes didn’t stick.

Halloween treat
 

7.     Set the finished product onto the fried tortilla.
 
Ice cream

8.     Optional: Add a drizzle of honey, a pinch more of cinnamon sugar or even garnish with festive gummies.

Are you looking for more fall recipes? Follow my Pinterest board for ideas!
Follow Mini Monets and Mommies's board Fall Foods on Pinterest.

Wednesday, September 23, 2015

How-To Color Pumpkin Seeds

Fall means a lot of things. It’s finally sweater weather and it’s time for pumpkins, leaves turning, Halloween and all things apple! Every year we head off to the same local farm to pick our pumpkins at their Fall Festival. Actually, I started going to this particular farm when I was about 5-yars-old with my own parents. Each annual trip includes climbing on the mountain of pumpkins, eating some sort of deep fried apple delicacy and taking home a trunk filled with would-be jack o’lanterns.
Pumpkin activity

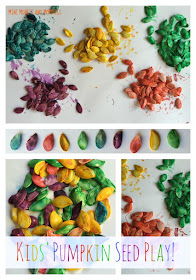
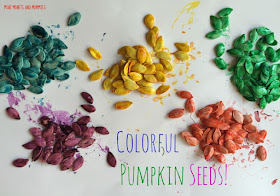
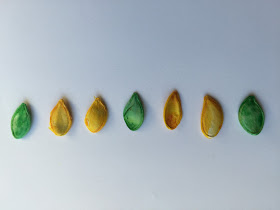
With so many pumpkins we have more than our fair share of seeds. While we bake some, I have to admit there are plenty that get tossed out with the rest of the pumpkin ‘guts’. If you’re in the same situation (i.e., you have about a zillion pumpkin seeds and nothing to do with them), try coloring them! Not only does this autumn activity for kids help your little one get artsy, but it also includes science, a sensory exploration and fine motor skill-building. After coloring the seeds, your child can use them for activity after activity. First, let’s start with the color-coating process…

Here’s What You’ll Need:

·        Pumpkin seeds

·        Sandwich-sized baggies – I recommend using the zipper kind, but I did also try the fold over ones. Even though these worked, remember to be extremely careful to twist the top together (this keeps the seeds and color from spilling out).

·        Food coloring

·        Cardboard

Here’s What to Do:

1.     Explore the pumpkin! Let your child scoop out the seeds with his hands, putting them on cardboard (reuse the side of an old box). Spend some time investigating what’s inside the pumpkin and comparing it to the outside. If you have a magnifying glass, use that too. Ask a few questions such as, “Does the inside look like you thought it would?” or, “What can we use the seeds for?”

2.     Rinse off the seeds. Put them in a strainer and run them under tap water until they aren’t quite so slimy.

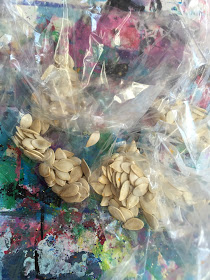
3.     Divide the seeds into the baggies—using one bag per color. Make as many colors as you want. You can use dried seeds as well. I like to use the still-wet ones, as it helps spread the food coloring around.
Fall activity
 

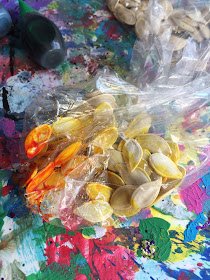
4.     Drip two drops of food coloring into each baggie.
 
Color craft

5.     Completely close the bags. Shake, mush and push the color over the seeds. This is an easy fine motor sensory activity to for your child. While kneading the color through, ask your child what he feels through the bag.
 
Kids' crafts

6.     Open the bags (one at a time), and dump the seeds out into like-colored piles onto a dry piece of cardboard.

Fall project
 

7.     Let the seeds dry. I put them on a sunny windowsill.
 
Seed science

8.     Play with the colorful pumpkin seeds!

What can your child do with the seeds?

Try:

·        Sorting them by color.

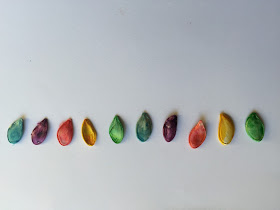
·        Making a pattern by hue.

Kids' science

Math activity
 

·        Tossing them into a fall-themed sensory bin.

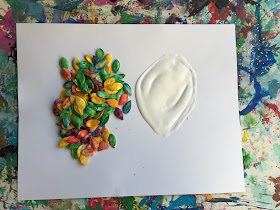
·        Using them to create a picture.

·        Sprinkling them into glue (like you would with glitter or craft sand).
 
Children's crafts

·        Anything else your child can imagine.

Are you looking for more fall activities? Follow my Pinterest board for ideas!
Follow Mini Monets and Mommies's board Fall Activities for Kids on Pinterest.

Monday, September 21, 2015

Spooky S'mores Halloween Treat

Spooky Halloween s’mores anyone? While the traditional graham, marshmallow and chocolate stack is sublimely sweet as is, why not go for a holiday version that includes scary skeletons (ok, not really scary – more of a cute candy versions), ‘dirt’ and ‘worms’.
Spooky s'mores

(This post contains affiliate links. Please see my disclosure statement for more information).

Last Halloween I made monster s’mores with ooey gooey marshmallows and candy eyes. This year I tried my hand at making my own candy. It’s no secret that I’m not always a whiz in the kitchen. So, when I found a skeleton candy mold I was somewhat skeptical. Making candy that actually looked like what it was supposed to was so much easier than I thought. That made this creepy sweet completely easy to make.

Try this out as a pre-holiday treat, make the spooky s’mores with your child on a chilly fall evening or put together a batch for a Halloween party!

Here’s What You’ll Need:

·        Skelton candy mold

·        Candy melts – I used orange ones, but you can also use white chocolate (or add your own hue to melted white chocolate with food coloring).

·        Graham crackers

·        Chocolate cupcake mix – I don’t mind using a mix, but if you have a favorite recipe you can try it out here.

·        Gummy or sour gummy worms

·        Marshmallows

Here’s What to Do:

1.     Bake the cupcakes. Let them cool completely. Cut them horizontally into slices.
 
Sweet treats

2.     Microwave the candy melts or chocolate. Follow the directions on the package.

3.     Pour the melted candy into the mold.

4.     Refrigerate the candy until it is completely hard. Pop it out onto a plate when it’s ready.
Candy molds

5.     Toast a marshmallow. If you have a campfire or fire pit, toast away the old fashioned way. If not, you can microwave it (on top of a graham cracker for approximately 10 seconds) or toast it in the oven (on top of a graham cracker in an oven-safe pan).

6.     Stack the marshmallow on top of the graham cracker.

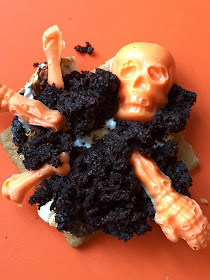
7.     Crumble and press a cupcake slice on top.
 
S'more recipe

8.     Arrange the skeleton bones in the cupcake.
 
Kids' recipes

9.     Toast another marshmallow. Add it on top of the ‘dirt’ cupcake and skeleton.
Spooky treats

10.    Stack another graham cracker on top.

11.    Top the s’more with a crumbled piece of cupcake. Layer a few gummy worms on to complete the spooky style.
 
Kids' desserts

That’s it. Super easy. If you’re looking for more s’mores, follow my Pinterest board for ideas galore!
Follow Mini Monets and Mommies's board Sweet S'mores on Pinterest.

Thursday, September 17, 2015

No-Carve Glitter Pumpkin Craft

Glitter. Not everyone adores the sparkly the stuff (or can even stand it for that matter), but for this kids’ pumpkin craft it’s absolutely essential.

Glitter art


Let’s say you don’t feel like carving the 35 or so odd little pumpkins that you just bought at the local farm festival (ok, so maybe I haven’t ever bought that many – but it has come close). This children’s art activity takes the actual knife work out of the picture. You can even do this one yourself – the result is quite crafty and gives that added sparkle to a Halloween party table or just dresses up your doorstep. Keep in mind, you’re using glue. That means the glitter pumpkin isn’t a wet weather outdoor craft. If you put it outside the glue is likely to run.

I started this art activity out as a plain no-carve sparkle glue drip pumpkin. It turned out well, but I had quite a lot of glitter left over (I always save the extra sparkly stuff in a bag after crafting). I added a mini pumpkin to the glitter bag and got a disco ball effect. So, this project actually has two parts: 1. The glue drip pumpkin and, 2. A finger paint glue (with no actual paint) glitter shaker version.

Here’s What You’ll Need:

·        A pumpkin – I used a smallish size and a teeny tiny mini one. But, any size will work.

·        Clear drying school glue

·        Glitter

·        A plastic bag

Here’s What to Do:

1.     Prep your work area. I always put a piece of card stock or scrap paper under any glitter art activity. When you’re done you can empty the excess glitter from the paper into the bag to use for the second project option.

2.     Drip glue over the top of the pumpkin. I found it easier to open the lid of the glue container. Your child may not be able to control the flow of glue perfectly well, but it will help him to build fine motor skills and a bit of self-control too!
 
Kids' craft

3.     Sprinkle glitter over the glue. Use one color or combine a few.
 
Art Activity

Sparkle craft

4.     Shake off the excess glitter onto the paper underneath. Spill the glitter into the bag.
Pumpkin crafts

5.     Take out the next pumpkin.

6.     ‘Finger paint’ glue over the surface.

7.     Pop the pumpkin into the glitter bag.
 
Glue glitter

8.     Shake the pumpkin around.

9.     Pull the pumpkin out to reveal a disco ball-like Halloween no-carve pumpkin!
 
Disco Ball
 

Are you looking for more Halloween or fall activities?

Try this glitter paper mache pumpkin craft!
Halloween crafts

And…

Follow my Pinterest board for ideas!
Follow Mini Monets and Mommies's board Fall Activities for Kids on Pinterest.

Monday, September 14, 2015

Yom Kippur Shofar Kids' Craft

The Jewish High Holidays are coming up. Recently I posted a Rosh Hashanah Tzedakah Box kids’ craft on Multicultural Kid Blogs. Today I’m bring you a Yom Kippur kids’ craft.

Jewish holidays

The Day of Atonement is a reflective time, when you take stock of the last year and ‘atone’ for you sins. The shofar, or ram’s horn, is part of the Yom Kippur temple/synagogue service (as it is for Rosh Hashanah as well). The shofar is blown at the conclusion of the service.

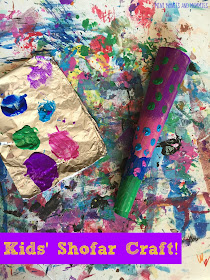
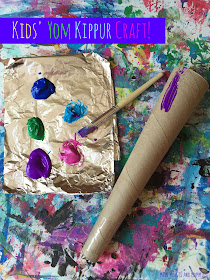
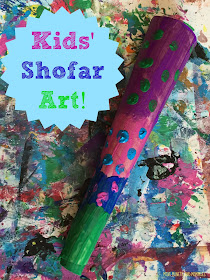
Your child can craft his own version of a shofar -- minus the real ram’s horn. Reuse an old cardboard paper towel tube (or cut a gift wrap tube down to size) as the base for this holiday project.

Here’s What You’ll Need:

·        1 cardboard tube – paper towel size

·        Scissors

·        Clear packing tape or masking tape

·        Tempera paint

·        A paintbrush

Here’s What to Do:

1.     Cut the tube all the way from the bottom to the top. This will be lengthwise.
 
Kids' craft

2.     Wrap the tube into a thin cone shape. Your child should start at the bottom, folding on end of the cut cardboard over the other. The tube will naturally start forming a cone.
 
Children's art

3.     Tape the bottom of the cardboard shofar. Your child can hold the tube together and you can tape or vice versa.
 
Yom Kippur activity

4.     Tape the top of the cone. Also add a strip of tape up the seam if needed.

5.     Paint the outside of the cone. As your child paints he’ll need to hold the cone upright. If not the paint will rub off on the table or whatever surface he is using. You can help out and hold the cardboard as he paints away. Another option is to paint one side/part and then weight the cardboard with a rock inside of the tube. When that part dries, turn the tube and repeat on the other side.
 
Painting Craft

6.     Let the paint dry completely.
 
Art activity

Use the Yom Kippur shofar for pretend play. Be careful and make sure that your child doesn’t accidentally eat the paint on the end of the shofar. Discuss not actually touching the cardboard to his mouth, and pretending to do so instead.

This post is part of Multicultural Kid Blogs' series on the Jewish High Holidays. Click on the picture below to see some of the other super-creative posts by the other bloggers who are participating!

Multicultural Kid Blogs