Hot chocolate
sugar face scrub? Yes! And, you can make this DIY beauty facial at home for a
fraction of the cost that a store-made brand would run.
(This post contains affiliate links. Please see my disclosure statement for more information).
I’m fairly
certain that I have the word ‘sucker’ scrawled across my forehead when it comes
to anything that combines food and beauty. I’m not talking about slathering
pounds of meaty lasagna across my face. But, any cosmetic, facial, cream,
lotion or potion that has anything remotely chocolate, vanilla, cotton candy or
frosting scented in it is completely irresistible to me. Maybe it’s the packaging
or maybe it’s just the thought of smelling like a sweet, sweet cupcake all day
long. In any case, I have somewhat of a spending problem when it comes to these
beauty treats.
So, I
decided to make my own. If chocolatey face scrubs are something that I know I
just can’t pass up, why not try a DIY version (that is, instead of spending way
more than I’d like to on one)? And, that’s where the hot chocolate sugar face
scrub came into play. This is also an easy answer to a 'beauty day' with your child. If you've got a preschooler or young child who likes to explore with her sense of taste, chemical-filled store-bought facials are major no-no's. While your child certainly shouldn't gobble down this DIY scrub by the spoonful, it is only made from kitchen ingredients. That means a stray taste here or there isn't the worst thing in the world.
Before I go
any farther, let me just say that the hot chocolate isn’t actually ‘hot’. It’s
more of a slightly luke warm temperature. Obviously, actual hot chocolate would
burn my skin (and yours too). With that in mind, never heat this mix up to a hot
temperature. Again, let me say – never, ever touch or apply a hot mix to your
skin. Only warm this scrub up to the temperature of warm running water from the
faucet.
Why
chocolate? For me the decision was mostly for the scent. I love, love, love the
smell. But, some say that chocolate’s anti-oxidant properties are excellent for
toning and hydration.
What else is
in this chocolate facial thing? As you’ll see, I’ve included heavy whipping cream. Aside from
needing something to mix the chocolate with, I didn’t want anything oily in the
mix. Some DIYers use coconut oil, olive oil or something similar as a base for
homemade facial masks. My skin breaks out easily, so I don’t want to add oil to
it. The cream was smooth enough to add some hydration, but didn’t make me feel
like an oil slick had spread to my face.
I also added
in coarse sugar. Aside from the sweetness factor, the thick grains acted as an
exfoliant.
How did I
make my chocolate scrub?
Here’s What
You’ll Need:
·
¼
cup heavy whipping cream
Here’s What
to Do:
1. Whisk together
the cream and cocoa.
2. Pop the
mix (in a microwave-safe bowl) into the microwave for about 20 seconds. Microwaves
vary in terms of intensity, so you may need more or less time. Heat the mixture
until it is only slightly warm to the touch. The idea here is to make sure that
the cocoa powder melts into the cream. It should feel like warm tap water.
3. Stir the
mix again. At this point I transferred the mix into a new, smaller bowl. It kept it more manageable and helped it to cool down. If the cocoa is still a bit clumpy, that's ok.
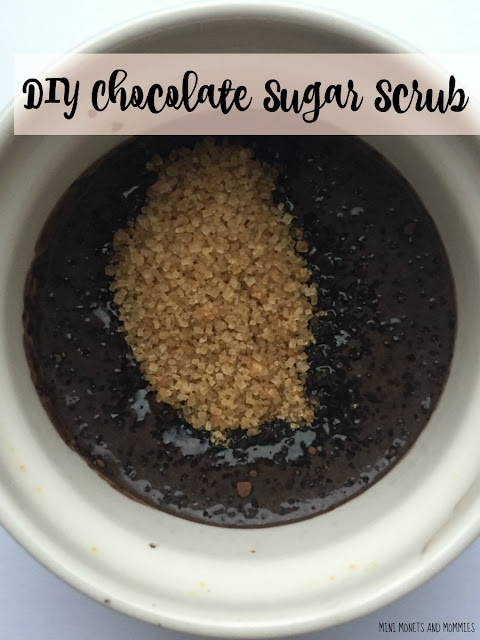
4. Add the
sugar, and mix it all together.
5. Test the
scrub on the small spot on your hand or arm, making sure that it isn’t too hot
first. If it’s steaming, smoking or bubbling it is definitely much too hot.
Allow the mix to fully cool before applying it to any part of your skin. Testing
the scrub also helps you to see if your skin reacts to it. I have extremely
sensitive skin. Doing a test run first helps me to see if I’ll get a rash,
redness or another issue form a cosmetic product.
6. Gently
scrub your face in a light, circular motion. Keep the chocolate scrub away from your eyes and lips. (My teenage son played the role of photographer. He thought it was absolutely hilarious that I had brown goop all over my face and took this picture as slowly as he could).
7. Wash the
scrub off with warm water. Pat dry with a soft towel.
That’s it!
Easy enough, right? I’m a little bit of a safety freak, so I’m going to say
again – this isn’t really a ‘hot’ chocolate recipe. The scrub should never get
to the point of being a hot temperature. If it somehow does, let it cool down completely
before applying it to your skin. A scrub that feels any warmer than the water
that you shower with or the water that you typically wash your face with is way
too hot. Also, if you know or suspect that you’re allergic or sensitive to any
ingredient, skip the scrub.

