Pages

Saturday, January 30, 2016

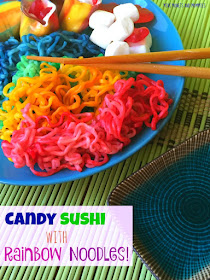
Swedish Fish Candy Sushi with Rainbow Ramen

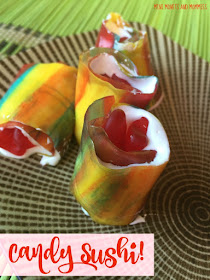
Swedish fish candy sushi with rainbow ramen noodles anyone? That’s right – you read correctly. Why, you may ask. Why not?

Candy Sushi

Ok, so I’m no sushi chef. But, I do enjoy making cute little candy concoctions. Last spring I made kosher candy sushi for Passover (you can make it minus the kosher ingredients as well). This time I went with a fruit roll-up, marshmallow fluff and fish (the Swedish kind, of course) creation. Let’s get this out of the way – it’s not a healthy snack by any means. If you want to give your child a nutritious after-school treat, by all means slice up an apple or peel a banana. This is a once-in-awhile, birthday party, fun-time, special day treat!

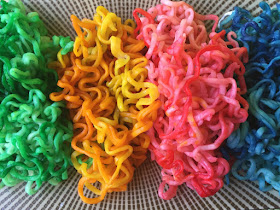
Now, what about the ramen? My son loves, loves, loves these noodles. I’ve seen rainbow spaghetti all over the place, so I figured I’d try it with ramen. Not that candy and ramen necessarily go together all of the time, but it’s a fun snack idea to try.
Candy treat

Before we get started, I have one serious caution to bring up – the Swedish fish sushi candy may pose a choking hazard to young children. It’s definitely not for kids three and under. When you look at all of the ingredients, you’ll notice that they’re all fairly sticky on their own. Combine them and they get massively chewy. While my 14-year-old was good with chewing the sticky sushi, your 4-year-old may not be. I’m always overly cautious when it comes to this type of thing. Seriously – ask my son. I think I may have cut his grapes for him until he was 10, and I’m the mom who refuses to give her kid gum out of fear he may try to swallow it. That said, be cautious when deciding if your child is old enough to chew something that’s quite so sticky. If taffy is a no-no now, skip the sushi (but, you can still give him the ramen).

Here’s What You’ll Need:

·        Ramen noodles

·        Food coloring

·        Plastic sandwich baggies

·        Fruit roll ups (we used the tie dye ones)

·        Marshmallow fluff

·        Swedish fish

To make the sushi:

1. Unwrap and unroll the roll up. You can go one of two ways here: Cut the roll up into long strips or make the sushi and cut it into pieces after.
 

2. Coat the roll up with a thin layer of marshmallow fluff.
Fruit roll-up

3. Cut the fish into pieces. Place the fish pieces onto the fluff, about 1-inch in from the top of the roll up.
Candy roll

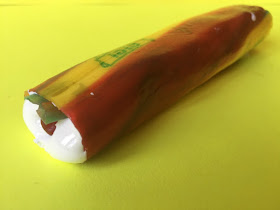
4. Roll your creation up.
Candy sushi


5. If you chose not to cut the roll up at the start, do so now (making 2-inch pieces).
Candy cooking

To make the rainbow ramen:

1. Boil the noodles for three minutes.

2. Strain and rinse the noodles under cool water.

3. Divide the noodles into four or more baggies.

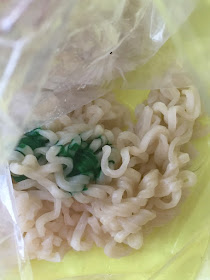
4. Add two or three drops of food coloring into each bag. Close the bags tightly.
Food color

5. Mush and mash the bags, spreading the color across all of the noodles.
Ramen recipe

Noodle recipe

Now you’re ready to serve up the sweet creation! Plate it all together, and serve with a side of ‘dipping sauce’. Use a chocolate sauce, more marshmallow fluff or a fruit-flavored drink (we used blue raspberry).
Rainbow noodles

Are you looking for more delicious desserts? Follow my Pinterest board for ideas!


Follow Mini Monets and Mommies's board Great Desserts on Pinterest.

Tuesday, January 26, 2016

Learning Letters with Water Color Resist Painting

The ability to write letters is a major part of early childhood development. If you’re looking at the title, and asking what this has to do with a water color resist art activity – I promise, I’ll explain.

Letter Art

(This post contains affiliate links. Please see my disclosure statement for more information).

My son never really struggled with writing letters. But, he did find the rote writing assignments (worksheet after never-ending worksheet) that his kindergarten teacher handed out to be quite the challenge. Why? Um, because they were boring. I remember him sitting at his tiny little work table in our living room, crying because he just didn’t understand why he had to write 10 lines of ‘A’.

I took my son’s issues to work with me. As a children’s art teacher, I had plenty of parents come to me with worries about their kids’ fine motor skills. Was Johnny having problems holding the crayons at art class too? Is Jenny behind because she refuses to write certain letters for her pre-k teacher? After talking to plenty of parents I found that the issues/problems/challenges that many (not all – and if you really feel that your child has a developmental delay you should immediately bring it to the attention of your pediatrician or a qualified, licensed early childhood professional/specialist) of these children had came from boredom. They could write, they just didn’t care to. But, put them in an art class and they were all in for playing with finger paints, paintbrushes, rollers, markers, crayons and whatever else we had to use.

If you’re looking for a way to get your child writing (or if you just want another option outside of a pencil), this art activity provides a bit more in the way of creative expression. It’s also an easy sensory play exploration and includes elements of science. The petroleum jelly allows your child to explore through his senses. Not only can he feel the slimy texture, but it’s also great for kids who may typically shy away from these types of activities. It’s clear – meaning it doesn’t ‘look’ messy. Some children may be more willing to explore the clearish jelly over something that looks like mud or muck.

Before beginning, start with a few open-ended questions (i.e., the science part). Ask questions such as, “What do you think will happen when you put the jelly on the paper?” or, “What do you think will happen when you paint the water over the jelly?” After making a few predictions, it’s time to move on to the art-making/ letter drawing and let your child experiment!

Here’s What You’ll Need:

·        White card stock paper

·        Watercolor paints

·        A paintbrush

·        Water

·        Petroleum jelly

·        Paper towels

Here’s What to Do:

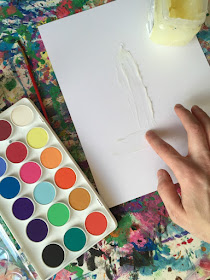
1. Pick a letter. After your child has a letter in mind, invite him to finger ‘paint’ the letter onto the paper with the jelly.
Early Literacy

Kids' art

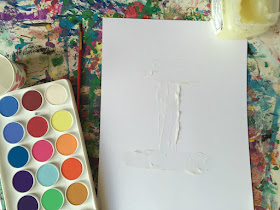
2. Paint the paper with the water colors. Watch what happens as the colorful water washed over the jelly (hint: it beads up). At this point, it’s a good idea to constantly clean the brush off. As it drags over the jelly it will pick some of the sticky stuff up. This may spread the jelly, making it difficult for the paint to stick to the rest of the paper. Wipe the brush off with a paper towel often.
Paint project

3. Use a fresh towel to wipe the jelly off of the paper. What’s left behind? The letter!
Children's art
 
Alphabet art
 

Are you looking for more art activities? Follow my Pinterest board for ideas!
Follow Mini Monets and Mommies's board Mini Monets and Mommies Blog on Pinterest.

Friday, January 22, 2016

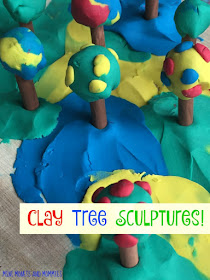
Tu B'Shevat Tree Kids' Clay Craft

Tu B’Shevat marks the ‘new year’ for trees. This might not be the best-known of the Jewish holidays, but it’s one that I always remember.

Tree Craft

(This post includes affiliate links. For more information please see my disclosure statement).


Every year we got to ‘plant’ trees in Israel. By plant, I mean we filled out a form, made a donation and a tree was planted in our names. I remember daydreaming about visiting my mini field of trees – that never happened. But, in celebration of Tu B’Shevat your child can grow her own forest.

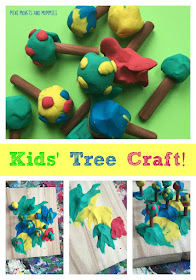
Ok, not really. But, she can make her own trees out of modeling clay and ‘plant’ them in some more clay. Your child can sculpt a grove of flowering trees, fruit trees or imaginative make-believe trees that have wild colors, bold patterns and swirls of hues. This also provides you with an opportunity to talk to your child about plant science and the growing cycle. Ask her where trees come from and what they need to grow.

We have somewhat of a stockpile of broken boards at our house (a side effect of seven years of karate). Instead of letting them pile up in the basement, I like to use them for art activities. For this one, we reused a board as the forest floor base. If you don’t have a board, don’t worry. You can use thick cardboard instead (e.g., the side of an old moving box).

Here’s What You’ll Need:

·        A piece of wood or cardboard (it must be flat, but can be any size you want)

·        Modeling clay

·        Thin wooden pegs (you can find these online or at most craft stores)

·        Tempera paint

·        A paintbrush

Here’s What to Do:

1. Paint the pegs. Your child can paint a realistic-looking brown trunk or opt for something colorful and out-of-the-ordinary. Let the paint dry completely.
Kids' art

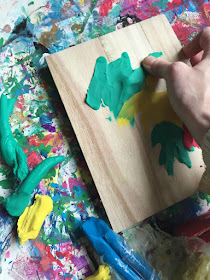
2. Finger paint the board with clay. Tear apart dime-sized pieces of clay and spread it (like finger painting) across the surface. It will stick. Make hills or mounds with the clay to push the peg trees through. Your child can create a topographical type of ‘map’ on the wood or make an imaginary area in a rainbow of colors.
Finger paint

3. Sculpt tree tops. Ball up green clay (or a mix of colors). Press it onto the top of the peg. Your child needs to experiment with the weight of the clay in order to find out how much she can put on top of the peg. Add too much and it won’t be easy to anchor the peg into the clay base. Add too little and the tree may look somewhat sparse. Your child can also add on flowers or fruit using smaller pieces of clay.

4. Press the bottom of the peg tree trunk into the clay base. Repeat for other Tu B’Shevat trees.
Tu B'Shevat art

Let’s recap: What did your child just learn/develop?

·        Culture: The Jewish holiday Tu B’Shevat (the new year for trees).

·        Science: Biology (the growing cycle) and physics (the effect that gravity has on a weighty peg). If you’re reusing wood or cardboard, your child is also learning about the environment.

·        Fine motor: Painting and playing with clay build dexterity and eye-hand coordination.

·        Art: Colors, shapes and exploring materials.
Holiday art

Are you looking for more kids’ crafts? Follow our Pinterest board for ideas!

 
Follow Mini Monets and Mommies's board Creative Kids Crafts on Pinterest.

Thursday, January 21, 2016

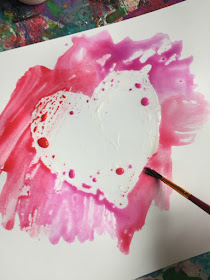
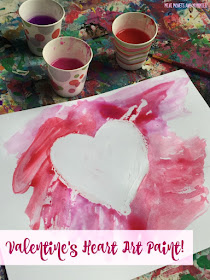
Valentine's Day Water Color Heart Art for Kids

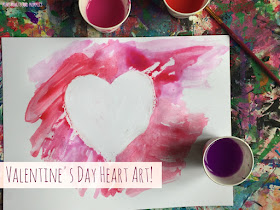
So, you’re looking for a Valentine’s Day art activity? You want something that’s not too tricky for the kids to try (maybe you aren’t crafty yourself, and don’t feel completely comfortable with a project that requires a hefty dose of artsy know-how), but is still engaging, interesting and even a learning experience. I hear you. And, that’s why we tried this holiday water color paint resist exploration.

Paint project

After stocking up on petroleum jelly for a few DIY lip balm projects, I realized that I still had quite a stash leftover. What to do? Use it for a painted heart negative space art activity! Last Valentine’s Day we did a similar project using paper, glue and glitter. This one lets your little artist explore colors, paint and a bit of science.

Before beginning, invite your child to feel the petroleum jelly. Ask her to tell you what she thinks will happen when she splashes the jelly with the water color paint (have her make a prediction – even if it isn’t technically ‘right’, the idea is for your child to explore, experiment and figure out what happens for herself).
Children's art

Here’s What You’ll Need:

·        White or light-colored card stock paper (or water color paper)

·        Valentine’s Day colors of water colors or tempera paint

·        Water

·        A paintbrush

·        Petroleum jelly

·        A paper towel

Here’s What to Do:

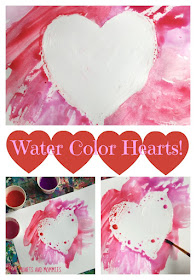
1. Finger paint a heart on the paper with the petroleum jelly. Really let your child layer it on, making this a sensory experience.
Petroleum jelly

2. Optional: Mix your own water colors. If you don’t have ready-made water color paint on hand, you can use those little last bits of tempera instead. I had barely enough red and pink to use for anything. I scooped it out into a small-sized paper cup, added a few tablespoons of water and mixed.
Tempera Paint

3. Paint over and around the heart. Ask your child why she thinks the water color paint isn’t sticking to the heart (a few drops may, but most won’t). Keep wiping the brush. As it drags over the heart, it will collect the jelly. This may make it tricky for the rest of the paint to stick to the paper (if your child is spreading the jelly around).
Heart paint

4. Let the paint dry for about half an hour.

5. Wipe the jelly off of the paper with a paper towel.
Kids' paint

Are you looking for more Valentine’s art activities? Follow my Pinterest board for ideas!
Follow Mini Monets and Mommies's board Valentine's Day Activities for Kids on Pinterest.

Sunday, January 17, 2016

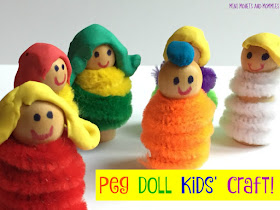
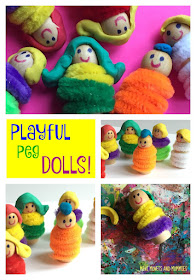
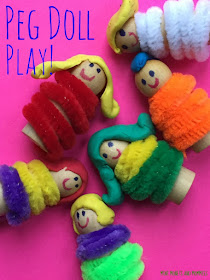
Peg Doll Kids' Craft: Wild Wigs and Crazy Colors

Recently I’ve seen adorable peg doll craft tutorial after even more adorable tutorial. So, I decided to try my hand at making a few of these cute little playthings. That said, I’m not quite the seamstress, and I truly doubted that I had any ability to sew teeny tiny little clothes for the pegs.

Kids' Craft

(This post contains affiliate links. Please see my disclosure statement for more information).

Instead of sewing or using fabric, I tried out pipe cleaners on the dolls. Super-easy and worked very well. While making a snack stadium (yes, they do exist – and are much more fun than simply stashing snacks on a table), I added these dressed-up pegs as football fans.

After making the first batch, I set out to create a few more. The only issue was that I had no more pegs. Even though the craft store is a quick 10 minute drive away, I didn’t feel like leaving the house on a cold, cold Sunday. With the pipe cleaner clothes and clay hair, I figured that it wouldn’t be terribly tricky to swap out the old look for a new one. And, it wasn’t!
Doll Craft

Not only can your child create her own peg dolls to play with, but she can make an infinite amount of interchangeable clay wigs and pipe cleaner dresses. This means endless pretend play possibilities. Your child dress up the dolls in holiday colors (such as pink and red for Valentine’s Day), make rainbow-hued hair or mix and match designs.

Here’s What You’ll Need:

·        Wooden peg dolls (you can find these at most craft stores or online)

·        Markers

·        Modeling clay (do not get air dry clay, it will crack and fall off)

·        Pipe cleaners

·        Scissors

Here’s What to Do:

1. Draw a face on the doll with the markers.
Children's art

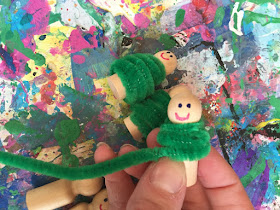
2. Wrap the peg with a pipe cleaner (or a few, for a multi-colored outfit), starting at the neck.
Wooden pegs

3. Mold the hair on the peg’s head with the clay.
Art activity

That’s it! When your kiddo gets bored playing with the dolls, take the ‘hair’ off and unwrap the pipe cleaners. Switch up the wigs and re-wrap the dolls with new pipe cleaner colors. What else can your child do with the dolls? Along with crafting them, your child can create pretend plays for the dolls. Use the changeable outfits (and hairstyles) to dream up colorful characters or make a fictional friend from a favorite book come to life!


Are you on the lookout for more kids’ crafts? Follow my Pinterest board for ideas!
Follow Mini Monets and Mommies's board Creative Kids Crafts on Pinterest.

Friday, January 15, 2016

DIY Valentine's Day Candy Heart Lip Treatment

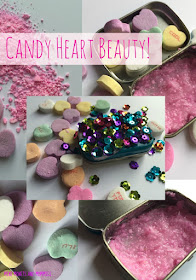
Valentine’s Day lip balm? This candy-covered holiday is sweet with all kinds of goodie-filled concoctions. I figured, “Why not make a glossy balm from those cute little candy conversation hearts?” Sounds yummy – right?

Valentine's Day

 
And, then I got to the first step: Breaking all of those hearts. I tried cutting them (totally not advisable in any way), I tried melting them (it doesn’t work well, and again it is in no way advisable), I tried the cheese grater (nope) and I tried smashing them with the back of a spoon (ok, this one kind of, sort of worked). Even though the spoon smash broke the candy into bits, it was still way too chunky to make a light lip balm out of. You really need more of a very fine powder to make this DIY work.

I had spent more time than I care to admit smashing the hearts, and wasn’t ready to give up just yet. That said, it was entirely clear that a straight out glossy pink heart-made balm wasn’t going to happen. What’s the next best thing? An exfoliating lip treatment! No, you can leave it on your lips – but, it softens, gets the rough skin off and leaves behind a slight sweet scent. And what better for kissing your sweetie on Valentine's Day than super-smooth lips?

Indulge yourself with this beauty treat or pamper a special someone with it. This is a super-easy Valentine’s Day gift for kids to make and give. They can even decorate the container, making it sparkle with holiday love!

Here’s What You’ll Need:

·        Petroleum jelly

·        Candy conversation hearts

·        A small-sized container or mint tin

·        Optional: Sequins and clear-drying school glue

If you want to make the lip treatment tin extra-fancy, glue sequins to the outside. Do not drip any of the glue inside of the tin and do not allow it to touch the exfoliant itself. Another option is to cover the top of the tin with a homemade label that reads, “Happy Valentine’s Day” or, “A Treat for My Sweet.”
Candy heart

Here’s What to Do:

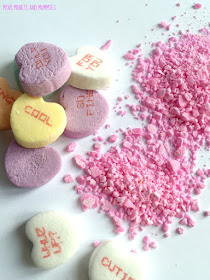
1. Break the hearts. I found the easiest way to do this (again, after trying many, many, many different techniques) was to sandwich the hearts in a paper towel and smash them with the back of a spoon. You don’t need to grind the hearts into powder (and, you probably won’t anyway). Make small bits, similar to exfoliating beads.
Conversation hearts

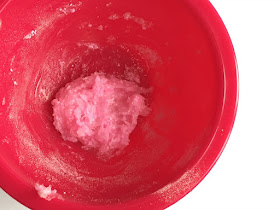
2. Mix the hearts in a bowl with the petroleum jelly. I used five hearts per two tablespoons of jelly.
Lip Treat

Exfoliate lips

3. Spoon the mix into the tin. Make sure to wash the tin out before adding the lip treatment. If you want a slightly minty tingle to it, use a mint tin and skip the washing step.

Candy Beauty

Even though this is a lip beauty treat, you can also get some smooth hands mileage out of it. While mixing I got plenty of the candy-jelly mix on my fingers. The result? Baby soft hands!

Are you looking for more Valentine’s Day ideas? Follow my Pinterest board for activities!

 
Follow Mini Monets and Mommies's board Valentine's Day Activities for Kids on Pinterest.

Wednesday, January 13, 2016

Chocolate-Covered Berry Valentine's Day Gelatin Dessert

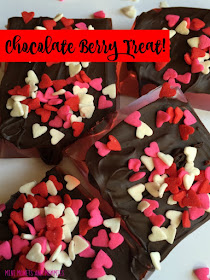
Valentine’s Day treats are all about the chocolate. Ok, so the candy hearts also make an appearance too. But, really – drenching just about anything in chocolate just seems to make it better. And I’ve done just that, making a holiday gelatin dessert.
Chocolate-covered berries

With some creative use of fruit juice, a generous addition of sweets and some heart-shaped sprinkles, you (and your kids) make a Valentine’s dessert that’s perfect for a party or any other time.

I got the idea for this recipe when I bought a way-too-big box of berry flavored sparkling water. I wanted to use it in something… I just wasn’t sure what. When I paired it with white cran-strawberry juice, the idea for turning it into a gelatin dessert jumped into my mind (I have no idea why, maybe it was fond early childhood memories). This holiday recipe is super-simple, meaning you don’t have to be Top Chef-worthy to quickly whip it up. It’s also a great way to involve the kiddos in cooking. Let them do the measuring and mixing as you talk about how the gelatin gels and why.

Here’s What You’ll Need:

·        4 packets of unflavored gelatin (with each packet measuring 2 ½ teaspoons)

·        1 cup of berry flavored sparkling water or seltzer

·        2 cups of a pink or red (for the Valentine’s Day theme) juice

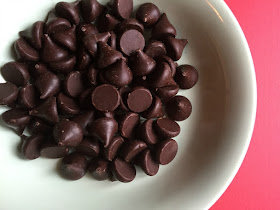
·        8 oz. dark chocolate (honestly, I used chocolate candy kisses that I got on Christmas clearance – for $1 a bag!)

·        Heart-shaped or red, pink and white sprinkles

Here’s What to Do:

1. Bring the juice to a boil on the stove.

2. Stir in the gelatin.

3. Add one cup of the berry water, and stir. The gelatin should be completely dissolved by now.

4. Pour the mix into a cake pan (or something similarly sized) and refrigerate until set (this may take several hours). The gelatin will be the consistency of gummy candy when it’s ready.

5. Melt the chocolate. I did this in the microwave (keep in mind, microwaves vary in intensity – so you may need to adjust the time). Put the chocolate in a microwave-safe bowl and heat for 45 seconds. Stir. If it’s not melted all of the way, heat for increments of 15 seconds until it is.
Valentine's Day

6. Cut the gelatin into blocks.
Gelatin dessert

7. Drizzle the heated chocolate over top to get a choco-topped berry flavor. Be careful, it will be very hot.

8. Sprinkle the hearts on top.
Valentine's Sweet

Are you looking for more Valentine’s Day treats? Follow my Pinterest board for ideas galore!
Follow Mini Monets and Mommies's board Valentine's Day Holiday Treats on Pinterest.

Monday, January 11, 2016

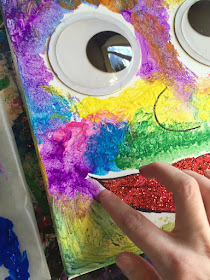
Wiggle Eye Painted Canvas Wall Art

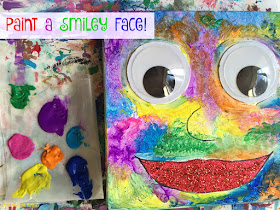
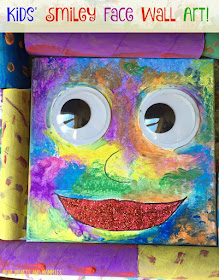
What do massive googley eyes, a pre-stretched canvas, glitter and tempera paint have in common? If you put them all together they make some pretty stellar wall art (and, bonus – it’s all kid-created)!


Smiley face

This post contains affiliate links. Please see my disclosure statement for more information.

When I spied the giant wiggle eyes I really couldn’t stop myself from buying them. I (very proudly) revealed my crafty purchase when I got home. And, surprise, surprise – my 14-year-old was actually impressed. I may have even heard a, “Mom, those are pretty cool” too! Really?

Now that I had these gigantor eyes, what should I do with them? It occurred to me that they could make some fairly fabulous wall art. This activity is super-easy, totally customizable and let’s your little one put his decorative touch on your home.

Here’s What You’ll Need:

·        A pre-stretched canvas

·        A pencil

·        A permanent marker – in a dark color

·        Giant googley eyes – You can buy these online or at lost craft stores

·        Clear drying school glue

·        Red glitter

·        A paintbrush

·        Tempera paint

·        Cotton balls

·        Scissors

·        Cardboard tubes – Reuse paper towel rolls

Here’s What to Do (to make the basic version):

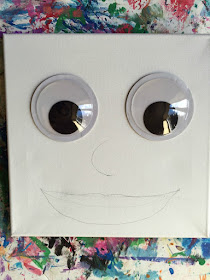
1. Glue the googley eyes to the canvas, near the top.
Wiggle eyes

2. Sketch a nose and mouth with a pencil.
Kids' drawing

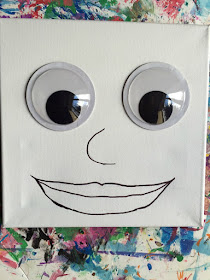
3. Trace the nose and mouth with the marker.
Smile face

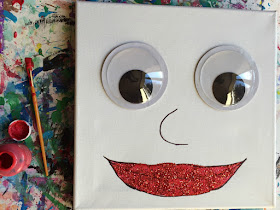
4. Paint the mouth.
Tempera paint

5. Sprinkle the glitter over the still-wet paint. Shake off the excess.
Sparkle paint

You can hang the smiley face art as is, or…
Kids' art

Add some color and a frame. Turn the smiley face into a friendly ‘monster’ to chase away the scary bedtime ‘monsters’ in your child’s room, make a furry friend or an imaginary character. Getting back to the friendly ‘monster’ idea, this is an artsy way to help your child take control over some of her fears and put bedtime woes – well, to bed. Come up with a special bedtime friend who keeps everything spooky and scary away. After your child paints his ‘friend’, hang it on the wall to keep the monsters at bay.

Here’s What to Do (to make a colorful version):

1. Follow the above instructions.

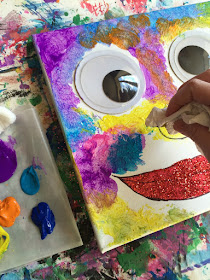
2. Pour a few pools of paint onto a paper plate or piece of wax paper.

3. Dip a cotton ball (or a crumpled piece of paper towel) into the paint and press it onto the canvas.
Print craft

4. Do a bit of finger painting around the eyes and the mouth to fill in the gaps.
Child's craft

If you want to add a frame…

1. Line the outside of the canvas with the paper towel tubes, you will need to cut them. Think of it like a puzzle that your child needs to solve.
Recycled art

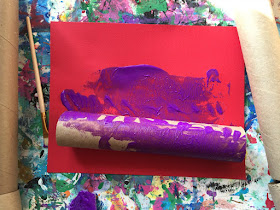
2. Paint the tubes. Here’s an easy trick to paint the whole tube quickly – pour a line of paint into a piece of paper. Roll the tube through the paint. Now it’s covered!
Art hack

3. Add some decorative touches, such as polka dots or lines.

4. After the paint dries, glue the tubes to the outside of the canvas.
Kids' activity

Now you’re ready to hang the painting!
Wall art

Are you looking for more kids’ art activities? Follow my Pinterest board for ideas!
Follow Mini Monets and Mommies's board Creative Kids Crafts on Pinterest.