Pages

Friday, March 25, 2016

How Can You Create Art Activities for Kids?

Where do all of my kids’ art activities come from? My head. Of course. But, what’s my process? Okay, I’ll share it with you!

Kids art


(This post contains affiliate links. Please see my disclosure statement for more information).

When I first started teaching children’s art classes I kind of didn’t know where to begin. I knew about child development. I knew about art processes. But, I didn’t really know how to create a ‘lesson’ (at least, not past mix these three colors together and let’s see what happens).

I remember kind of freaking out the first time that I taught summer art camp. During the school year the museum where I worked had some extremely solid programs that came with already-created lesson plans. I was in luck. Then the summer rolled around, and my boss handed out a ‘theme’ focus. Taking the topic and creating five days’ worth of activities for preschoolers wasn’t exactly easy. Even a decade later, it still isn’t easy.

Every time a friend or a parent comes to me with, “I just couldn’t come up with my own art activities for the kids. It’s just not something I’m good at.” I think about that very first summer. I think about how I tried (and totally failed) so many times to design thoughtful, developmentally appropriate, amazingly awesome art activities. I wanted to engage the littles, get them thinking, help them to explore art and most of all (hopefully) help them to learn a thing or two.

So, you say you want to start creating your own kids’ art activities? Whether it’s for the preschool class that you teach, your neighborhood playgroup or your own kids at home, you need to come up with your own process. For some (and I started out this way), it’s easiest to take an existing activity and make it your own. Add another few steps, swap out one material for another, change the size, add a texture, switch up the subject matter, use different colors, go from 2D to 3D or figure out some other way to make it slightly different, using the original as inspiration.

Okay, so you want to start totally from scratch. How? Well, we try to teach our kids using a hands-on approach. And, that’s what you can do – right now. Get hands-on, playing with art materials. Experiment with processes, let yourself be a kid again. Not only is this a great way to start thinking up some pretty exciting art projects, but it’s also majorly relaxing. Think about it, you get to take a break from work and stop stressing about your adult life. Playing with art (as an adult) reminds you of what it was like to be a carefree kid. So, take your time and enjoy it.

Here’s what I like to do when creating new activities…

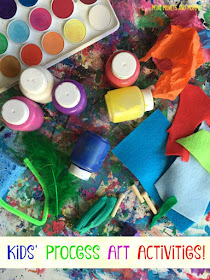
I start with the materials. Sometimes just one or two that I want to focus on. Sometimes I spread out a buffet of materials, just to get myself thinking.

Process art
 
Occasionally I just sit in an open space (usually on the floor) with my favorite scrap foam core board. I use it as a mess barrier. But, now it’s so colorful it kind of inspires me.
Lesson planning
 

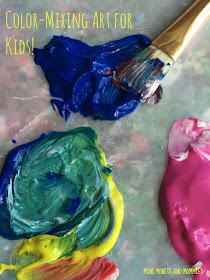
If I’m planning on a paint project I start mixing colors.

Paint process
 
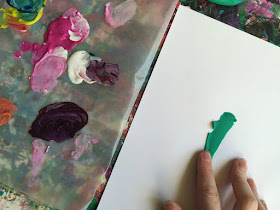
Or, if I want to use another material, I just start exploring. I might spread some clay out on paper.
Clay activity


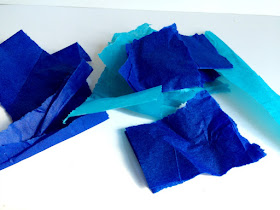
Tear up paper.

Collage paper


Pour out some glitter and glue.
Sparkle crafts

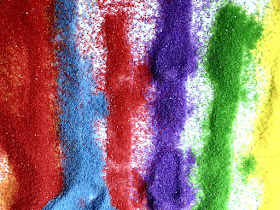
Pour some craft sand onto glue.

Colorful sand
Or, start mixing it all together.

Admittedly, the result makes much more of a process-oriented activity. Keep in mind, even process activities can be ‘planned’. This doesn’t mean that you direct the activity, just that you set up the framework. Doing the activity first (yourself) is extremely helpful. It helps you to help your child, and you can check out the process first to make sure that it actually works.

Are you looking for a few starter ideas? Check out our Pinterest board on process art for a few!
Follow Mini Monets and Mommies's board Process Art for Kids on Pinterest.

Wednesday, March 23, 2016

Colorful Cupcake Math for Kids! Really!

What do cupcakes and math have in common? Nothing, you say? Well, maybe they might just have a few things in common – I mean beyond measuring ingredients to make them.

Cupcake crafts


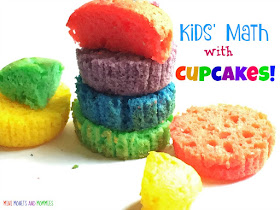
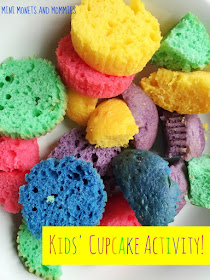
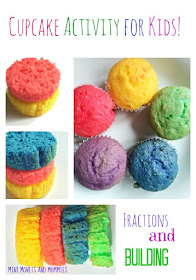
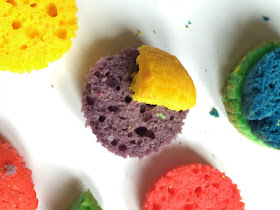
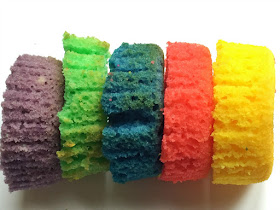
With a few drops of food coloring you can bake up a batch of rainbow cupcakes. Yes, they’re upper-tasty to eat. But, there’s so much more that you can do with them (before eating them, of course). You can use them to build your child’s fine motor skills, learn about colors, better understand fractions and explore engineering! And, don't forget the sensory aspect. Not only do they smell delicious, but they also feel pretty awesome. Take a look at the photos of ours and you'll see just how much the cupcake slices mimic sponges.

Cupcake project
So, go ahead and make math tasty and get creative with cupcakes.

Here’s What You’ll Need:

·        White cupcake mix (There’s no shame in using boxed mix. Sure, your own homemade recipe may be fab. But, if you’re not the best baker, go ahead and use the one from a box)

·        Food coloring – Try using just the three primary colors (red, yellow and blue) to add in a color-mixing lesson.


Here’s What to Do:

1. Mix up the cupcake batter.

2. Divide the batter into three or more bowls.

3. Add two to three drops of food coloring into each bowl. Your child may notice that the color turns lighter as you mix. Ask her why she thinks this is happening (hint: Ask her what color the batter is). If you don’t have a rainbow of hues on hand, mix the primary colors to make the secondaries (orange, purple and green).

4. Pour the batter into a cupcake tin and bake (follow the directions on the box/recipe).

5. Let the cupcakes cool completely.

6. Slice the cupcakes into pieces. Cut a whole slice, and then make halves, fourths or thirds.

Kids' cupcakes
Now it’s time to explore! If you want to work with fractions your child can build on a whole cupcake base. Add a quarter, or half on top. Then add and subtract ‘pie’ pieces.

Colorful crafts
If your child wants to experiment with engineering, have her build a tower, a wall or whatever type of structure she wants.

Math project
When you’re all done with the math, your child can eat the pieces! Not all at the same time though, of course.

Are you looking for more kids’ activities? Follow our Pinterest board for ideas!
Follow Mini Monets and Mommies's board Creative Kids Crafts on Pinterest.
Thursday, March 17, 2016

Spring Showers and Flowers Kids' Art Activity

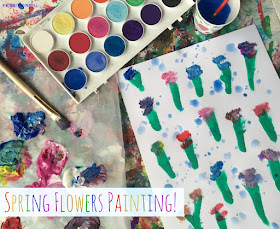
April showers bring May flowers – right? If you’re looking for a spring themed kids’ art activity, I’ve got a paint and clay exploration for you!

Spring art

This post contains affiliate links. please see my disclosure statement for more information.

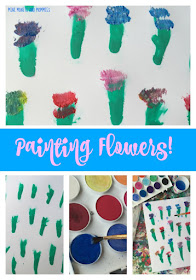
This started as a simple piece of pattern play, with clay of course. It grew into a multi-media project. Your child can explore two kinds of paint, color-mixing and much more.

What can this art exploration help your child to learn (or how can it help her to develop)? Obviously, it focuses on spring plants (so, that’s some science for her). After creating flowers, your child will add ‘rain’. Use this opportunity as a way to introduce the plant growing cycle (including what a plant needs to grow – such as rain).

The color-mixing aspect also ties in science as well. The ‘finger paint’ clay process is an easy way to build fine motor skills, as is playing with different types of paintbrushes (thick and thin). If your child chooses, she can create a pattern with the spring flowers she’s making. Use this as a math activity, helping your child to understand what a pattern is and counting the blooms.
Kids' art

Keep in mind, your child’s artwork doesn’t have to look exactly like what’s pictured here. Encourage her to explore, experiment and make her own discoveries within the materials given and the processes used!

Here’s What You’ll Need:

·        White paper

·        Green modeling clay (make sure that it’s soft)

·        Tempera paint (choose as many or as few colors as you want – you can also just go with the primaries)

·        Blue water color paint

·        Thick and thin paintbrushes

Here’s What to Do:

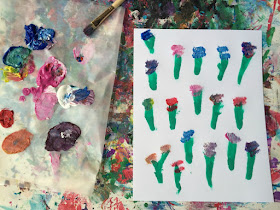
1. Tear dime-sized pieces of clay apart. Press the clay onto the paper, ‘finger painting’ flower stems. Your child can make the same motion as she would if she was actually painting with her hands. Soft clay will easily spread and stick onto the paper.
Kids' crafts

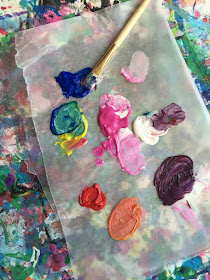
2. Pour a few quarter-sized pools of tempera paint onto a piece of wax paper (it’s a simple, and affordable, palette).

3. Mix the colors into new ones.
Tempera Paint

4. Choose a paintbrush (or your child can use her fingers). Dab different colors of paint onto the flower stems.
Kids' art

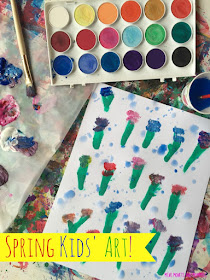
5. Make it rain! Wet another paintbrush. Dip it into blue water color paint.


6. Sprinkle the water color paint over the flowers to create rain, splattering it like a Jackson Pollock artwork! Your child needs to keep adding more water and paint to the brush as she goes along.
Flower painting

Are you looking for more kids’ art activities? Follow our Pinterest board for ideas!
Follow Mini Monets and Mommies's board Creative Kids Crafts on Pinterest.
Sunday, March 13, 2016

Gummy Bear Picture Frame Kids' Craft

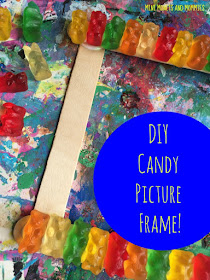
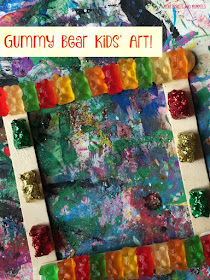
Ah, the gummy bear! Who would have thought that you could use this tasty candy treat for a cute kids’ art activity? And a DIY picture frame nonetheless? Well, you can.
 
Picture Frame

(This post contains affiliate links. Please see my disclosure statement for more information).

I’m a fan of eating the squishy little bears. That said, sometimes I forget that I bought a bag while walking the aisles of Target (I meant to get cat food, towels and an air freshener, but somehow ended up with a cart filled with things like candy). The forgotten bears go from sweetly soft and chewy to rock hard – making them completely inedible. Now what?

Take your stale gummy candy and turn it into this crafty little picture frame! Add the frame to your child’s room décor or gift it to a friend or family member (it’s an easy holiday present for grandma or a fun end of the school year gift for teacher). As a bonus, this frame isn’t just an artsy gift. It helps your child work on fine motor skills such as eye-hand coordination and dexterity, color recognition and sorting (she’ll match colors with bears and glitter later on – if you want to add this step).

Keep your child’s creativity in mind while creating this craft. That means she doesn’t have to make her frame to look exactly like we did. Does she want to add more bears? Ok! Maybe she wants to use a different color pattern? Great! What happens if she wants to position the bears in a different way, use only one color or glue on just three bears? That’s fine too. The picture frame tutorial simple present the basic how-to steps. Take it from there and let your child make the project her own.

Here’s What You’ll Need:

·        4 thick craft sticks

·        Clear-drying glue (we used both school glue and tacky glue)

·        Gummy bears

·        Wax paper

·        Glitter (in colors that match the bears)

Here’s What to Do:

1. Position the craft stick in a square shape.

2. Dot glue on the ends of the top and bottom sticks.
Craft sticks

3. Press the side sticks on to complete the frame shape.
Craft stick

4. Draw a line of glue along the craft stick.
Kids' crafts

5. Line up the bears, pressing them into the glue.

6. Repeat for one or more of the other sides.
Gummy bear

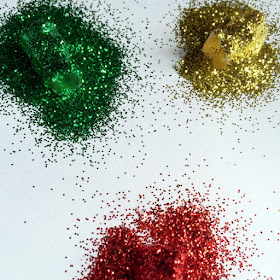
7. Optional: Create glitter gummy bears. Pour a quarter-sized pool of school glue onto wax paper. Give the bears a bath in the glue.

Kid's art


Sprinkle the glitter on top of each one, matching the glitter color to the bear’s color. Let the glitter-bears dry.
Sparkle craft

8. Glue the glitter guys onto the frame too!
Candy glitter

When the frame’s dry, tape a photo or one of your child’s drawings to the back. You can prop up the frame or attach magnetic strips to the back, turning it into a fridge magnet.

Are you looking for more kids’ crafts? Follow our Pinterest board for ideas!
Follow Mini Monets and Mommies's board Creative Kids Crafts on Pinterest.

Monday, March 7, 2016

Kid-Made Art Material: Glitter Glue Yarn

Glitter plus glue plus yarn equals what? A completely kid-made art material! Not only will your little artist totally enjoy the mess-making sparkle party that erupts from this crafty activity, but she can use what she makes to create anything from a glittering alphabet to a glowing rainbow (and much, much, much more).

Kids' art

(This post contains affiliate links. Please see my disclosure statement for more details).

Yes, I know – any kind of kids’ art activity with glitter is a bit frightening for those of us who are neat freaks. Even those of us who only marginally care about housekeeping still kind of fear the dreaded sparkles. They end up in the floor boards, embed themselves in the carpet and will probably stay in both your hair and your child’s hair for the next few washes – at least. That said, it’s just so much darn fun to play with glitter!

I’m always trying to think of new (or at least, new to me) ways of using the sparkly stuff. Awhile back we made ‘metallic finger paint’, which was really modeling clay mixed with glitter. Clay holds the glitter surprisingly well. This time I went with a glue-based activity. Your child can create sparkle yarn to use right away or save for some art-making later on.

Here’s What You’ll Need:

·        Glitter (obviously)

·        Yarn

·        Clear-drying school glue

·        Scissors

·        Wax paper

·        A paintbrush

Here’s What to Do:

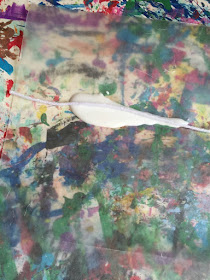
1. Cut the yarn into whatever size your child wants.
Kids' crafts

2. Pour a thin pool of glue (approximately earthworm size) into the wax paper.

3. Drag the first piece of yarn through the glue, coating the entire piece. Your child can leave the glue off of the edge that she’s holding on to (you can snip this off later on).
Children's art

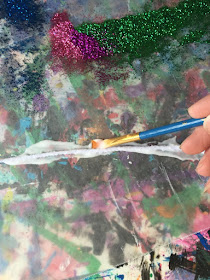
4. Coat any bare spots using the paintbrush to push the glue over the yarn.

Kids' glitter

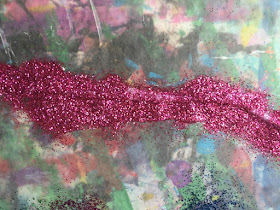
5. Sprinkle glitter over the glue. Rotate, turn and twirl the yarn to cover the whole thing. Shake off the excess.

Sparkly yarn

6. Let the yarn dry on the wax paper. Turn it as it dries, making sure that it doesn’t stick.

7. Repeat with other colors.
Art activity

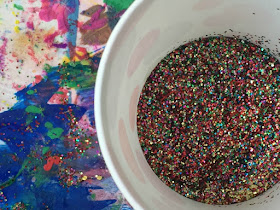
Now your child has mounds of extra sparkles that have landed on the wax paper. Create a funnel with the paper, emptying the excess glitter into a baggie or a paper cup (creating a rainbow blend of colors).
Colorful sparkles

Use the kid-made art material, glitter-glue yarn, to do just about anything. Add more glue to the back and create a rainbow, make abstract free-form art or wind the yarn around a glue-coated mason jar to make a sparkling pencil holder. Tip: Use a paintbrush to sweep away any excess glitter that gets on paper or another surface. There’s no end to the creative uses!
Children's yarn

Are you looking for more kids’ crafts? Follow our Pinterest board for ideas!
Follow Mini Monets and Mommies's board Creative Kids Crafts on Pinterest.
Tuesday, March 1, 2016

Marshmallow Peep Puffy Paint Kids' Art

Have I made marshmallow paint? Yes. Yes, I have. But, it’s almost Easter – so, I’m taking it up a notch and making finger paint with marshmallow Peeps.

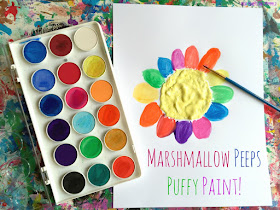
Puffy paint

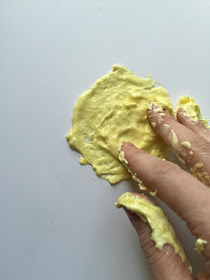
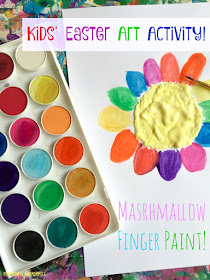
This kids’ art activity is completely simple, but messier than you’re probably imagine. As if puffy paint (or finger paint) wasn’t messy enough on its own, add in the Peeps factor and you’ve got quite the sticky surprise. So, why try it? Well, because it’s super-fun! Even though it’s ooey, gooey and sticky, it’s also washable. With that in mind, this Easter art activity is also a sensory exploration. Let your little artist make a mess, get into the paint and experiment with the finger painting to her heart’s content (ok, so maybe not on the walls, your white couch or her sister’s hair).

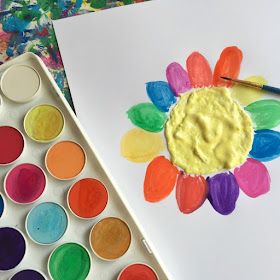
Along with the puffy paint, I’ve also added in an extra step with water colors. This is completely optional, but does offer your child the chance to continue on with the art-making in a different way. She can switch from pushing, stretching and pressing the finger paint on to the paper to holding the thin paintbrush. It’s fine motor fun!
Easter crafts

Here’s What You’ll Need:

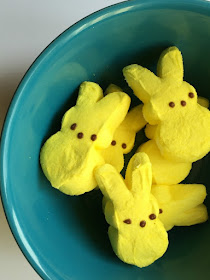
·        Marshmallow Peeps (we used yellow bunnies, but you can use any color or the chick variety)

·        Softened margarine

·        Food coloring (optional)

·        Card stock paper

·        Water color paints and a brush (optional)

Here’s What to Do:

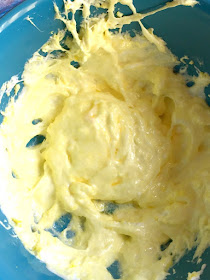
1. Put the Peeps into a bowl and microwave them. We used five marshmallow bunnies, and microwaved them for 20 seconds. Microwaves vary in intensity, so you may need slightly more or less time to heat them. When the marshmallow treats start puffing out, they’re ready.
Bunny candy

2. Mix the margarine in with the marshmallows. We used one tablespoon per the five bunnies. The margarine makes the paint slightly less sticky and easier to spread.
Children's art

Kids' art

3. Test the paint to make sure it’s not too hot for your child. If it’s cool enough to touch, your child can start spreading it over the paper.
Puffy paint

4. Optional: Add a few drops of food coloring to change the hue.
Kids' art

Spring flower

5. Optional: Wash your child’s hands, grab a brush and add water colors to the painting.

Kids' crafts
 

We made flowers, but your child doesn’t have to. She can make a bunny, an Easter egg, a tree, a house, a plain, a train, a cat, a dog … you get it – she can paint anything she wants. Or, she can just explore spreading the paint and make an abstract work of art.
That’s it! As your child is painting, ask a few open-ended questions to get her thinking. Try:
·        How does the paint feel on your hands?

·        Why do you think we needed to heat the Peeps before panting?

·        How do you think the margarine changed the marshmallows?

·        What do you think will happen if we let the paint sit out overnight? – Try letting it sit out. Then touch the paint, exploring how the texture has changed.

·        What do you think would happen if we used a paintbrush with the puffy paint?

Are you looking for more Easter art activities?

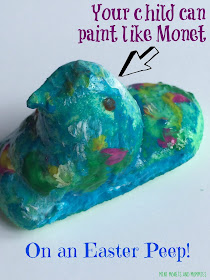
Try painting a Peep!

Easter sculpture

Make some jelly bean water colors!

Water colors

Dye Easter eggs with holiday candy!

Jelly beans

Follow our Pinterest board for ideas!
Follow Mini Monets and Mommies's board Easter Crafts for Kids on Pinterest.