Pages

Saturday, October 29, 2016

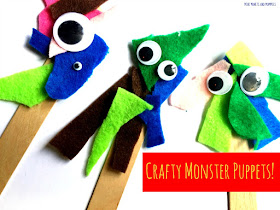
Use Those Felt Scraps: Totally Not Scary Monster Puppets for Kids

Halloween monsters! Spooky! Um, now your 4-year-old is in tears. She’s not exactly ready for the fill-on ghoulishly scary experience that comes along with this holiday. That’s okay. This kids’ craft felt art activity is far from the walking dead, vampires and chainsaw-wielding maniacs that spook their ways through horror flicks.

Craft felt


(This post contains affiliate links. Please see my disclosure statement for more information).

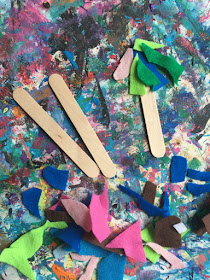
So, this started with scraps. We’ve got crazy amounts of craft felt. I’m a fan of DIY felt boards, so the leftovers tend to pile up. Actually, I stash them away in a baggie, tuck them into the craft bin and usually forget all about them. What happens? I end up with a ridiculous number of felt-filled baggies.

The problem with using the scraps is that they tend to be oddly shaped. There were no circles to add on as faces or roof-shaped triangles to make houses. What to do with these bits and pieces?

Well, instead of tossing them (awfully wasteful, right?) they became sweet—not scary—monsters. Yep, your child can turn a bag, handful or a few felt scraps into perfectly adorable Halloween monster puppets. Oh yeah, you might need a few other things too.

Here’s What You’ll Need:

·        Felt scraps

·        Scissors

·        Clear-drying school glue

·        Googley eyes (I prefer a variety of sizes)

·        Thick craft sticks

Here’s What to Do:

1. Trim the scraps. Or not. It depends on what your child wants to do. She can use the scissors to create any sizes and shapes she wants.

Puppet art
 
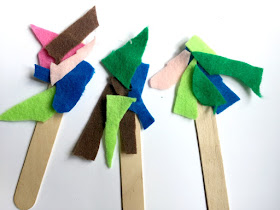
2. Glue the scraps onto the tops of the craft sticks. Layer and overlap them to create hairy-looking Halloween monsters!
 
Kids' art
 

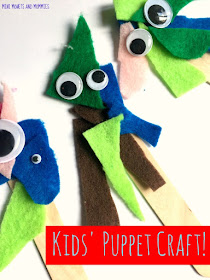
3. Glue the eyes onto the felt. Your child can use one giant eye or glue a group of differently sized eyes on.
Kids art
 

That’s it. Well, of course, your child needs to let the glue dry. After it’s completely dry, she can play with the monster puppets. She can create her own stories or act out a monstrous tale. Don’t stop at one puppet, make a few too!

This is also an easy option for a Halloween or birthday party. Simply set out the scraps on a table and let the kiddos glue away. Use a permanent marker to write each child’s name on their puppet’s craft stick (a washable marker will run when your child holds the puppet by the handle).

You can also pack up the very few materials (felt, eyes and sticks), and put them into baggies to use later on. Easily stash the kids’ craft in your bag and bring it to grandma’s, on vacation or anywhere else!

Monday, October 17, 2016

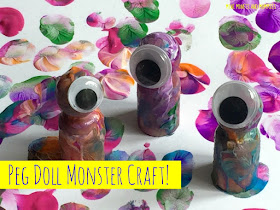
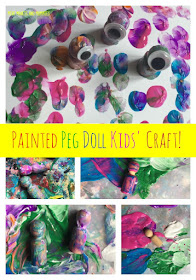
Halloween Monster Kids' Peg Doll Art Activity

Your kids are all about crafting for Halloween. But, those super scary monsters aren’t exactly a great match for your preschooler. Neither are spooky spiders or ghoulish ghosts. That’s okay. These peg doll monsters are cutely creative—without any of the “Boo!” factor.

Painting crafts


(This post contains affiliate links. Please see my disclosure statement for more information).

Honestly, this kids’ art activity came from the fact that we had an awful lot of pegs sitting around. After making a batch of peg dolls with removable modeling clay hair (and simple pipe cleaner clothes), I just put the unused materials (pegs) away.

Now that it’s almost Halloween, those plain ‘ol pegs are getting some use. This art activity lets your child learn about colors (and color mixing!), explore the artistic process, get creative and create a totally usable toy.

Holiday crafts
 

Here’s What You’ll Need:

·        Wooden pegs (peg dolls)

·        Tempera paint

·        Clear-drying school glue

·        Googley eyes

Here’s What to Do:

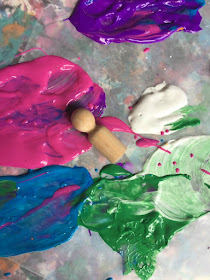
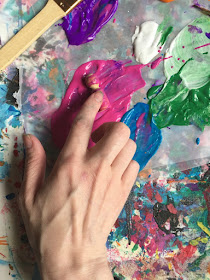
1. Pour the paint into pools on a palette. You can also use thick cardboard or do what I do and use wax paper. The wax paper is inexpensive (and you probably already have it in your kitchen) and provides a barrier in between the paint and your table. Use as many colors as your child wants. You can choose a rainbow of hues or just go with the primaries (red, blue and yellow) for a lesson in color-mixing.

Children's crafts
 

2. Roll the pegs through the paint. That’s right—your child is just going to roll them! As she rolls them from color to color the peg dolls will get coated. What’s the result? A rainbow-like swirl. Let your little artist keep going until she wants to stop. It’s okay if the colors mix so much that they turn into a muddy brown or tan. The important part of this is that your child gets to have fun exploring the color-mixing process. And bonus, she’s also building fine motor skills too!
Kids' art

Art activity

3. Let the paint dry completely.

Painting craft
 

4. Glue the googley eyes on. Your child can glue one pig eye on each doll’s head or glue a monstrous number of eyes all over the doll. Let the glue dry before your child plays with the dolls.
Monster art

This also makes an easy (and creatively fun) addition to a kids’ Halloween party. Set up paint stations, hand out the pegs and let the kids roll away! If you don’t have to time during the party, make a few beforehand to hand out as favors or use as decorations.