Pages

Sunday, April 16, 2017

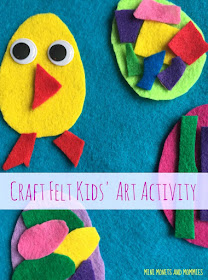
Kids' Craft Felt Easter Eggs


Are you looking for a last-minute kids’ Easter art activity? Well, this one is super-simple – and tons of fun too! With some craft felt scraps, and a few googley eyes, your kiddo can get artsy and make these textured eggs.

Craft felt

2D Easter Eggs


Okay, everyone knows that making those colorful eggs is a major part of Easter. At least, for kids. Even if you’ve got the food coloring, glitter, stickers and anything else you need to make the eggs (try dyeing them with jelly beans), your child can still try this two-dimensional craft.

Your child has a few different options when it comes to these eggs. There’s a permanent craft, in which she’ll use glue. Or, you can take a DIY felt board approach. To make the felt board, simply glue a paper-sized sheet of craft felt to a piece of cardboard. Reuse the front of a cereal or cracker box instead of buying new board. The felt eggs will stick to the felt on the board, making it a completely reusable craft.

Learning and Development


So, what will your kiddo learn?

·         Fine motor skills – scissor skills, eye-hand coordination

·         Color recognition and identification

·         Math – shapes, counting, patterns

·         Creative thought

·         Problem-solving

Materials


·         Craft felt – use craft felt sheets (paper-sized) and/or leftover scraps

·         Scissors

·         Googley eyes

·         School glue

How-To Activity Steps


1. Cut the felt into egg-shaped ovals.
Childrens crafts

2. Create smaller-sized shapes. Your child can cut apart scraps that are left over from other projects. Ask your child to name the shapes she’s cutting out and name the colors.
Kids crafts

3. Press the smaller shapes onto the eggs. Add in an extra math lesson, and have your child count the pieces as she’s putting them on the eggs. If she’s making this a permanent piece of art, glue the pieces on. Your child can make patterns, stack the shapes (creating new textures) or even make an Easter chick.

4. Glue the googley eyes on top of the felt pieces. If your child is making this a reusable activity, make sure she glues them directly onto the egg.

Kids art
 

Are you looking for more artsy activities? Follow Mini Monets and Mommies on Instagram for creative kids’ crafts!

Thursday, March 23, 2017

Rainbow Sparkle Slime

Who doesn’t like glitter slime? Seriously. How could your child not absolutely love it? It sparkles, it stretches and it’s so much science-y fun.

Colorful craft


(This post contains affiliate links. Please see my disclosure statement for more information.)

Learning and Development


Slime recipes are perfect for little learners. Why? Not only are they completely cool to play with, but they also include plenty of educational aspects. Yep, I said educational. So, what can your child learn and how can she develop?

·        Science: Sensory exploration (sense of touch), states of matter, exploring light and scientific inquiry (making predictions, observing/collecting data and analyzing data)

·        Math: Making measurement

·        Art: Colors

·        Building fine motor skills

Materials for the Slime Recipe


Here’s what you’ll need:

·        ¼ cup of clear Elmer’s glue

·        ¼ cup Liquid starch

·        ¼ cup of water

·        Fine glitter in a rainbow of colors

To make more of the slimy stuff, use more of each ingredient. Keep them in the same proportions.

How-To Steps


Before starting, keep in mind that this is NOT a taste-safe recipe. If your child tends to put things in her mouth or tries to eat non-edible items, this is not for her. Always supervise your child at all times and never allow her to put any of the ingredients or the finished product in or near her mouth.

Now that you’re ready to begin, ask your child to predict what will happen when you mix the ingredients together. Write down her predictions and compare them to what really happens. As the two of you go through this recipe your child can observe what’s happening to the ingredients, telling you what she thinks is going on.

1. Measure the ingredients.

2. Mix the glue and the water together.

3. Add in the liquid starch, blending it in until the mix gels. If it’s too watery, add a tiny bit more of the liquid starch.

Kids' activity
 

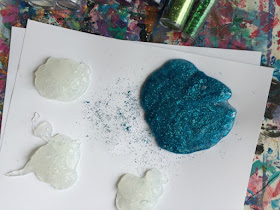
4. Separate the slime into piles.

5. Pour a different color of glitter onto each pile.

Sparkle slime
 

6. Spread the sparkles throughout each slime pile. Your child can use her hands to twist, mush and mash the glittery stuff in.

Glitter art

Childrens' activity

Sparkle project
 

Play Time


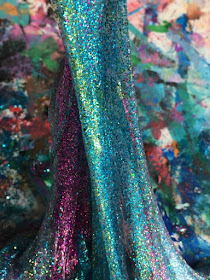
Now that your child has several different colors of glitter slime, it’s time to play. She can keep the hues separate or start blending them together. Try holding the stretchy, sparkly stuff up to the light. Your kiddo can move it around, exploring how the lights reflects off of it and makes the colors change.

Are you looking for more super slime ideas? Check these out!


Saturday, February 4, 2017

Valentine's Day Kids' Art: It's Heart-Felt!


Valentine’s Day is coming up! That means hearts, hearts and more hearts. Am I right? So, that also means kids’ art activities that feature the lovey-dovey shape.


Kids' crafts

(This post contains affiliate links. Please see my disclosure statement for more information.)

I’ve done quite a few kids’ crafts with a Valentine’s theme. Heart paint resists, crafty little candy pockets and geometry art were all fun children’s activities that feature the holiday. This time I’m working on a super-easy activity.

Craft felt is kind of perfect. It’s easy to work with (your kiddos can actually cut through it) and it sticks to itself. Instead of buying fancy felt boards you can DIY yourself one with an 8x10-inch piece of felt (glue it onto a piece of reused cardboard!). This Valentine’s Day craft is super simple and your kids can use it, reuse it and reuse it again. Or, you can use card stock paper and turn it into a cute (and crafty) card!

What Can Your Child Learn?

There isn’t just ‘one way’ to play with this Valentine’s kids’ activity. Your child can let her imagination lose and figure out new and different ways to create. That means there are endless possibilities, and many, many different ways your child is learning. To give you an idea, check out the basic ways it can help your child’s development. Your child will:

·        Build fine motor skills

·        Explore textures (sensory experience)

·        Recognize colors

·        Identify shapes (math-geometry)

·        Problem solve

·        Learn about the part-to-whole relationship

What Art Materials Do You Need?

Craft felt – in a rainbow of colors
Scissors 
Card stock paper
A marker
Clear-drying school glue

Optional: Cardboard (reuse the front of a cereal type of box)

How-To Steps for Creating Valentine’s Heart-Felt Art

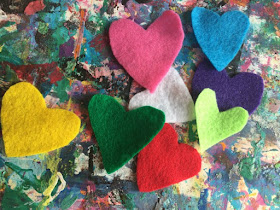
1. Fold the felt in half. Draw half of a heart, starting at the fold. The hearts should be fairly small – about the size of a golf ball.

Valentine's art
 

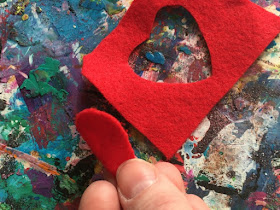
2. Cut along the line. Unfold the felt to reveal a full-sized heart.

3. Repeat, making hearts in other colors.
Rainbow hearts

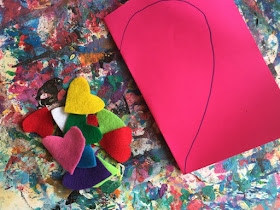
4. Create a larger heart. Fold a piece of card stock paper in half and repeat the folding and cutting steps. Your child can also use another piece of craft felt instead of the paper.

Holiday art

Children's crafts
 

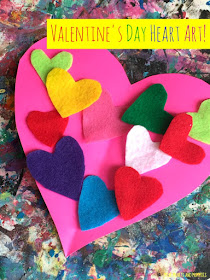
5. Put the small hearts onto the larger one! Your child can make a picture, abstract heart art or create patterns with the craft felt.

Kids crafts
 

Optional: Place the larger craft felt heart onto a piece of cardboard. Trace it and cut it out. Glue the felt on to make a Valentine’s Day themed felt board. Now you have a reusable DIY felt board that your child can press the smaller hearts onto.